In order to Add printer using IP Address, you need to know the IP Address of the printer, which can be easily found by printing a Self-test page on the printer that you are trying to add.
The procedure to print the Test Page or Configurations page varies, depending on the model/make of the printer & whether the printer is equipped with Buttons, LCD Panel or Touch Screen. Once the self-test page is printed, it will show all the details of the Printer including its current IP Address.
Add Printer Using IP Address in Windows 11/10
As mentioned above, the first step is to find the IP Address of the Printer, which can be found by printing a configurations page and using various other methods as provided in this guide: 5 Ways to Find Printer IP Address in Windows 11/10.
After finding the IP Address of the printer, you can follow the steps to manually add the Printer to computer, using its static IP Address.
Steps to Add Printer to Computer using IP Address
Make sure the Printer is switched ON and follow the steps below to Add the Printer to your computer.
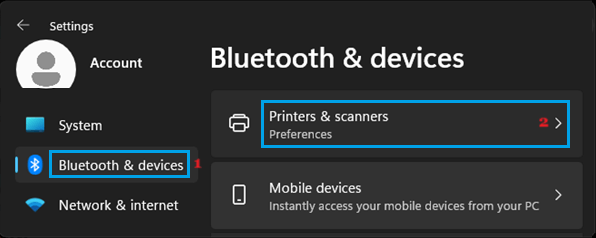
1. Go to Settings > Devices > Bluetooth & Devices (left-pane) > click on Printer & Scanners in the right-pane.
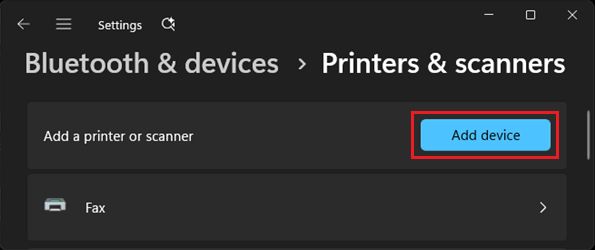
2. On the next screen, click on Add Device button, located in Add a Printer or Scanner tab.
Windows 10: Go to Settings > Devices > Printers & Scanners (left-pane) > click on Add a Printer or Scanner option.
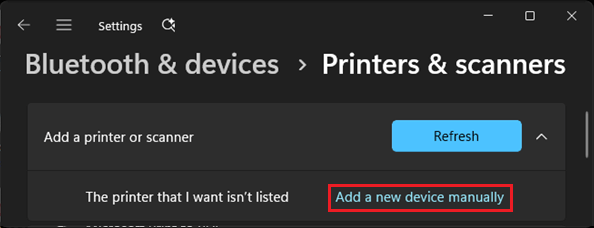
3. On the next screen, click on Add a new device manually option.
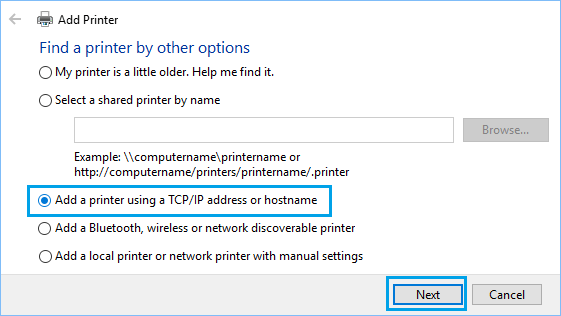
4. On the next screen, select Add a Printer Using TCP/IP address and click on the Next button.
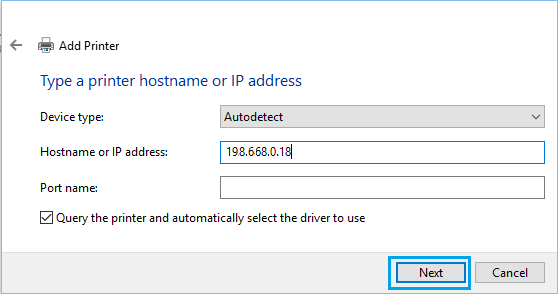
5. On the next screen, enter Hostname or IP Address of the Printer and click on the Next button.
6. Windows should be able to find the printer if the printer is on and it is properly configured. If not, you may be prompted to provide more information about the printer.
7. On the next screen, select the Printer Manufacturer in the left-pane. In the right-pane, select your Printer model and click on the Next button.
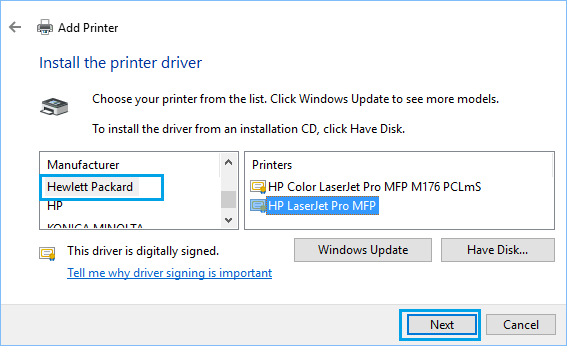
Note: Click on Windows Update button, in case your printer is missing in the list and you want to see more models.
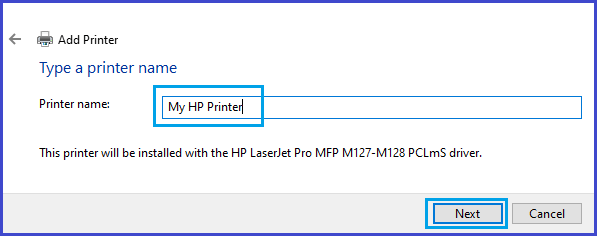
8. Type the Name for the Printer and click on Next.
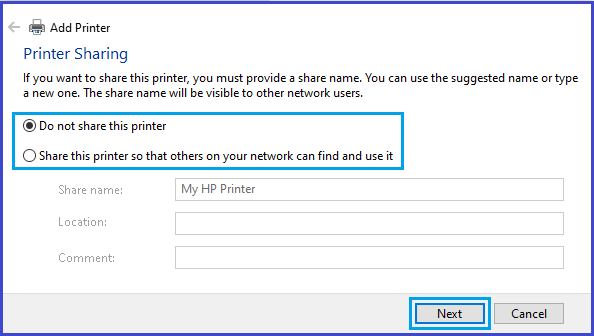
9. Select whether you want to Share the printer or not and click on Next.
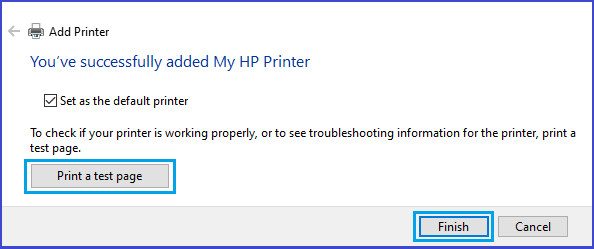
10. On the next screen, you can Print a test page and click on Finish.
This completes the process of adding a Printer to Windows computer by using its IP Address.