While “Another computer is using the printer” error message in Windows appears to suggest that someone else on the network (home, office) is using the printer, it rarely ends up being due to the printer actually being in use by another computer on the network.
In most cases, the reason for this error message is due to printer spooler service being stuck, a previous failed/crashed print job, WSD (Web Services on Devices) glitches or the printer driver becoming outdated/corrupted.
Related: How to View Print History on Windows Computer
Another Computer is Using the Printer Error in Windows
If your computer is bothering you with “Another computer is using the printer” message, you should be able to fix the problem using the following troubleshooting steps.
1. Power OFF and Power ON Printer
Starting with a simple fix, switch OFF the printer by pressing its Power button. Wait for 60 seconds and press the Power button to restart the printer.
If this fix works, you will first see the printer going through its warm up process and after a while whatever is in the print queue will be printed.
2. Restart Print Spooler Service
Restarting the Print Spooler service can help in fixing printing problems.
1. Right-click on the Start button and click on Run.
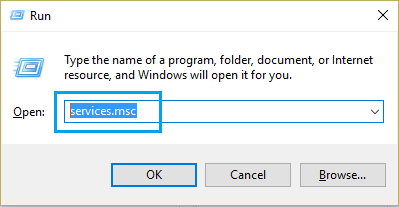
2. In the Run command window, type services.msc and click on OK.
3. On the services screen, scroll down and right-click on Print Spooler and click on Stop.
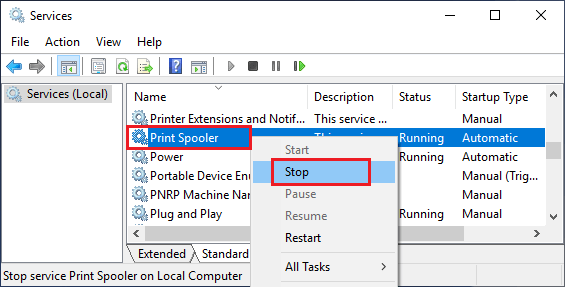
4. Next, right-click again on Print Spooler again and this time click on Restart.
3. Remove WS Printer Entry
When Windows detects a network printer, it has a tendency to create a duplicate entry/icon on the Devices and Printers screen. One of these will be listed with its regular name (say Canon TS series Printer) and the other one will have a WS suffix in its name ( Canon TS series Printer WS).
Since, WS (Web Services on Devices) relies on Windows searching for printers on the network, this setting is known to cause problems.
1. Press Windows + R keys to open Run Command.
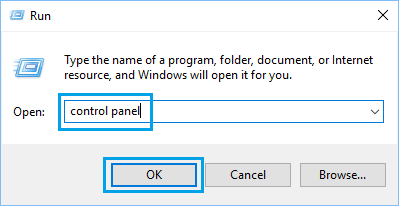
2. On the Run Command pop-up, type Control Panel & click on OK.
3. On the Control Panel screen, switch to Large Icons view, right-click on Devices & Printers and click on Open.
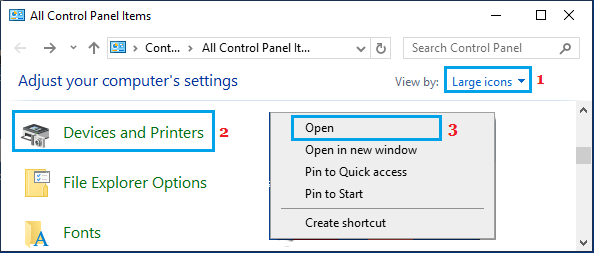
Note: Do not click on Devices & Printers, as this will lead you to the Settings App.
4. On the Devices & Printers screen, right-click on the Printer that has WS in the name and click on Remove Device.
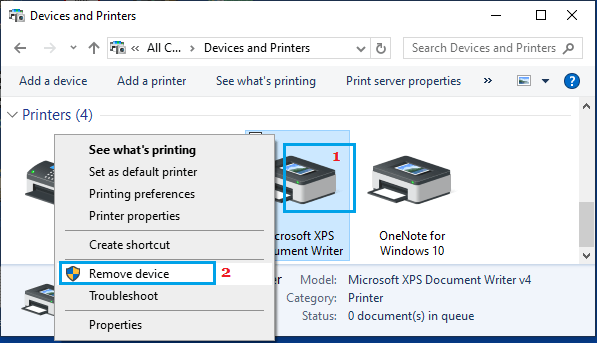
5. Repeat the above step to remove other printers (if any) that have WS in their names.
4. Prevent Windows From Setting Default Printer
Preventing Windows from setting the default printer and manually selecting the desired default printer is another solution to this issue.
1. Press Windows + I keys.
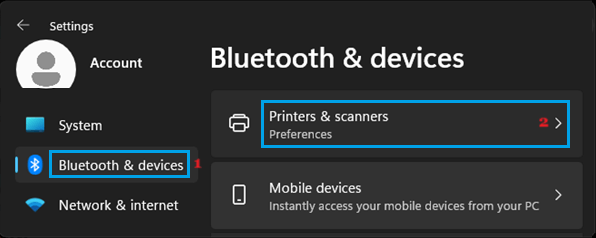
2. On the Settings screen, select Bluetooth & Devices (left-pane) and click on Printers & Scanners in the right-pane.
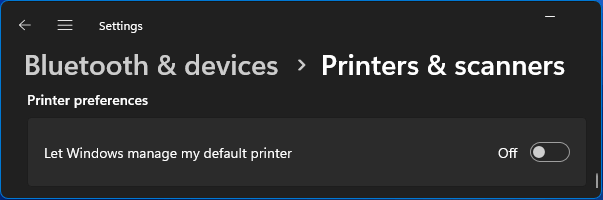
2. On the next screen, go to “Printer Preferences” section and disable Let Windows manage my default printer option.
3. After this, scroll up and select the Printer that you want to set as the default Printer.
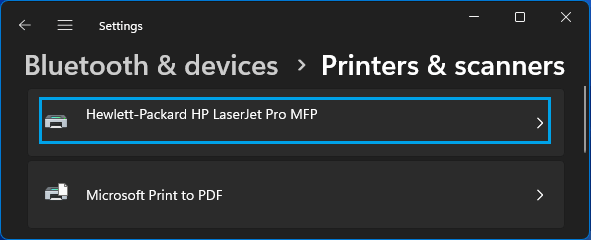
4. On the next screen, click on Set as Default button next to the Printer that you want to set as the Default Printer on your computer.
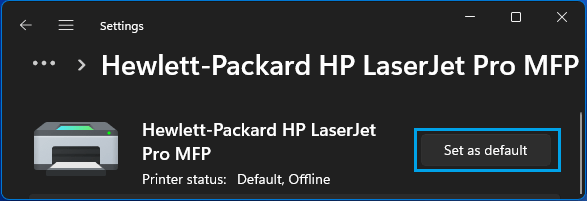
This will prevent Windows from switching to other printers.
5. Update Printer Driver
If above methods did not help, manually update the Printer Driver by going to the Device Manager screen.
1. Right-click on the Start button and click on Device Manager.
2. On the Device Manager screen, right-click on your Printer and click on Update Driver.
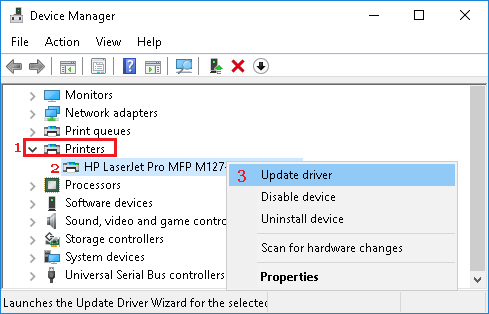
3. On the next screen, click on Search Automatically for updated driver software option.
4. Allow Windows to search for the updated printer driver and install it on your computer.