In case you are worried about High CPU Usage by Antimalware Service Executable, you may be relieved to know that MsMPEng.exe is not a virus or malware trying to steal or damage your data.
MsMPEng.exe or Antimalware Service Executable is a legitimate part of Microsoft’s Windows Security App and it has been specifically designed to scan your computer for malware.
In general, Antimalware Service Executable is known to consume high resources (RAM & CPU) only while Windows Security is performing a Real Time Scan, Full System Scan or Updating Virus Definitions.
Once these tasks are completed, CPU usage by Antimalware Service Executable should automatically go down to normal levels and you should find your device running normally.
Antimalware Service Executable High CPU & RAM Usage
If your computer is constantly slowing down or freezing due to High CPU & RAM usage by Antimalware Service, you should be able to fix the problem using the following methods.
1. Disable Real Time Protection
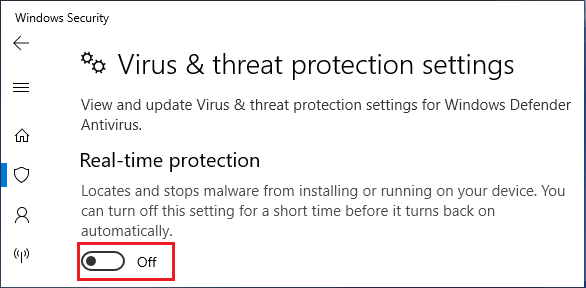
A quick way to fix High CPU & RAM usage by Antimalware Service Executable is to disable Real Time Protection feature in Windows Security.
1. Type Windows Security in the Search bar and click on Windows Security App in the search results.

2. From the next screen, go to Virus & Threat Protection > Manage Settings > switch OFF option, Real-Time Protection.
You will not see Manage Settings option if a third-part antivirus software is installed on your computer and also if Microsoft Defender Periodic scanning is switched OFF.
Note: This method disables Real-time protection for a temporary period. Windows will automatically enable Real-Time Protection, the next time you Login to the computer.
2. Prevent Antimalware Service Executable from Scanning its Own Folder
It is noticed that Antimalware Service Executable uses high CPU & RAM due to its tendency to scan its own folder located at path C:\Program Files\Windows Defender.
1. Type Windows Security in the Search bar and click on Windows Security App in the search results.
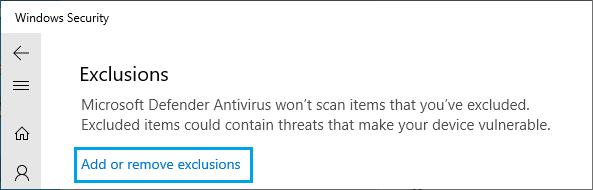
2. From the next screen, go to Virus & Threat Protection > Manage Settings > scroll down to “Exclusions” section and click on Add or remove exclusions link.
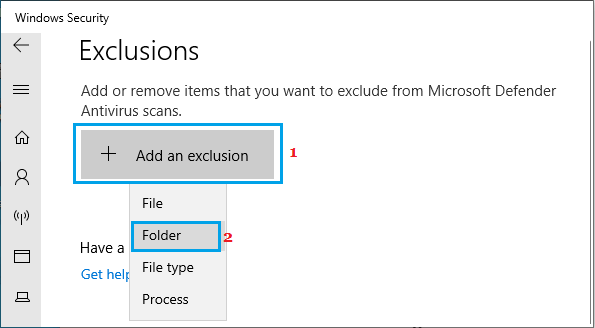
3. On the next screen, click on Add an Exclusion and select the Folder option.
4. On next screen, navigate to C: Program Files > Windows Defender and click on Select Folder button.
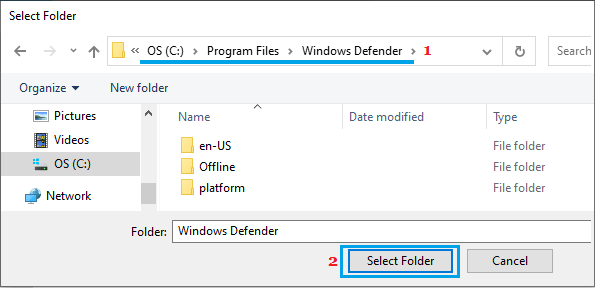
Restart the computer and you should find an overall improvement in its functioning.
3. Disable Scheduled Tasks
Disabling Windows Defender scheduled tasks is another way to reduce High CPU & Memory Usage by Antimalware activity on your computer.
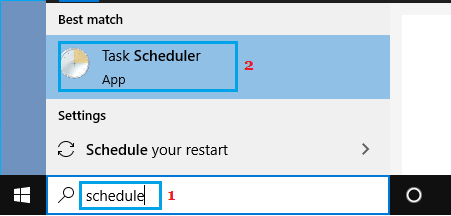
1. Type Task Scheduler in the Search bar and click on Task Scheduler in the search results.
2. On the Task Scheduler screen, navigate to Task Scheduler Library > Microsoft > Windows > Windows Defender. In the right-pane, disable All the 4 Windows Defender Tasks.
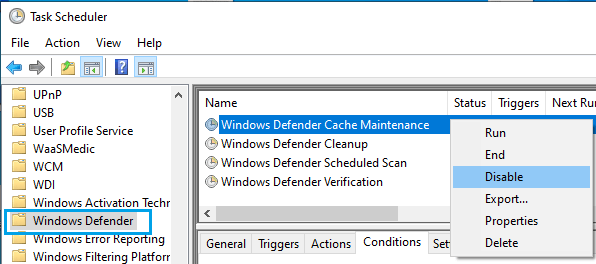
After this, you should find a significant reduction in CPU & RAM usage by Antimalware Service Executable.
4. Install Third Party Antivirus Program
The easiest way to fix High CPU Usage by Antimalware Service is to install a reputable third-party Antivirus program on the computer.
Windows Defender automatically disables itself, whenever any other third party antivirus program is installed on the computer.
Once Windows Defender is disabled, you will no longer find Antimalware Service running and consuming resources on your computer.
5. Disable Windows Defender AntiSpyware Function Using Registry
The AntiSpyware function of Windows Defender has been reported to remain active, even after Windows Defender is disabled on the computer. This can be fixed by disabling AntiSpyware via registry.
Note: It is a good safety precaution to create system restore point before making Registry Edits on the computer.
1. Open Run Command > type Regedit in the Search box and click on OK.

2. On Registry Editor screen, navigate to HKEY_LOCAL_MACHINE\SOFTWARE\Policies\Microsoft\Windows Defender > Double-click on DisableAntiSpyware and change its Value Data from 0 to 1.
This will Permanently Disable Windows Defender on your computer.
If you cannot find DisableAntiSpyware DWORD, right-click in an empty area in the right pane > select New and click on DWORD (32-bit) Value.
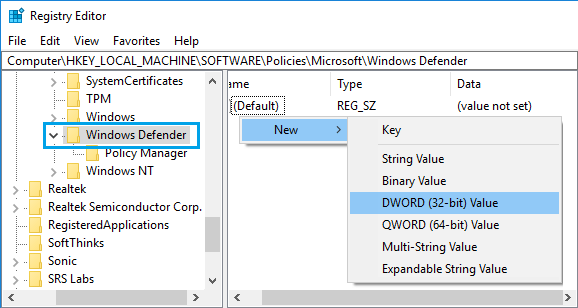
Name the new Key as DisableAntiSpyware > Enter 1 in the Value Data field.