You won’t be able to access music, movies and other content in iTunes, if your computer is not yet authorized in iTunes. You can find below the steps to Authorize Windows Computer on iTunes.

Authorize Computer on iTunes
Apple’s licensing system prevents users from accessing purchased content on iTunes, until the computer is formally authorized on iTunes or Apple Music.
Currently, you can authorize up to 5 computers on iTunes, which means that it is equally important to deauthorize old and unused computers on iTunes, in order to create room for new computers.
Another restriction is that you can authorize the same computer using a different Apple ID only once every 90 days.
Here it also needs to mentioned that iOS devices are not counted, you can have any number of iPads, iPhones, iPods and Apple TV devices accessing content from iTunes.
Steps to Authorize Windows Computer in iTunes
If iTunes is already downloaded and installed on your device, authorizing Windows computer on iTunes is a fairly straight forward process.
1. Open the iTunes App on your computer.
2. Select the Account tab in top-menu bar > hoover mouse over Authorizations and select Authorize This Computer option in the side-menu.

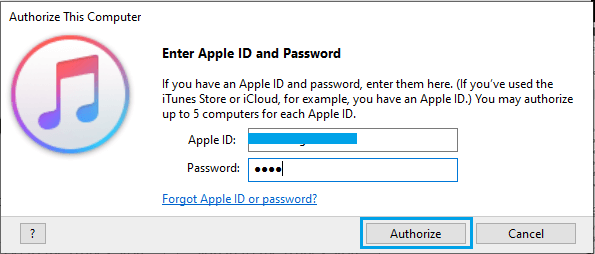
3. On the pop-up, enter your Apple ID, Password and click on the Authorize button.

Note: If the top-menu bar in iTunes is not available, press and hold Ctrl + B keys at the same time and it will become available on your computer.
Once your computer is authorized on iTunes, you will be able View, Access and Play any digital content that is available in your iTunes Account.