• Skip to main content
  • Skip to primary sidebar

Techbout

Technology Simplified.

  • Windows
  • Mac
  • iOS
  • Android
  • Office
Home » iTunes » How to Authorize and Deauthorize Mac on Apple Music

How to Authorize and Deauthorize Mac on Apple Music

By: Waseem Patwegar

You won’t be able to access paid music, if your computer is not authorized in Apple Music. You can find below the steps to Authorize and Deauthorize Mac on Apple Music.

Authorize and Deauthorize Mac on Apple Music

Authorize And Deauthorize MacBook on Apple Music

The way Apple’s licensing system works, it prevents users from accessing even purchased content in Music App, until your device is formally authorized to use Apple Music.

Currently, you can authorize up to 5 computers on Apple Music, which points to the importance of deauthorizing old and unused computers, in order to create room for new computers in the Music App.

Steps to Authorize MacBook on Apple Music

The Music App is installed by default on MacBooks, if you have an older Mac, you may have iTunes installed on your device.

Open the Music App on your MacBook > select the Account tab in top-menu bar > hoover mouse over Authorizations and select Authorize This Computer option in the side-menu.

Authorize This Computer Option in Apple Music on Mac

On the pop-up, enter your Apple ID, Password and click on the Authorize button.
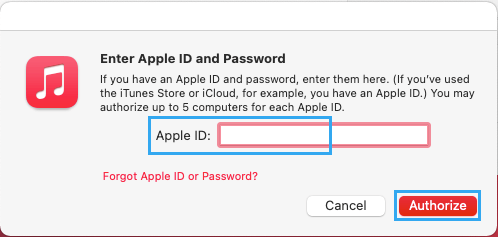
This will authorized your computer on Apple Music, which allows you to View, Access and Play any digital content that is available in your Apple Music Account on this MacBook.

Deauthorize MacBook on Apple Music

If required, you can Deauthorize your MacBook in Apple Music and prevent it from accessing paid Music in Apple Music App.

Open Music App > select the Account tab in top-menu bar > hoover mouse over Authorizations and select Deuthorize This Computer option in the side-menu.

Deauthorize This Computer Option in Apple Music on Mac

On the pop-up, enter your Apple ID, Password and click on the Deauthorize button.

This will deauthorize and remove the computer from Apple Music, which basically creates an empty spot for another computer in Apple Music.

Related
  • How to Set Sleep Timer In Apple Music on iPhone
  • How to Add Music to iPhone Without iTunes

You May Also Like
    • Transfer Contacts From iPhone to Android
      How to Transfer Contacts From iPhone to Android
      • Transfer iPhone Contacts to Gmail
        How to Transfer iPhone Contacts to Gmail
        • Notes Not Syncing Between iPhone and Mac
          Notes Not Syncing Between iPhone and Mac: How to Fix?

Primary Sidebar

Twitter
Facebook


Popular Now

  • How to Reduce Cellular Data Usage on iPhone
  • How to Backup Registry in Windows 11/10
  • How to Check Computer Specs in Windows 10
  • How to Remove Bloatware From Windows 10 PC
  • How to Create Local Account in Windows 11

Gadget Guide

  • Mac vs PC Comparison: Should You Buy Mac or PC
  • Chromebook vs Windows Laptop
  • Kindle E-Reader Comparison | Which Kindle to Buy
  • iPad vs iPad Pro Comparison
  • Advantages of Chromebooks


About | Privacy Policy | Disclosure | Terms | Contact
© Copyright 2022 @Techbout.com · All Rights Reserved