If you are unable to login to the computer and there is no error message, the problem may simply be due to the keyboard being faulty, caps locks being switched ON or it could be due to temporary software glitch.
However, this problem can also occur due to corrupted system files, the user profile being corrupted or due to recent update or app being installed on the computer.
In such cases, you may find the computer coming up with “We can’t sign in to your account” error message, followed by “You have been signed in with a temporary profile” message.
Fix: Can’t Login to Windows Computer
In many cases the login problem on a Windows computer ends up being due to temporary software glitch, which gets resolved when the computer restarted.
Hence, make sure that you restart your device before moving ahead with other troubleshooting steps.
1. Switch OFF Caps Lock
The problem could simply be due to the Caps Lock being switched ON. You can confirm this by taking a look at the top-right corner of the keyboard.
If the Caps Light is switched ON, press the Caps Lock key to switch off the Caps Lock Key.
2. Check the Keyboard
The problem could be due to the keyboard not working or one of the keys on the keyboard being stuck, damaged or not working properly.
This can be confirmed by using the view password option at the login screen, which allows you to see the password that is being typed.
If the keyboard is faulty, you can make use of the On-screen keyboard to login to the computer.
3. Use Recovery Mode
Forcing the computer into Recovery Mode and using the Restart option on the winRE screen can help in fixing login problems.
1. Switch OFF the computer > After 30 seconds, press the Power button to restart the computer.
2. Repeat the above steps 2 more times and you should find the computer restarting in Windows Recovery Environment (winRE) mode.

3. On the Automatic Repir screen, click on the Restart button and wait for the computer to repair the problem and restart.

After the computer Restarts, you might be able to login to your User Account.
4. Use Safe Mode
If your computer is coming up with “We can’t sign in to your account” error message and logged you into a temporary user account, you should be able to fix the problem by starting the computer is Safe Mode.
1. Restart the computer and wait for the login screen to appear. If the login screen does not appear, press Ctrl + Alt + Delete keys to activate the login screen.
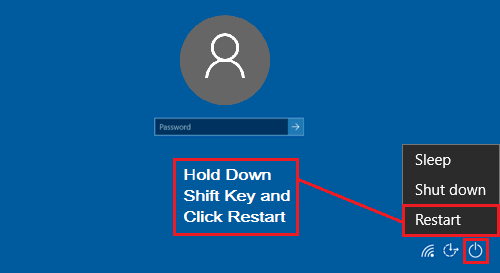
2. At the login screen, click on virtual Power Icon (lower-right corner) > press and hold the Shift Key and select the Restart option.
Note: If the computer is not going to the login screen, you can force it into Recovery mode and access Advanced Startup options.
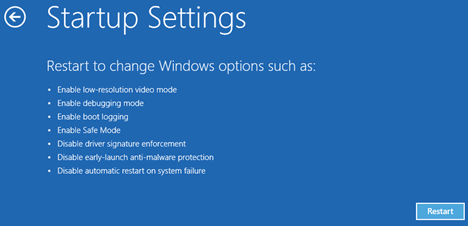
3. After the computer restarts, navigate to Troubleshoot > Advanced options > Startup Settings and click on the Restart button.
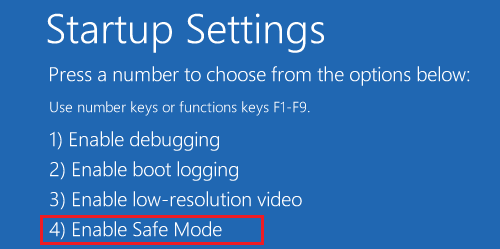
4. On the next screen, press the F4 key to start the computer in Safe Mode.
5. When the computer starts in Safe Mode, you should be able to login to your locked User Account.
6. After you are logged-in, you can check system files for damage by using Command prompt.
If the problem has started after installing an app or making certain changes, you remove the app and use System Restore to undo the changes.
5. Disable Fast Startup
The fast startup feature has been associated with login problems. Hence, disabling the Fast Startup feature should help in fixing this issue.
Start the computer in Safe Mode using step 3 or 4 as provided above and disable Fast Startup by using steps as provided in this guide: How to Enable/Disable Fast Startup in Windows 11/10.
6. Repair Corrupted User Profile
If the User Profile is corrupted, you won’t be able to login to the User Account or use any of above steps to fix the problem.
The solution in such a case is to repair the corrupted user profile using steps as provided in this guide: How to Fix Corrupt User Profile In Windows 11/10.