While the IP Address of your iPhone is automatically assigned by the Modem/Router, it is possible to change the IP Address of your iPhone; if it becomes necessary.
In general, users find the need to change the IP Address of iPhone to bypass website blocks, bypass firewall, fix network connectivity issues and other reasons.
As you must be aware, the IP Address of iPhone consists of 4 sets of numbers (say 192.175.0.12). In this number set, the first three number sets (192.175.0) are derived from Router IP Address and the last set is assigned by the Router to iPhone.
Hence, when you manually change the IP Address of iPhone, the first 3 number sets need to match the IP Address of the Router and only the last number set (12 in this case) can be changed or replaced by any number from 1 to 256.
Change IP Address On iPhone
It is most likely that your iPhone is using a dynamic IP Address assigned by the DHCP Server. If it becomes necessary, you can manually change the IP Address of your iPhone by using the following steps.
Step 1. Find the Router IP Address
The first step is to note down the IP Address of Router, as this will be required for use in the next step.
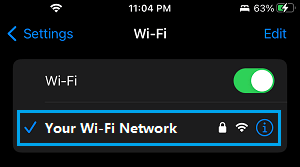
1. Go to Settings > Wi-Fi > tap on your Wi-Fi Network.

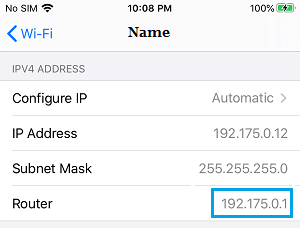
2. On the next screen, scroll down to “IPV4 ADDRESS” section and note down the IP Address of Router.

Also, note down the Subnet Mask Address and the last number set of current IP Address (12 in above case).
Step 2. Manually Change IP Address on iPhone or iPad
After noting down Router IP Address and Subnet Mask Address, you can follow the steps below to assign a New IP Address to your iPhone.
1. Go to Settings > Wi-Fi > tap on your Wi-Fi Network.

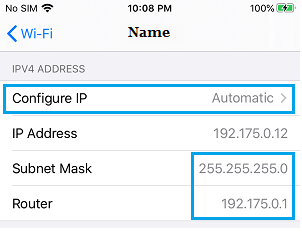
2. On the next screen, scroll down to “IPV4 ADDRESS” section and tap on Configure IP option.

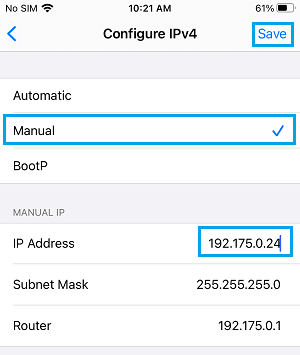
3. On the next screen, select the Manual Option > Enter Router IP Address, Subnet Mask Address, New IP Address and tap on Save.

As mentioned above, the first 3 number sets in New IP Address (168.175.0 in above case) need to be the same as the Router IP Address. Only the Last Number Set can be changed, using any number from 1 to 256.