You may want to change your Name on Facebook for various reasons, ranging from change in surname or legal name to other possible reasons.

Change Facebook Name
Before going ahead with the steps to change your Name in Facebook, you need to be aware that Facebook allows Name changes once every 60 days.
This practically means that if you change your mind or make a mistake during the Name change process, you won’t be able to go back and correct the mistake or switch back to your original Name for a period 60 days.
Also, if you change your name frequently, Facebook may prevent you from making any further changes to your Name for a period of 120 days.
You also need to be aware that Facebook does not allow the use of Titles (Professional or Religious), Offensive words, Suggestive words or Phrases in place of a Name.
You may also be interested in knowing that Facebook allows the use of Nick Names like Bill in place of William or Liz in place of Elizabeth.
Changing your Name or Adding a Nickname to Facebook will not change anything else in your Facebook Account, it will not remove tags applied to your previous Name.
Steps to Change Facebook Name on iPhone or Android
The steps to change Facebook Name on Android Phone and iPhone are quite similar, except for the location of the 3-line Hamburger Menu Icon.
1. Open Facebook > tap on 3-line menu icon (located at bottom on iPhone and at top on Android Phone).
![]()
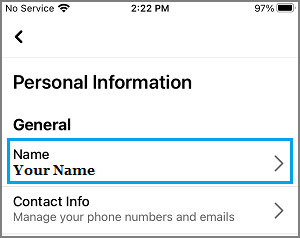
2. From the next screen, go to Settings & Privacy > Settings > Personal Information and tap on your Name.
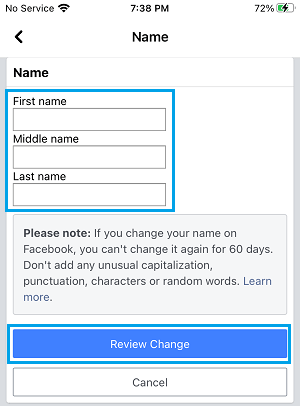
3. On the Name screen, type your New Name and tap on Review Change button.
4. On the next screen, check your New Name, enter your Facebook Password and tap on Save Changes button.
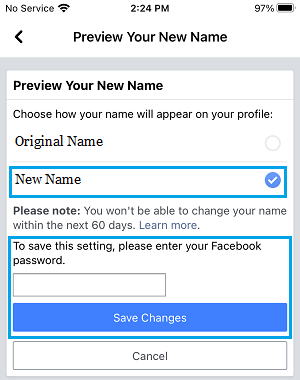
Depending on your Privacy Settings, your New Facebook Name should now start appearing to your Contacts and others.
Use Nickname on Facebook.
Instead of changing your Name on Facebook, you can add a Nickname to your existing Name and request Facebook to show this Nickname, instead of your Name.
1. Open Facebook and tap on 3-line menu icon (located at bottom on iPhone and at top on Android Phone).
![]()
2. From the next screen, go to Settings & Privacy > Settings > Personal Information and tap on your Name.

3. On the Name screen, scroll down and select Add a Nickname, a birth name… option.
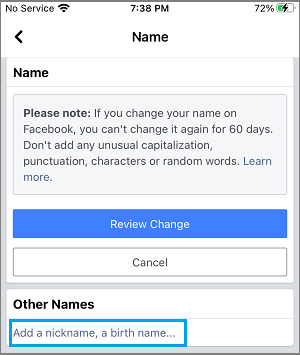
4. On the next screen, type your Nickname, select the option to Show at top of profile and tap on the Save button.
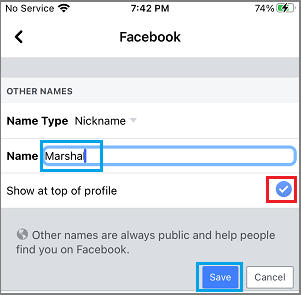
Depending on your privacy settings, your Nickname should now start appearing to your Contacts and others on Facebook.