In addition to the initial User Account created during the setup process, macOS provides the option to create additional User Accounts on Mac, with and without admin privileges.
While you can make use of the initial User Account to login and get your work done, the recommended security practice is to keep the initial User Account for Admin related tasks and use another User Account for login and day-to-day tasks.
In addition to this, it is also important that you create another User Account on your MacBook with Admin Privileges, in order to deal with the possibility of being locked out of your main User Account.
Create New User Account on Mac
You can follow the steps below to create a New User Account on your Mac.
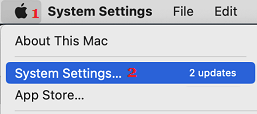
1. Click on Apple Logo in top-menu bar and select System Settings in the drop-down menu,
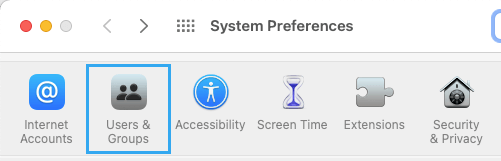
2. On the next screen, click on Users & Groups icon.
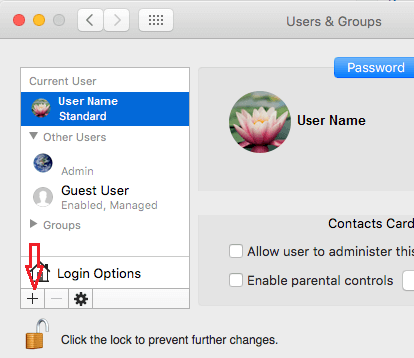
3. On the next screen, click on the Lock icon located at lower left corner of the screen.
![]()
4. On the pop-up, enter your Admin User Name, Password and click on Unlock.
5. On the next screen, click on the “+” Plus button, located at bottom-left corner of the screen.
6. On the next screen, enter the Name, Password and Password Hint for the New User Account and click on Create User button.
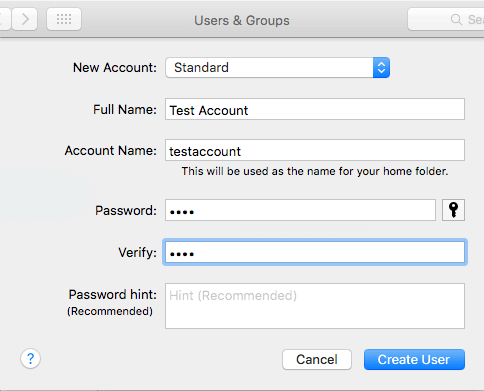
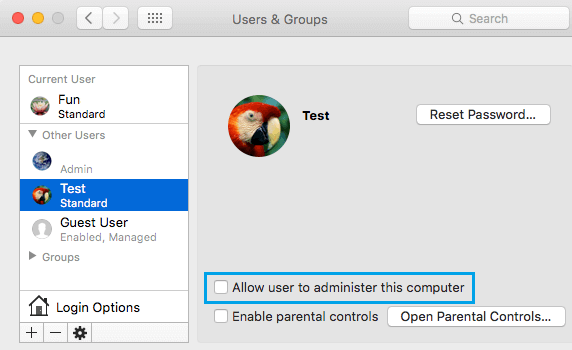
7. On the next screen, you can select “Allow user to administer this computer” option, if you want to grant Admin privileges to the New User Account.
After this, the New User Account will become available on the Lock Screen of your Mac.