In case you are not aware, creating your own Contact Card on iPhone with proper Home and Work Address is the only way to Add your Home and Work Address to the Maps app on iPhone.
This allows you to get directions to Home or Place of work by using Voice Commands like “Siri take me Home” or “Siri take me to work”.
Similarly, the Autofill feature in Safari browser can pull information from your Contact Card to automatically fill up your Name, Address and Phone Number.
Create Your Contact Card On iPhone
The first step that is required to create your own Contact Card on iPhone is to add a New Contact with your own Name, Phone Number, Address and other information to Contacts App.
After adding the New Contact with your information to Contacts App, the next step is to associate this New Contact with “My Info” section of the Contacts App on your iPhone.
Step 1. Add Your Information to Contact Card on iPhone
Follow the steps below to Create a New Contact Card on iPhone and add your Name, Phone Number, Address and other information to this Contact.
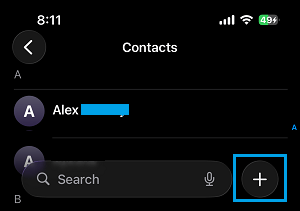
1. Open the Contacts app on your iPhone and tap on + Icon.
2. On New Contact screen, type your Name, Phone Number, Home Address and other details that you want to make available in your Contact Card.
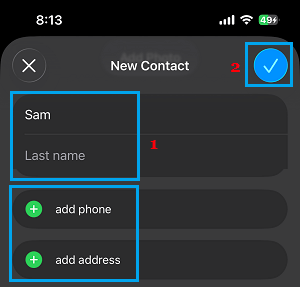
3. Once you are finished, tap on Done to save your Contact Card on iPhone.
Step 2. Add Contact Card to My Info on iPhone
Now that a New Contact with your information is available in the Contacts App, the next step is to associate this Contact with “My Info” section of the Contacts App.
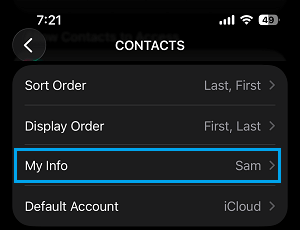
1. Go to Settings > Apps > Contacts.
2. On the next screen, scroll down and tap on My Info tab.
2. On the next screen, select the New Contact that you created with your information in Step 1.
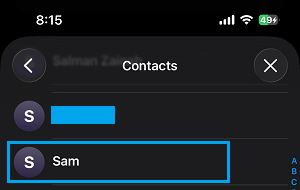
3. That will be it! – You have successfully created your own Contact Card on iPhone.
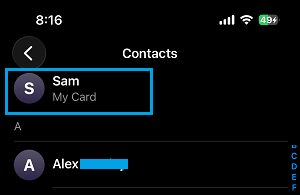
From now on, whenever you open the Contacts App, you will see your Contact Card (My Card) at the very top of the screen, followed by other Contacts.