In general, the reason for Windows computer coming up with “Default Gateway is not available” error is due to a temporary glitch or a stuck process or program preventing the computer from connecting to internet.
Apart from this, there could be various other reasons for network connectivity error on a Windows computer, ranging from Network Adapter drivers becoming outdated or corrupted to other reasons.
Default Gateway is Not Available Error in Windows 10/11
If your computer is coming up with “The Default Gateway is not available” error message, you should be able to fix the problem using the following troubleshooting steps.
1. Restart the Computer
Starting with the most basic and often overlooked troubleshooting step, restart the computer and see if this helps in fixing the problem.
1. Power OFF the computer.
2. Allow the computer to completely Shut Down > Wait for 30 seconds and Restart the computer.
This simple troubleshooting step can help, if the problem is being caused due to stuck programs and processes on your computer.
2. Run Network Adapter Troubleshooter
Next, see if the built-in Network Adapter Troubleshooter as available in Windows 10 can help you in fixing this problem.
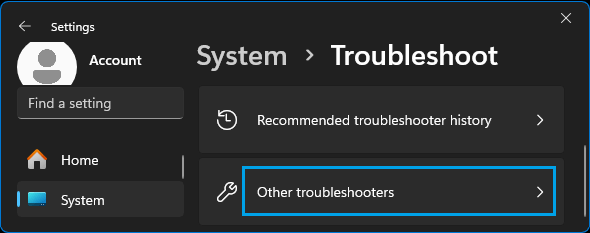
1. Go to Settings > System > Troubleshoot.
2. On the next screen, scroll down and select Other troubleshooters.
Windows 10: Go to Settings > Update & Security > Troubleshoot > Additional Troubleshooters.
2. On the next screen, select Network Adapter and click on Run the Troubleshooter.
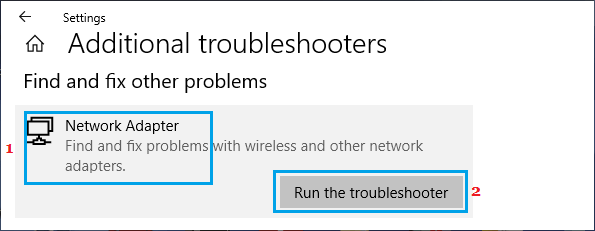
3. Follow the on-screen instructions as the Troubleshooter tries to find and fix problems on your computer.
3. Update Network Adapter Driver
In general, Windows 10 should automatically update the Network Adapter, but this may not always happen.
1. Right-click on Start button and click on Device Manager.
2. On Device Manger Screen, expand Network Adapters entry > right-click on WiFi Adapter and click on Update Driver Software option.
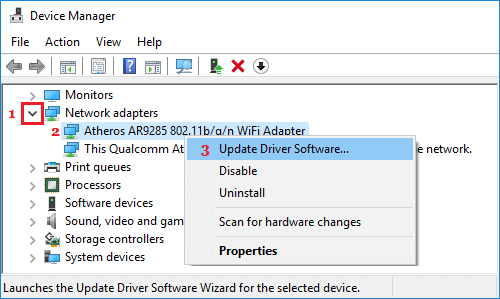
Tip: If you see multiple entries, look for something that reads Network, 802.11b or has WiFi in it.
3. On the next screen, select Search Automatically for Updated Driver Software option and follow the instructions to install the driver.
4. Reset TCP/IP
1. Type “Command Prompt” in the search bar > right-click on Command Prompt and select Run as Administrator option.

2. In Command Prompt window, type netsh winsock reset and press the Enter key.

3. Close the Command Prompt window, Restart the computer and see if the problem is now fixed.
5. Prevent Computer from Switching OFF Network Adapter
The problem of WiFi disconnecting in Windows 10 is also known to be due to the computer automatically turning OFF WiFi Adapter in order to conserve power.
1. Right-click on the Start button and click on Device Manager.
2. On Device Manger screen, expand Network Adapters entry > right-click on WiFi Adapter and click on Properties.
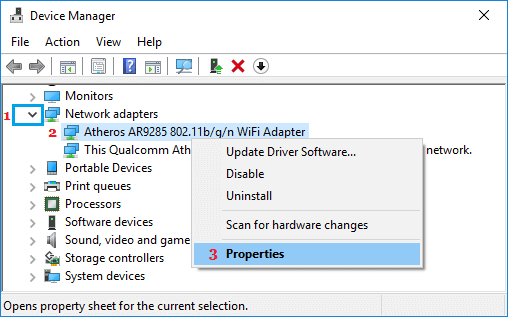
Tip: In case you see too many entries, look for something that says Network or 802.11b or has WiFi in it.
3. On Properties screen, select the Power Management tab and uncheck Allow the computer to turn off this device to save power option.
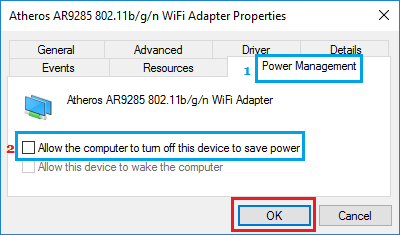
4. Click on OK to save this setting on your computer.
After this your computer won’t be able to Turn OFF the Network Adapter, which should fix the problem.
6. Temporarily Disable Antivirus Software
The problem could be due to the Antivirus software program on your computer blocking accessing to Default Gateway.
To confirm, temporarily disable the Antivirus Software installed on your computer and see if this helps in fixing the problem.
7. Check for Malware
The problem could also be due to Network configurations on your computer being modified by viruses or malware.
You can check your computer for malware using Windows Defender Offline Scan and Windows Malicious Software Removal Tool as available on Microsoft’s download site.