As indicated by its name, the purpose of “Remote Assistance” feature on a Windows computer is to allow a trusted technical support person to diagnose and fix problems on your computer, even if they are located far away from your device.
In general, “Remote Assistance” feature is enabled by default on a Windows 11/10 computer, which allows users to share screen or allow trusted personnel to troubleshoot problems on their computers; without the need to use any third-party tools or go through complicated settings.
Note: Remote Assistance is not the same as Remote Desktop; which is not enabled by default on a Windows computer and needs to be manually enabled.
Disable Remote Assistance in Windows 11/10
Even though “Remote Assistance” is enabled by default on a Windows computer, it does not necessarily mean that your computer is actively accepting remote connections. It works only when the user initiates a request for remote assistance, often by generating a password token; which keeps the user in control of the remote session.
However, there is always the possibility of someone being able to gain access to your device using this open backdoor or enticing you or a family member into a “tech support scam“; when this feature is kept enabled on a computer.
Hence, it is a good practice to disable “Remote Assistance”; as soon as it has served its intended purpose and this is recommended by most security experts.
1. Disable Remote Assistance Using Run Command
An easy way to disable “Remote Assistance” on a Windows computer is by using Run Command.
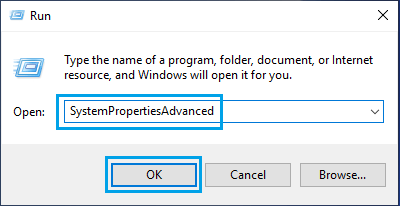
1. Press Windows + R keys to open Run Command.
2. In the Run command window, type SystemPropertiesAdvanced and click on OK.
3. On the “System Properties” screen, switch to Remote tab and uncheck Allow Remote Assistance Connections to this computer option.
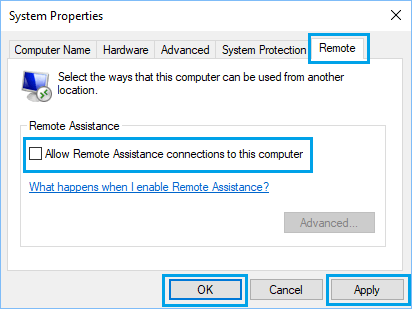
4. Click on Apply & OK to save this change on your computer.
If it is required, you can manually enable “Remote Assistance” at any time on your computer by selecting or checking the “Allow Remote Assistance” option.
2. Disable Remote Assistance By Using Control Panel
Another easy way to disable the “Remote Assistance” feature on a Windows computer is by using Control Panel.
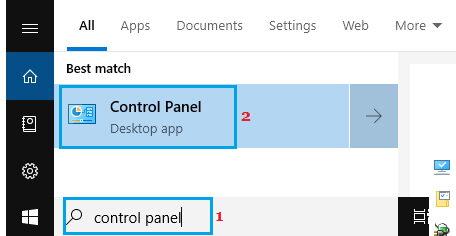
1. Type Control Panel in the Search bar and click on Control Panel App in the search results.
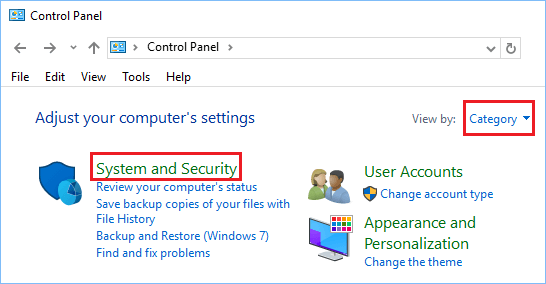
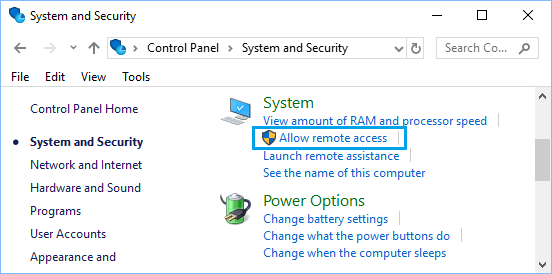
2. On the “Control Panel” screen, make sure you are in “Category” view and click on System and Security.
3. On the “System and Security” screen, click on Allow Remote Access option located under “System” section.
4. On the next screen, uncheck Allow Remote Assistance connections to this computer option.
5. Click on Apply and OK to save this setting on your computer.
3. Disable Remote Assistance Using Registry Editor
You can also disable the “Remote Assistance” feature on your computer by using Registry Editor.
1. Open the Run Command on your computer.
2. Type Regedit and press the Enter key or click on OK.

3. On the “Registry Editor” screen, navigate to HKEY_LOCAL_MACHINE\SYSTEM\CurrentControlSet\Control\Remote Assistance.
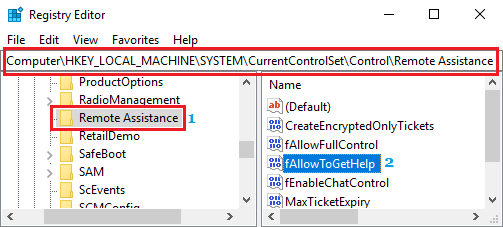
4. Select Remote Assistance in the left-pane and double click on fAllowToGetHelp DWORD in the right-pane.
5. On the Edit DWORD pop-up, change Value Data to 0.
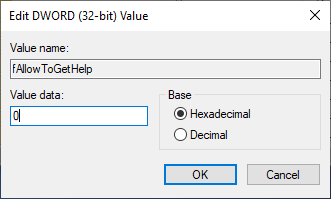
6. Make sure that you Restart the computer to apply this change.
If required, you can enable “Remote Assistance” feature on your computer by reversing the above change.