Allowing the computer remain at its default sleep mode settings can significantly increase the battery life of your device and help in protecting the privacy and security of your data. However, it is not uncommon to find users looking for a way to change sleep mode time and even disable sleep mode in certain special cases.
For example, it becomes necessary to prevent the computer from going to sleep; if it is expected to provide remote access or function as a media, storage or gaming server. In all these cases, the PC needs to stay awake 24/7, which can only be achieved by disabling sleep mode.
Computers being used in conference rooms, information kiosks and point-of-sale systems are examples of other cases where there is a valid requirement to disable sleep mode on a Windows computer.
Disable Sleep Mode in Windows 11/10
If you are looking for a way to disable sleep mode on your computer, it is most likely that you want to prevent the computer from going into sleep, only when it is plugged-in or connected to a power source.
Disabling sleep mode when the computer is running on battery power can lead to a considerable reduction in the Battery Life of your computer and is not recommended.
1. Disable Sleep Mode Using Settings
If your computer is required to stay awake for an extended period time, you can easily change the time after which your computer goes to sleep by using steps as provided in this guide: How to Change Sleep Mode Time in Windows 11/10.
If the computer needs to stay awake 24/7, you can follow the steps below to disable the sleep mode on your computer and prevent it from going to sleep.
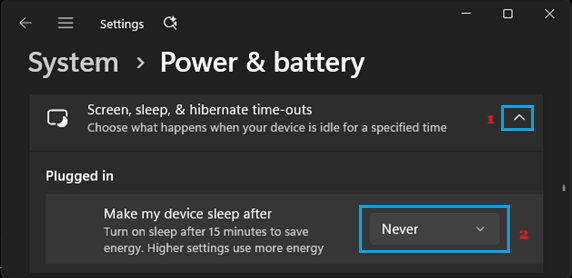
1. Go to Settings > System > Power & Battery.
2. On the next screen, click on Screen, sleep & hibernate time-outs and select the Never option for “Make my Device sleep after” entry in “Plugged-in” section.
Windows 10: Go to Settings > System > Power & Sleep (left pane) > set ‘When Plugged in’ setting to Never.
2. Enable Sleep Mode Using Settings
As mentioned above, you can extend the Battery Life of your Laptop computer by enabling recommended sleep mode settings, when it is running on Battery power.
1. Go to Settings > System > Power & Battery.
2. On the next screen, click on Screen, sleep & hibernate time-outs > scroll down to “On Battery” section and select 10 minutes (Recommended) setting for “Make my Device sleep after” entry.
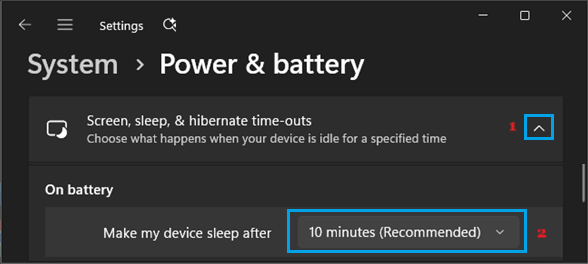
This will make your device to automatically go into sleep mode, if it remains unused for a period of 10 minutes.
Note: If required, you can select a slightly longer period (say 15 minutes).
3. Disable Sleep Mode Using Advanced Power Plan Settings
Another way to disable sleep mode and prevent your device from going to sleep is by going to Advanced Power Settings on your computer.
1. Right-click on Start Button and click on Run.
2. In the Run Command window, type powercfg.cpl and click on OK.

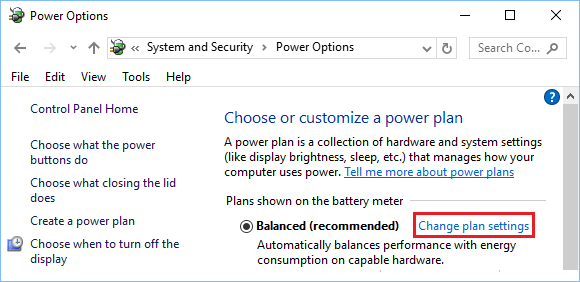
2. On the next screen, click on Change Plan Settings link, located next to the “Balanced (recommended) power plan setting on your computer.
3. On the next screen, select the Never option for Put the computer to sleep entry in “Plugged-in” section.
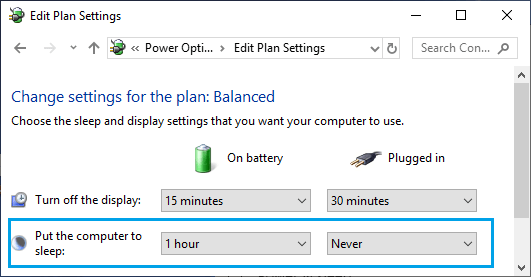
As mentioned above, selecting the “Never” option for On Battery entry is not recommended, as it can lead to loss of Battery Life on your computer.