Portable USB Drives rank among the top sources for spread of malware and viruses on Windows computers. Hence, it makes sense to disable the use of USB Drives on a Windows computer in certain cases.
Another reason for disabling USB Drives on a Windows computer is to prevent the possibility of anyone being able to steal data the data from your computer by making a copy of your files to a USB storage drive.
Disable USB Drives in Windows 10/11
If it becomes necessary, you can disable the use of USB Drives on a Windows 10/11 computer by using Group Policy, changing security settings and also by using Registry.
1. Disable USB Drives By Using Group Policy
If you are using the Professional version of Windows, you can disable USB Drives by using the Group Policy Editor.
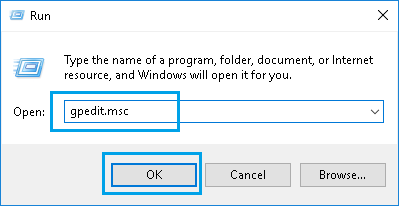
1. Right-click on the Start button and click on Run.
2. In the Run Command screen, type gpedit.msc and click on OK.
3. On Local Group Policy Editor screen, navigate to Computer Configuration > Administrative Templates > System > Removable Storage Access.
4. Next, select Removable Storage Access in the left-pane. In the right-pane, double-click on Removable Disks: Deny Read Access entry.
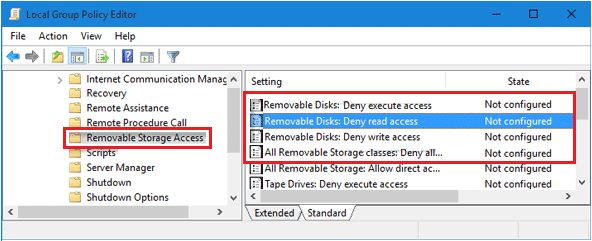
5. On the next screen, select Disabled option > click on Apply & OK to save this setting.
This will apply the policy at Machine Level, preventing all Users on your computer from accessing files located on USB Storage Drives.
Similarly, you can disable Write Access for all Users by enabling Removable Disks: Deny Write Access Policy.
If you only want to Apply the policy at User Level, navigate to User Configuration > Administrative Templates > System > Removable Storage Access.
Note: It is important to apply Removable Disks: Deny Execute Access policy, if your intention is to prevent any malicious code in the USB Drive from running on your computer.
2. Change Security Settings for usbstor.PNF
If you are using the Home Edition of Windows, you can disable the use of USB Drives and on your computer by changing security settings for usbstor.PNF file.
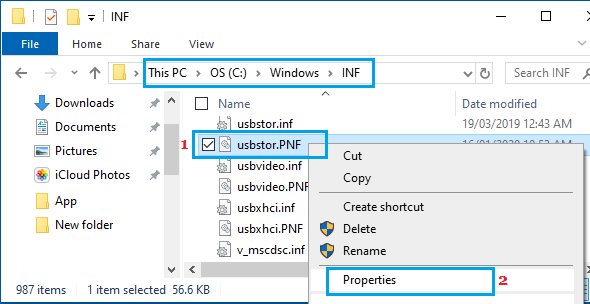
1. Open the File Explorer on your computer and navigate to C:\Windows\INF folder.
2. In the INF Folder, right-click on usbstor.PNF File and click on Properties.
3. On INF Properties screen, click on the Security tab > select Users entry and click on the Edit button.
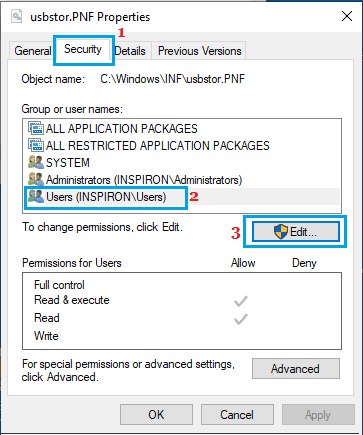
4. On usbstor.PNF permissions screen, check the Deny box located next to “Full Control” entry.
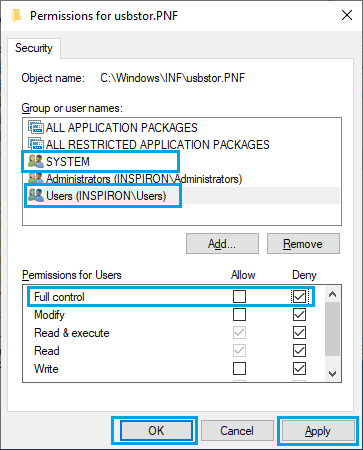
5. Click on Apply & OK to apply this change on your computer.
Note: You also need to Add the System Account to Deny List, using the same steps.
3. Disable USB Storage Devices Using Registry
If the USB Storage Device has been prreviously used on the computer, you need to make changes in the registry file to prevent its use on your computer.
1. Right-click on the Start button and click on Run.
2. In the Run Command window, type regedit and click on OK.

3. On Registry Editor screen, navigate to HKEY_LOCAL_MACHINE\SYSTEM\CurrentControlSet\Services\USBSTOR.
4. Click on USBSTOR in the left-pane. In the right-pane, double-click on the Start entry.
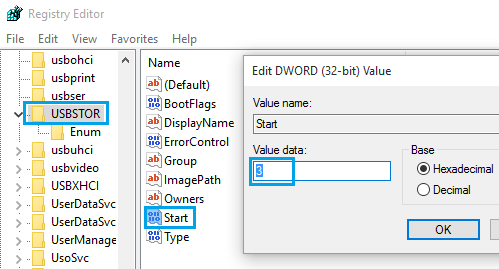
5. On Edit DWORD pop-up, change the Value data from 3 to 4 and click OK .
Make sure that you Restart the computer for this change to apply on your computer.
Note: This method works only if the driver for USB Storage Device is already installed on your computer.