When a Windows computer goes in to Hibernation (or hibernate mode), it saves all the open files, apps, programs and settings to a dedicated file (hiberfil.sys), located on the local hard disk of the computer.
This allows the computer to be completely powered-off; when it is not actively being used and spring back to life (upon restart); with all your open files and active programs waking up in the same state as you had left them, prior to Hibernation.
The clear advantage of hibernation over sleep mode is that hibernation consumes “zero” battery life, while sleep mode needs to make use of battery power to keep the RAM running.
Enable or Disable Hibernation in Windows
While it is easy to enable Hibernation on a Windows computer and start experiencing its proven battery saving and session preservation capabilities, you may find the need to disable hibernation; if it is causing problems or you want to recover the storage space occupied by “hiberfil.sys” file on your computer.
Reasons to Enable Hibernation
The main reasons for enabling hibernation on a Windows computer can be summarized as the following.
- Extends Battery Life: Unlike sleep mode; which needs battery to keep the RAM alive, Hibernation saves your session to the hard disk and completely switches off the computer.
- Session Preservation: You can leave all your files and apps open for days and expect them to be available for your use in the same condition that you had left them.
- Required for Fast Startup: It is necessary to enable the hibernation mode on a Windows computer, in order to use the Fast Startup feature.
In addition to above, Hibernation provides more security for your data by saving it to encrypted hard drive, unlike sleep mode; which leaves your data in the RAM in an unencrypted format.
Reasons to Disable Hibernation
The main reasons for disabling hibernation on a Windows computer can be summarized as the following.
- Recover Storage Space: You can expect to recover a good amount of storage space (75% of the RAM capacity) by disabling Hibernation, which automatically clears the storage space occupied by the “hiberfil.sys file” on your computer.
- Protect SSD Drives: Disabling Hibernation can prevent the possibility of the SSD drive being worn out; due to repeated writing of the entire RAM content to SSD Drive, every time the computer goes into Hibernation.
- Dual Boot Issues: On computers using dual or multiple operating systems (Windows & Linux), Hibernation can end up locking the shared Windows drive; preventing Linux from creating new files and modifying the existing ones.
In addition to above, problems like memory leaks, frozen/stuck apps, system crashes and essential services like Wi-Fi, Bluetooth and Audio services not waking up properly and causing problems are noticed more frequently on computers using Hibernation.
1. Location of Hibernation File (hiberfil.sys)
Being a system file, Windows operating system keeps “hiberfil.sys” hidden. You need to enable the option to view hidden system files in order to view this file.
1. Open the File Explorer on your computer.
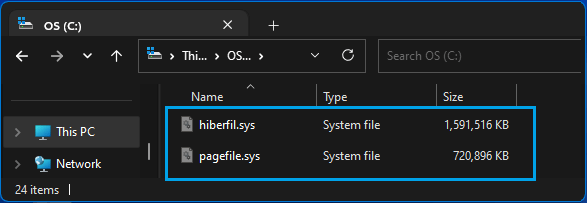
2. From the File Explorer screen, go to This PC > Local drive (C:) and you will be able to see the “hiberfil.sys” file and the amount of storage space occupied by this file on your computer.
Now, when you right-click on hiberfil.sys and try to delete the file, it is likely to come up with an error message reading “This action can’t be completed because the file is open in another program”.
Even if you manage to delete this file, it will be automatically created by the computer. Hence, the only way to delete “hiberfil.sys” file and recover storage space is by disabling Hibernation.
2. Disable Hibernation Using Command Prompt
The easiest way to disable Hibernation on a Windows computer is by using Command Prompt.
1. Type CMD or Comm in the Search bar > right-click on Command Prompt App in the search results and select Run as Administrator option.

2. On Command prompt screen, type powercfg.exe /hibernate off and press the Enter key on the keyboard of your computer.

3. Once the Command is executed, hibernation will be immediately disabled on the computer.
After this, when you go to C:\hiberfil.sys, you will see that hiberfil.sys file has been deleted from the computer.
3. Disable Hibernation Using Advanced Power Settings
If you do not like using the Command prompt, you can disable Hibernation by going to “Advanced Power Settings” screen.
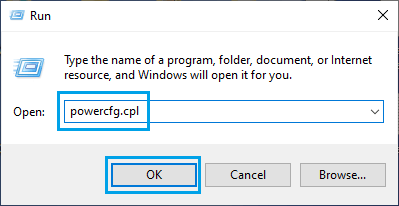
1. Press Windows + R to open the Run command on your computer.
2. Type Powercfg.cpl and click on OK.
3. From the next screen, go to Change Plan Settings > Change Advanced Power Settings.
4. On the next screen, expand the Sleep entry > expand Hibernate After entry and set both On Battery and Plugged in to Never.
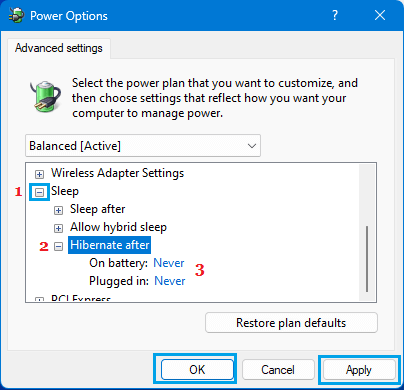
5. Click on Apply & OK to save this change in Power Settings on your computer.
This will ensure that your computer never goes into Hibernation, while using battery and also when it is plugged-in to a direct power source.
4. Re-Enable Hibernation in Windows 11/10
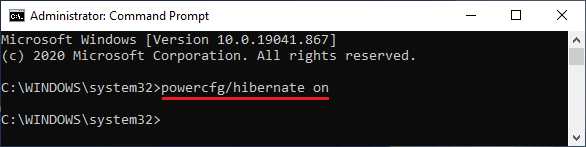
If you decide to make use of the Hibernate mode to save battery life, you can re-enable Hibernation on your computer by executing the “powercfg.exe /hibernate on” command.
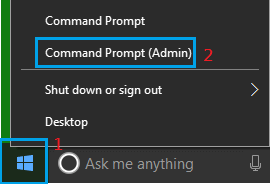
1. Right-click on the Start button and click on Command Prompt (Admin).
2. On the Command prompt screen, type powercfg.exe /hibernate on and press the enter key on the keyboard of your computer.
Once this command is executed, Windows will recreate the hiberfil.sys file.
5. Enable/Disable Hibernation Using Registry Editor
Another way to enable or disable Hibernation on a Windows computer is by using Registry Editor.
However, this method is required; only if the Command prompt is giving errors or has been disabled by the system administrator.
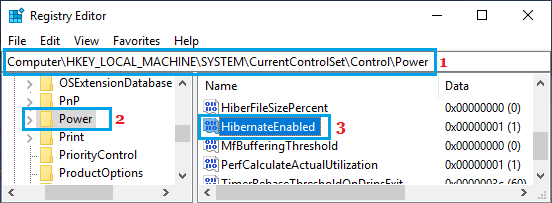
1. Type Registry in the Search bar and click on Registry Editor in the search results.

2. From Registry Editor screen, navigate to HKEY_LOCAL_MACHINE\System\CurrentControlSet\Control\ Power and double-click on HibernateEnabled entry in the right-pane.
3. On the next screen, you can disable Hibernate Mode by changing Value Data to 0.
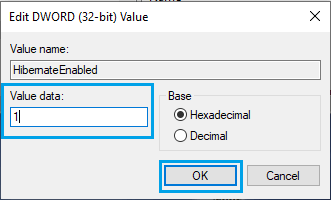
4. Click on OK to close the registry editor and save the changes on your computer.