If you are looking for a way to disable JavaScript in Google Chrome browser, it is likely that you are either trying to troubleshoot problems or concerned about JavaScript being exploited by malware or hackers.
However, you need to be aware that most websites make use of JavaScript to display menus, sharing buttons and other interactive elements, which can cease to function, when JavaScript is disabled in the web browser.
You can test this by disabling JavaScript in Google Chrome and visiting, Facebook, Gmail and other Social Media apps that are known to rely on JavaScript to power interactive features on their websites.
Disable JavaScript in Google Chrome
You can find below the steps to Disable JavaScript for all websites and also the steps disable JavaScript for specific or selected websites in Google Chrome browser.
Note: In certain cases, disabling JavaScript can result in broken menus, blank images and can prevent you from posting comments and logging in to the website.
1. Disable JavaScript For All Websites in Google Chrome
You can disable JavaScript in Google Chrome browser at any time by using the following steps.
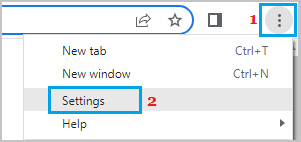
1. Launch the Chrome browser on your computer > click on 3-dots icon and select Settings in the drop-down menu.
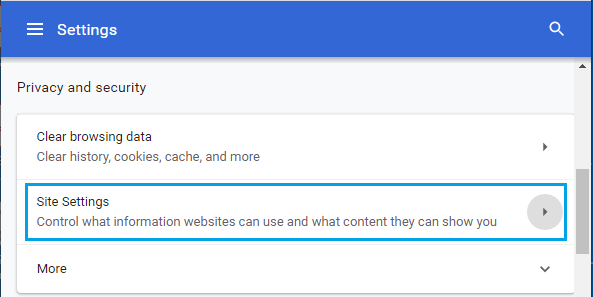
2. On the next screen, click Privacy & Security tab (left-pane) and click on Site Settings in the right-pane.
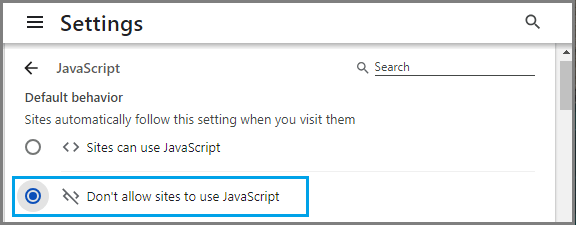
3. From Site Settings screen, go to JavaScript and select Don’t allow sites to use JavaScript option.
4. Make sure that you restart the Chrome browser to apply this change.
Note: Once you are done with the reason for disabling JavaScript, make sure that you Update Google Chrome and Enable JavaScript, in order to enjoy the full functionality of your favorite websites.
2. Disable JavaScript For Specific Websites in Google Chrome
If you do not trust certain websites, you can disable JavaScript specifically only for those websites, while allowing JavaScript for all other websites on your computer.
1. Click on 3-dots menu icon > select Settings in the drop-down menu.
2. On Settings screen, click Privacy & Security (left-pane) and click on Site Settings in the right-pane.
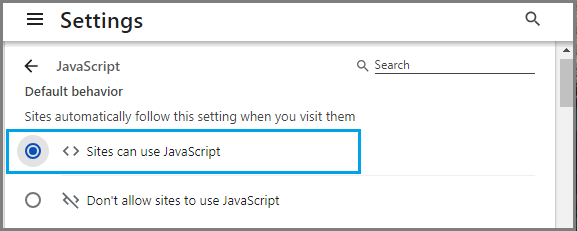
3. From Site Settings screen, go to JavaScript > select Sites can use JavaScript option.
4. On the same screen, scroll down a bit and click on the ADD button next to Not Allowed to use JavaScript entry.
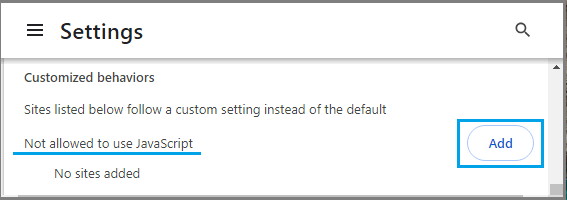
5. On the next screen, type URL of the website for which you want to Enable JavaScript and click on the ADD button.

6. Restart the browser to implement this change on your computer.
3. Steps to Enable JavaScript in Google Chrome
The steps to Enable JavaScript in Google Chrome are practically the same on Mac, Windows computers and Chromebook.
1. Open Google Chrome > click on 3-dots icon and select Settings in the drop-down menu.
2. On the next screen, click on Privacy & Security tab (left-pane) and click on Site Settings (right-pane).
3. On Site Settings screen, scroll down and click on JavaScript > On the next screen, select Sites can use JavaScript option.
4. Restart the browser to apply the above changes on your computer.
4. Enable JavaScript For Specific Websites in Google Chrome
The other option is to Enable JavaScript for specific websites, while blocking JavaScript for all other websites.
1. Open Google Chrome > click on 3-dots icon and select Settings in the drop-down menu.
2. On the Settings screen, click on Privacy & Security tab in the left-pane. In the right-pane, click on Site Settings.
3. From the next screen, go to JavaScript > select Don’t allow sites to use JavaScript option.
4. On the same screen, scroll down a bit and click on the ADD button located next to Allowed to use JavaScript entry.
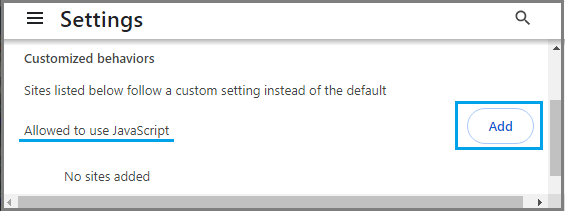
5. On the next screen, type URL of the website for which you want to Enable JavaScript and click on the ADD button.
6. Restart the browser to implement this change on your computer.