The main purpose of the “SysMain” service (previously known as SuperFetch) is to enhance system performance by monitoring usage patterns, predicting which applications are likely to be used and preloading them into memory (RAM) of the computer.
In theory, the built-in SysMain service should help in improving the responsiveness and performance of the apps; if it is able to perform the following functions.
- Background Activity: SysMain service needs to be actively running in background; in order to learn, analyze and predict usage patterns.
- Preload Applications: Preload the most commonly used applications into RAM.
- Dynamic RAM Management: Ideally SysMain should free up preloaded applications from RAM, whenever other applications require memory.
Should You Enable or Disable SysMain?
In general, the SysMain service can be kept enabled on computers with sufficient RAM capacity (over 8 to 16 GB) and it can be safely disabled; if it is causing the following issues.
- High Disk Usage: SysMain service needs to constantly read/write to hard drive; which can lead to extended periods of high and even 100% Disk usage.
- High RAM Usage: SysMain tries to make the full use of unused RAM; which can lead to issues on computers that are using resource intensive applications and games.
- High CPU Use: SysMain needs to actively update usage logs, compress/flush RAM; which can lead to random and untimely CPU spikes.
Note: The SysMain service is enabled by default in Windows and it gets automatically re-enabled via Major feature updates and also by regular cumulative updates.
1. Disable SysMain (Superfetch) Using Services
If the SysMain (SuperFetch) service is causing High Disk Usage and other problems, you can follow the steps below to disable SuperFetch service on your computer.
1. Press Win + R keys to open Run Command.
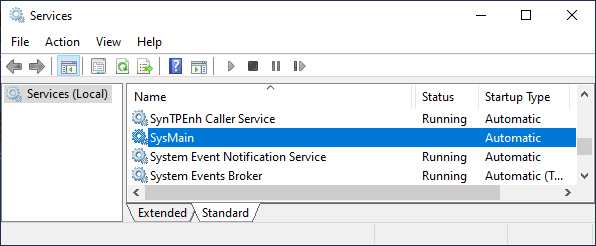
2. In the Run Command window, type services.msc and click on OK.

3. On the “Services” screen, open the SysMain service by double-clicking on it.
4. On the “SysMain Properties” screen, set the “Startup type” to Disabled.
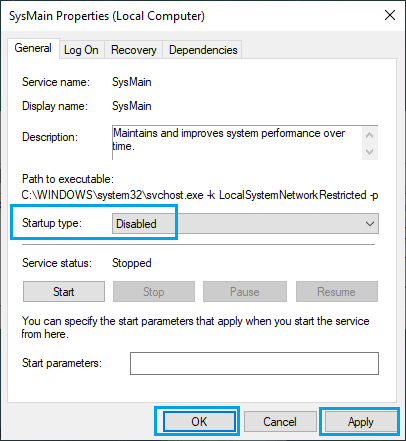
4. Click on Apply and OK to save this change on your computer.
2. Disable SysMain (Superfetch) Using Registry Editor
As mentioned above, the SysMain service gets automatically re-enabled and reset back to its default “Automatic” startup option via Windows updates. You can prevent this from happening by modifying the Registry key associated with the SysMain service on your computer.
1. Open Run command > type Regedit and click on OK.

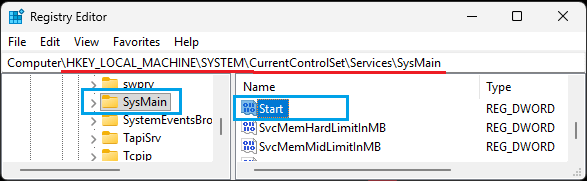
2. On the “Registry Editor” screen, navigate to HKEY_LOCAL_MACHINE > SYSTEM > CurrentControlSet > Services > SysMain and double-click on Start entry in the right-pane.
3. On “Edit DWORD” pop-up, change the Value data to 4 to disable the SysMain service on your computer.
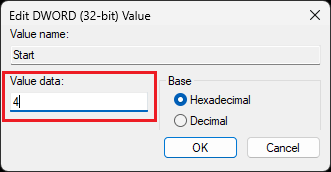
4. Click on OK to save this change on your computer.
Important: After this, you need to change the startup type for SysMain service to disabled by using the first step as provided above on this guide.
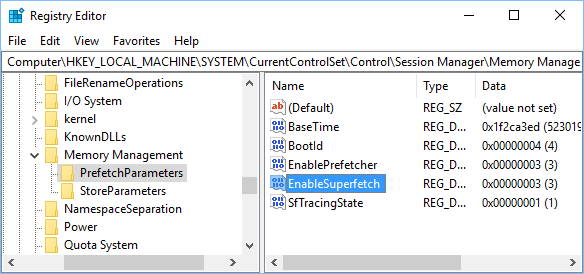
If you are unable to find the “SysMain” entry, navigate to HKEY_LOCAL_MACHINE > SYSTEM > CurrentControlSet > Control > Session Manager > MemoryManagement > PrefetchParameters and double-click on EnableSuperFetch.
On “Edit DWORD” pop-up, type “0” in “Value data” field to disable SuperFetch service on your computer.
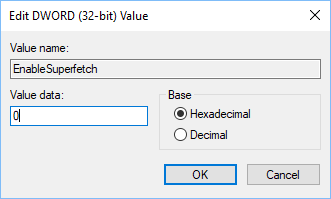
Click on OK to save the changes and close the Edit DWORD screen.
Note: If you cannot find EnableSuperFetch entry, you can create one by right-clicking on PrefetchParameters Folder and selecting New > DWORD Value.