The Disk Utility feature on Mac can be used to Format External Storage Drives. You can find below the steps to Format USB Drive on Mac.
Format USB Drive on Mac
Formatting can be defined as the process of erasing all the existing data from a Storage Drive and making it ready to Store Data in a desired File System.
When you Format a USB Drive on Mac, you will be required to select the type of File Storage System in which the USB Drive needs to be formatted.
The type of File Storage System required on a USB Drive depends on the type of device (Mac or PC) on which it is going to be used.
Hence, select macOS Extended format, if the USB Drive is only going to be used on a Mac. If you want to use the USB Drive on both Mac and Windows, you can select FAT32 or exFAT File Format.
Difference Between FAT32 and exFAT
In addition to being compatible with macOS and Windows, FAT32 is compatible with Linux, Android and devices like DVD Player, Game Consoles and others.
However, a significant disadvantage of FAT32 is that it only supports file sizes up to 4 GB and partition size is limited to 2 TB.
In comparison, exFAT supports partitions larger than 2 TB and has no file size limit (supports files larger than 4 GB).
In general, FAT32 file system is considered to be more stable, compared to exFAT File system, which is more prone to getting corrupted.
Steps to Format USB Drive on Mac Using Disk Utility
Before going ahead, you need to be aware that all the data on the USB Drive will be totally erased. Hence, make sure that the drive is blank or copy the data to another place before proceeding.
1. Plug the USB Drive into Mac and click on the Finder Icon.
![]()
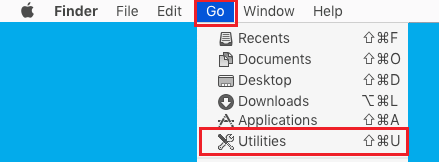
2. Select the Go tab in top-menu bar and click on Utilities in the drop-down menu.
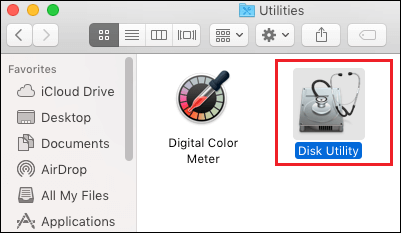
3. In Utilities Folder, double-click on Disk Utility Icon.
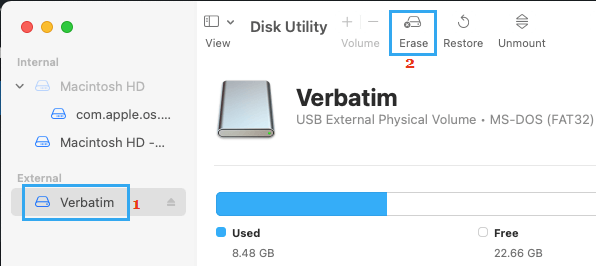
4. On the next screen, select the USB Drive in the left-pane. In the right-pane, click on Erase option.
5. On the next screen, type a Name for the USB Drive > select the required File Format > select Security Options and click on the Erase button.
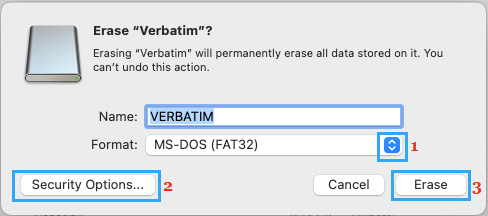
If you click on Security Options, you will see Four Different Security options to Erase the Disk.
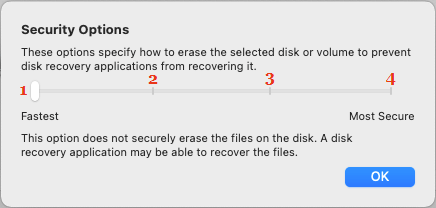
The default First option is the Fastest way to Format USB Drives on Mac, but it provides the least security.
A USB drive of Hard Disk erased by using the Fastest option can be recovered by File Recovery programs that are available in the Market.
The Second option overwrites the data twice, once by using random data and then by writing a pass of zeroes over the entire disk.
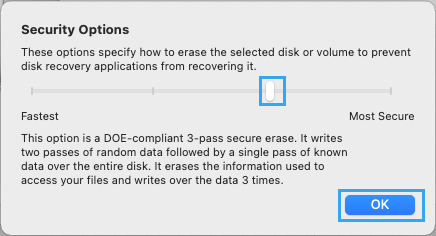
The Third option provides DOE-complaint 3-pass secure erase by writing 2 passes of random data, followed by a single pass of known data over the entire disk.
The Fourth option overwrites the data 7 times, enough to achieve US Department of Defense (DOD) 5220-22 M standard for securely erasing magnetic data.