While the Photos App on Mac allows you to transfer, store, manage, edit and view photos, it also provides the option to Hide Photos that you do not want to be viewed by others.
When you hide Photos on Mac, the Photos are moved to a separate “Hidden” folder, which prevents those Photos from appearing in any visible Photo Album in the Photos App.
At any time, you can open the Hidden Photos Album to view Hidden Photos and also Unhide the hidden Photos.
Hide & Unhide Photos on Mac
You can find below the steps to Hide single and multiple photos on Mac.
1. Hide Single Photo on Mac
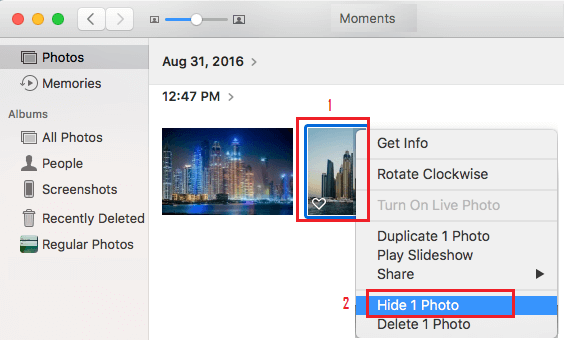
All that is required to Hide any Photo on Mac is to right-click on the Photo and select Hide Photos option in the menu that appears.
1. Open the Photos app on your Mac and find the photo that you want to hide.
2. Right-click on the Photo that you want to hide and select Hide Photo option in the menu that appears.
3. On the confirmation pop-up, click on the Hide Photo button to confirm.
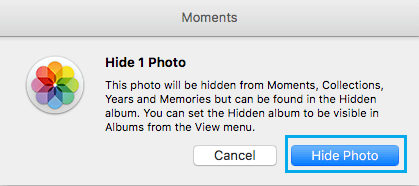
You will immediately see the photo disappearing and it will no longer appear in any accessible Photo Album in the Photos App.
2. Hide Multiple Photos on Mac
Similarly, you can also select multiple photos and move them to the Hidden Folder on your MacBook.
1. Open Photos App > Press and Hold the Command Key and select Photos that you want to Hide by clicking on them.
2. Once the Photos are selected, right-click on any selected Photo and click on Hide Photos option in the right-click menu.
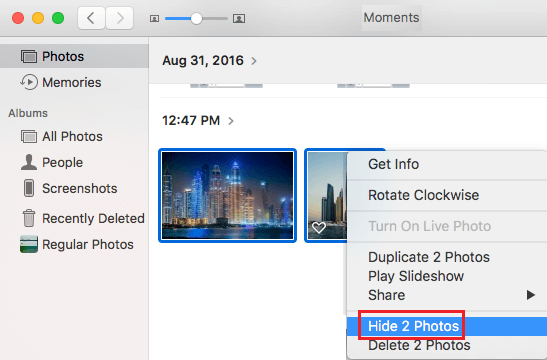
3. On the confirmation pop-up, click on Hide Photos option to confirm.
3. Hide Hidden Photo Album
For more security/privacy, you can hide the Hidden photos Album on your MacBook.
1. Open the Photos App on your iPhone.
2. Click on the View tab in the top menu-bar and select Hide Hidden Photo Album option in the drop-down menu.

Now, when you open the Photos App, the Hidden Album won’t show up in the side-menu or the left-pane.
4. How to View Hidden Photos On Mac
You can View Hidden Photos on your Mac by following the steps below.
1. Open Photos App > click on the View option in top menu-bar and select Show Hidden Photo Album option in the drop-down menu.

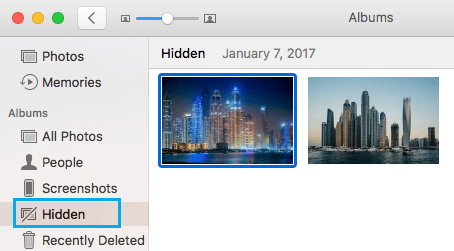
2. Now, when you open Photos App and Hidden Folder tab in the left-pane, you will be able to see all the hidden Photos in the right-pane.
5. Unhide Photos On Mac
At any time you can unhide Photos on your Mac by following the steps below.
1. Open Photos App > select the Hidden tab in the left-pane. In the right-pane, you will be able to see all the Hidden Photos.
2. Right click on the Photo/Photos that you want to unhide and select Unhide Photo option in the menu that appears.
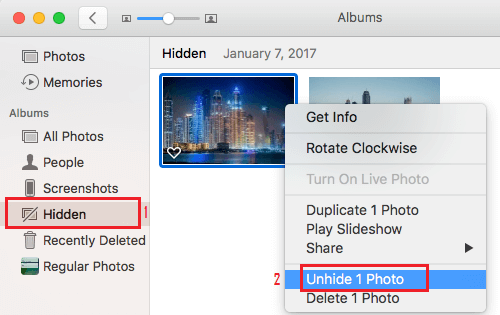
The selected Hidden Photo/Photos will be immediately removed from Hidden Album and move to the original location from where they were hidden.