Users trying to troubleshoot High CPU Usage on Windows computer have reported noticing over 90% of the CPU being used by Service Host: Local System (Network Restricted) Service.
While the Task Manager may point to “Service Host Local System (Restricted Network)” as being responsible for high CPU Usage, the problem is actually known to be caused by SuperFetch and its related services.
The main purpose of SuperFetch Service is to improve the boot up time of programs on a computer by pre-loading the most commonly used program files into RAM.
However, this pre-loading activity by the SuperFetch Service can sometimes lead to alarmingly High CPU Usage, especially on computers with Mechanical Hard Drives and Low RAM capacity.
High CPU Usage by Service Host Local System
In most cases, the problem of High CPU Usage by Service Host Local System can be fixed by disabling the SuperFetch service. If it does not, you need to disable other related services that can lead to this issue.
1. Disable SuperFetch Service
As mentioned above, disabling the SuperFetch Service alone should help in fixing the problem.
1. Right-click on the Start button and click on Run.
2. In Run Command window, type services.msc and click on OK.

3. On the Services Screen, double-click on SuperFetch to open its Properties screen.
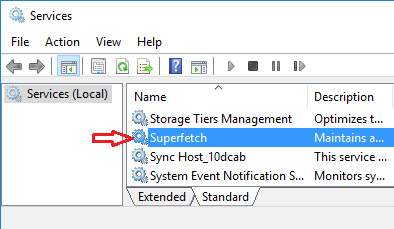
4. On SuperFetch properties screen, disable SuperFetch by changing Startup type to Disabled.
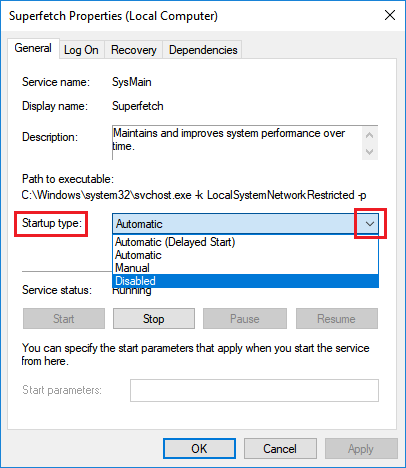
5. Click on OK to save this setting and Restart your computer.
2. Disable Windows Update Delivery Optimization
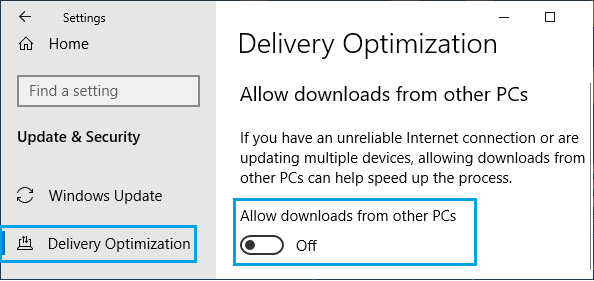
Disabling Delivery optimization feature for Windows Update can help in reducing CPU usage.
Windows 11: Go to Settings > Windows Update > Advanced Options > Delivery Optimization > On the next screen, disable Allow Downloads from other PCs option.

Windows 10: Go to Settings > Updates & Security > Delivery Optimization > disable Download from other PCs option.
After this, restart the computer and you should notice a considerable reduction in CPU Usage on your computer.
3. BackGround Intelligence Transfer Service
Another Windows Service that comes under “Service Host Local System” and causes High CPU Usage is known as BackGround Intelligent Transfer Service.
1. Right-click on the Start button and click on Run.
2. In the Run Command window, type services.msc and click on OK.
3. On the Services Screen, double-click on BackGround Intelligent Transfer Service to open its Properties screen
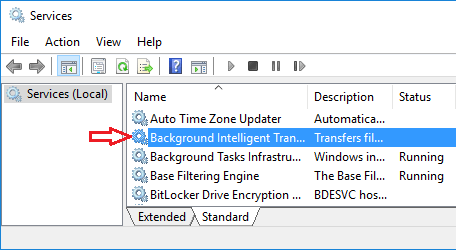
4. On properties screen, change the Startup type to Manual.
5. Click on OK to save this setting and Restart the computer.
4. Run System File Checker
You may also want to Run SFC Scan Command to check the System Files on your computer for Errors.
1. Open Command Prompt As Admin.
2. On the Command Prompt window, type sfc /scannow and press the Enter key on the keyboard of your computer.
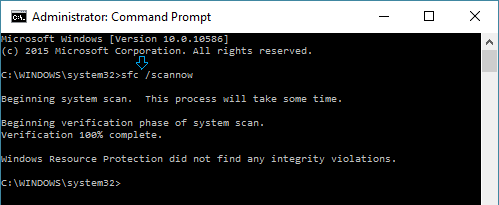
3. Make sure you restart the computer.
Is It Safe to Disable SuperFetch Service?
In general, High CPU Usage by “Service Host Local System” occurs when the the SuperFetch Service is trying to remove old files from RAM and replace them with new ones.
Once this task is completed, CPU usage by Service Host Local System on the computer should quickly go down to normal levels.
However, if the computer is constantly suffering from episodes of High CPU Usage, you will be left with no option, but to disable the SuperFetch service on your computer.