If Windows Defender Antivirus protection is not working, it can make your computer vulnerable to malware, viruses and other types of online threats.
In general, the most common reason for Windows Defender not working on a Windows computer is due to a third-party antivirus program being available on the computer.
This problem can also occur due to Windows Security App being damaged, system files related to Windows security being corrupted and Windows Defender being disabled in the registry.
Windows Defender Not Working in Windows 11/10
If Windows Defender is not working on a new computer, the problem is most likely due to the trial version of McAfee or another third-party antivirus program being enabled during the setup process.
If you can’t switch-on Windows Defender, even after disabling/uninstalling the third-party antivirus program, you should be able to fix the problem using other troubleshooting steps as provided below in this guide.
1. Disable/Uninstall Third-Party Antivirus Program
As mentioned above, it is likely that you may have unknowingly enabled antivirus protection by McAfee or by another third-party antivirus program during the setup process of the computer.
The solution in this case is to disable or uninstall the third-party antivirus program and manually enable Windows Defender Antivirus protection on your computer.
1. Go to Settings > Apps > Apps & Features.
2. On the next screen, click on third-party Antivirus program and select the Uninstall option.
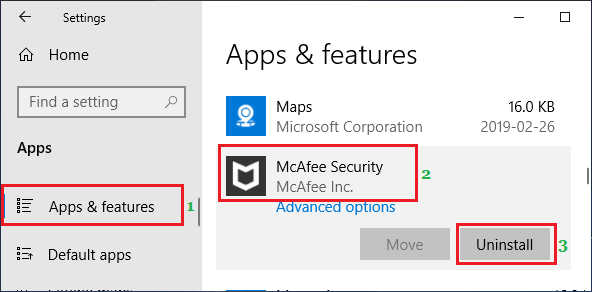
3. Wait for the Antivirus program to be removed from the computer.
2. Manually Enable Windows Defender
After removing the third-part antivirus program, you should be able to manually enable Windows Defender Antivirus protection on your computer by following these steps.
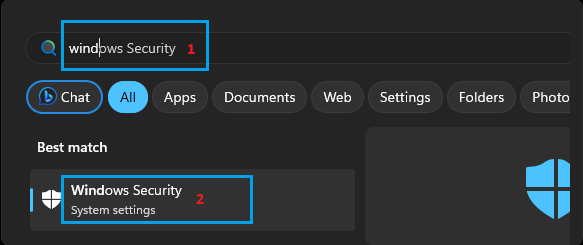
1. Type Windows Security in the Search bar > click on Windows Security System Settings in the Search Results.
2. On the next screen, click on the Turn on button, located under Virus & Threat Protection section.
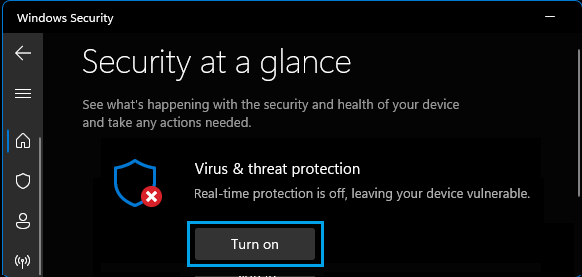
3. Enter Admin Password to authorize this change on your computer.
4. Follow the instructions to update Virus & Threat protection definitions (If prompted).
3. Repair/Reset Microsoft Security App
Like any other App or Desktop program, Windows Security App can also suffer from damage and corruption.
1. Right-click on the Start button and click on Installed Apps (Apps & Features In Windows 10).
2. On the next screen, locate Windows Security, click on 3-dots Icon and select Advanced options.
3. On the next screen, select the Repair option.
Note: If you are still unable to enable Windows Defender, Reset Windows Security App and try to enable Windows Defender.
4. Install Updates
Make sure that your computer is up-to-date with the latest available updates.
1. Go to Settings > Windows Update (left-pane) > click on Check for Updates button in the right-pane.
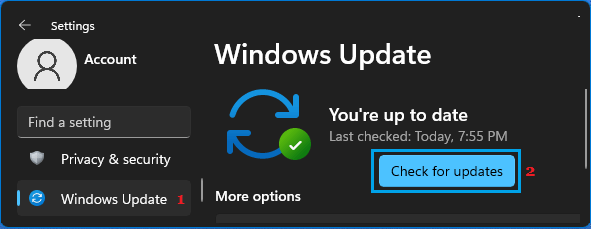
2. Wait for Windows to check for available updates and follow the instructions to install updates (If available).
5. Check Windows Defender Registry
As mentioned above, the problem could be due to Antivirus feature of Windows Security program being disabled on the computer by a third-party antivirus program or by malware.
1. Press Windows + R keys > type Regedit and click on OK.

2. On Registry Editor Screen, navigate to HKEY_LOCAL_MACHINE\SOFTWARE\Policies\Microsoft\Windows Defender. In the right-pane, double-click on DisableAntiSpyware and change its Value Data from 1 to 0.
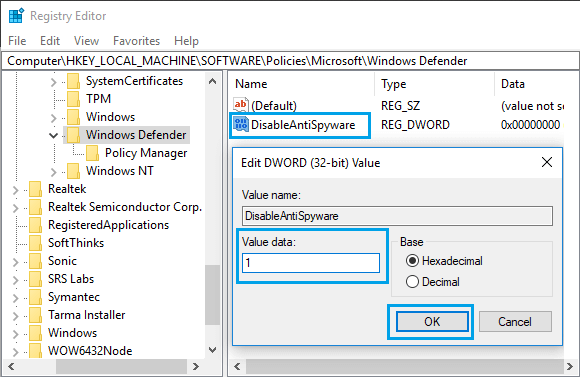
Note: The “1” in Value data field Disables Windows Defender and 0 Enables Windows Defender.
After this, restart the computer and see if you can enable Windows Defender on your computer.
6. Download Windows Security Troubleshooter
If above methods did not help, you can try Windows Security Troubleshooter as available on Microsoft’s website.
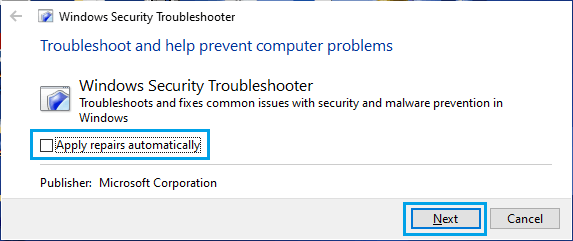
1. Go to Microsoft’s Windows Security Support page and click on the Download button to download Windows Security Troubleshooter on your computer.
2. Once the File is downloaded, open the File and follow the instructions to Troubleshoot and fix Windows Security problems on your computer.
Note: You can also download the Troubleshooter to an External Storage Drive and Run the Troubleshooter from USB Drive to fix problems on your computer.
7. Use Antivirus Program Clean Up Tool
Sometimes, the problem is due to a previously installed antivirus program not being completely uninstalled from the computer.
You can make use of Antivirus Software Removal Tools as provided by Microsoft to fix this issue.
1. Go to Microsoft’s support page.
2. Download the Antivirus Software Removal Tool as applicable for the antivirus program installed on your computer.
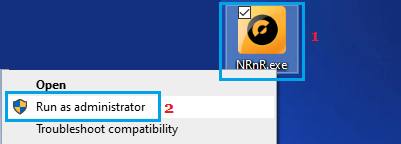
3. Once the file is downloaded, right-click on the Downloaded File and click on Run as Administrator option.
4. On the next screen, select the Advanced option.
5. Next, click on Remove Only and wait for the tool to remove all traces of antivirus program from your computer.
8. Scan PC Using Microsoft Safety Scanner
If you are still unable to Switch-ON the “Real-Time Virus Protection” feature in Windows Security, it is good idea to check the computer for Malware by using Microsoft Safety Scanner tool
1. Download Microsoft Safety Scanner on your computer.
2. After the File is downloaded, open the File by double-clicking on it.
3. On the next screen, select Type of Scan and click on the Scan button.
4. Once, the scan is completed, you will be able to see the Scan results.
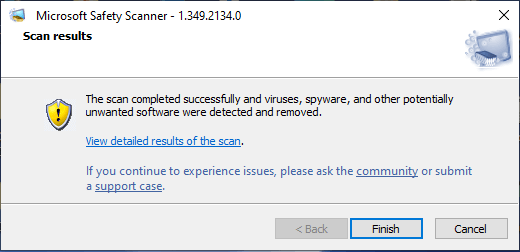
5. You can click on Finish to close the window or click on View Detailed Results of the scan link to take a look at detailed scan results.
9. Run SFC Scan & DISM Tool
As mentioned above, the problem could be due to Windows security related sytem files being damaged or corrupted on your computer.
This can be checked by using SFC scan tool as available in Windows and corrupted system files can be repaired by using the DISM Tool.
You can find the steps to check system files for damage and repair them in this guide: How to Repair Corrupted System Files In Windows 11/10.
10. Reset the Computer
If above methods did not work, the only remaining option is to Reset the computer to its Original Factory Default Settings.
1. Reset the computer using steps as provided in this guide: How to Factory Reset Windows Computer.
2. After the Reset process is completed, open Windows Security > click on the Turn on button for Virus & Threat Protection.
Hopefully, you should now find your computer being protected by the Real-time virus and Threat protection feature of Microsoft’s free Windows Security program.