Most users have experienced the problem of a Microsoft Word Document not responding, freezing and refusing to work on their computers.
When this happens, Microsoft Word fails to open the requested file and you may find Microsoft Word program crashing and displaying the following error message.
“Microsoft Word has stopped working – A Problem caused the program to stop working correctly. Windows will close the program and notify you if a solution is available”.
Microsoft Word Has Stopped Working
In most cases, the problem of Microsoft Word not working, responding or freezing can be fixed by disabling Add-ins, repairing program files and other methods as provided below.
1. Repair Microsoft Word
The problem of Microsoft Word not responding on your computer could be due the installation of Microsoft Word being damaged or corrupted.
1. Right-click on Start button and click on Run.
2. Type appwiz.cpl in the Run Command window and click on OK.

3. On Programs and Features screen, right-click on Microsoft Office and click on the Repair option in the menu that appears.
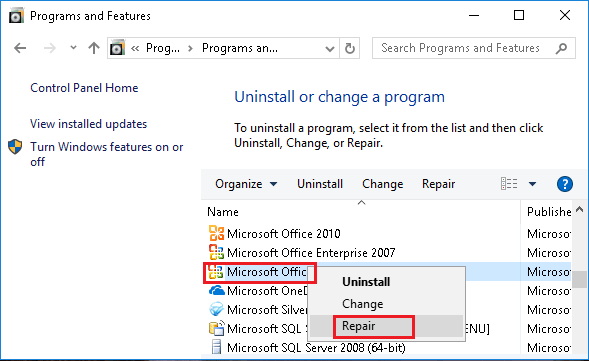
Note: If the Repair option is not available, right-click on Change > select Repair in the pop-up and click on Continue.
Wait for Windows Repair program to restart Word and repair Microsoft Office program.
2. Run Word in Safe Mode
Opening Microsoft Word in Safe mode, disables all Plug-ins and Add-on programs that might be causing the problem on your computer.
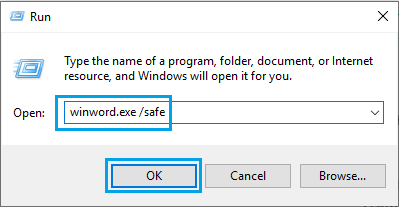
1. Right-click on Start button and click on Run.
2. On the Run command window, type winword.exe /safe and click on OK to start Microsoft Word in Safe Mode.
3. Now try opening the non-responsive Word File again on your computer.
If this fixes the problem, you can follow the next method to disable the Plug-ins one-by-one, in order to identify the particular plug-that is causing the problem on your computer.
3. Disable Plugins and Add-Ins
External Plugins can interfere with proper functioning of Microsoft Word. Hence, follow the steps below to disable Microsoft Word Plug-ins installed on your computer.
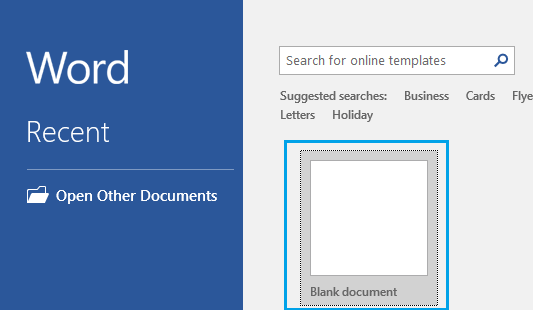
1. Open the Microsoft Word Program on your computer and open a blank document.
Note: Open Microsoft Word in Safe Mode, in case you are unable to open Word program.
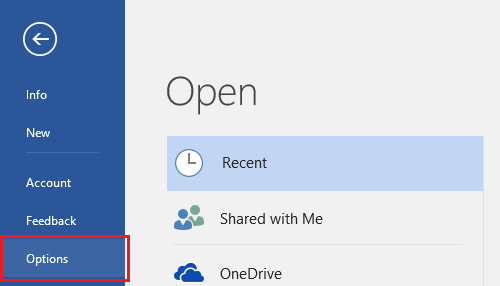
2. Once you are in Microsoft Word, click on the File tab.

3. In the menu that appears, scroll down and click on Options.
4. In Word Options screen, click on the Add-ins in the left pane. In the right-pane, select Word Add-ins and click on the Go… button.
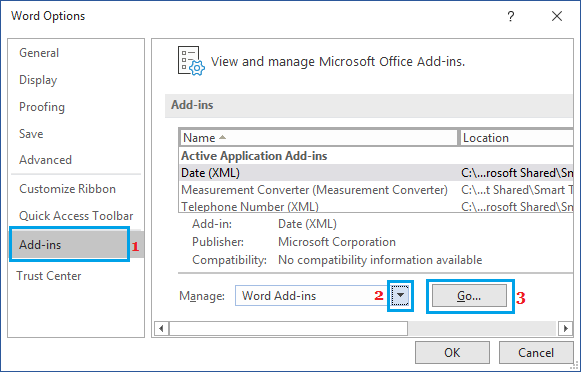
5. On the next screen, uncheck the little box next to the active Add-Ins and click on OK to save the change.
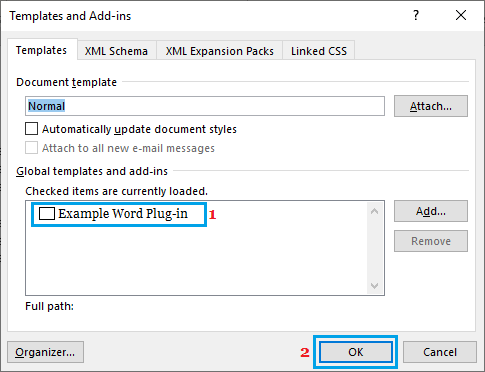
After disabling Word Add-Ins, restart Microsoft Word and see if the problem of Microsoft Word not responding is fixed.
Note: If there are multiple Plug-ins, you can try to isolate the particular Plug-in that is causing problems on your device by disabling them one-by-one.
4. Change Default Printer
Microsoft Word can become unresponsive, if it is unable to communicate with the default printer attached to your computer.
Hence, follow the steps below to switch the default printer on your computer to Microsoft Print to PDF or Microsoft Document writer and see if this helps in fixing the problem.
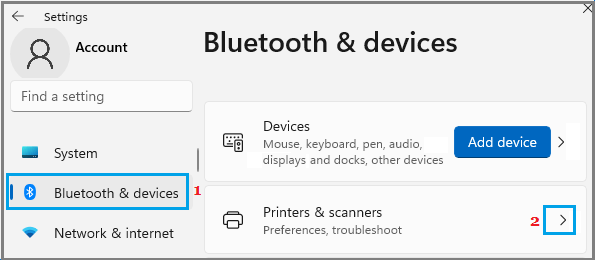
1. Go to Settings > select Bluetooth & Devices in the left-pane and click on Printers & Scanners in the right-pane.
2. On Printers & scanners screen, select Microsoft Print to PDF.
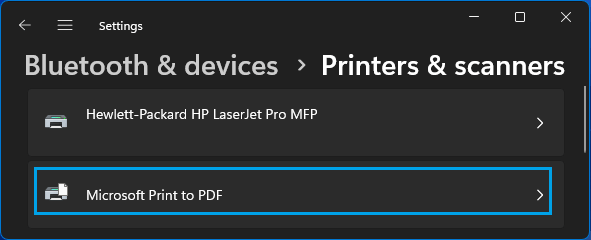
3. On the next screen, click on Set As Default button.
Note: On Printers & Scanners screen, scroll down to “Printer Preferences” section and disable Let Windows manage my default printer option.
Windows 10: Go to Settings > Printers & Scanners > In the right-pane, click on Microsoft XPS Document Writer and click on Manage.
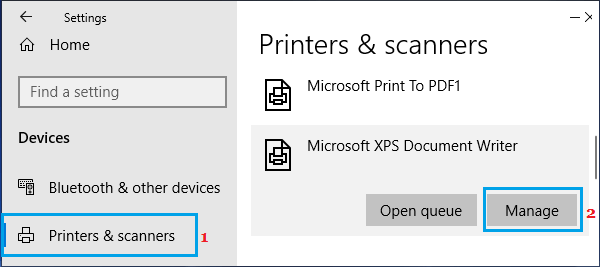
On the next screen, select Set as Default option.
After changing the default printer to Microsoft Print to PDF or Microsoft XPS Document Writer, try to open any Microsoft office File or Microsoft Word program and see if the problem is fixed.