The Move Function in Windows 10 allows you to locate Pictures, Music and other User Folders to any other location on your computer. You can find below the steps to Move User Folders to Another Location in Windows 10.
Move User Folders to Another Location in Windows 10
The “Users” Folder in Windows 10 is located in the same location as the operating system files (at C:/Users). As you create new User Accounts, Windows creates sub-folders with “User Names” within the Users Folder (C:/Users/User Name).
Typically a “User Folder” or User Account in Window 10, comprises of Desktop, Documents, Downloads, Music, Pictures and Videos Folders.
All these standard User Folders can be moved to any other location on your computer (different partition) and also moved to an external drive or another computer on the network.
While you may be tempted to move Folders to an external drive, you need to be aware that moving User Folders to an external drive or to another computer is not recommended. Windows can misbehave, if User Folders are moved to an external hard drive or computer and these sources get disconnected.
With this understanding, let us go ahead and take a look at the steps to Move User Folders to another Location in Windows 10.
Steps to Move User Folders to Another Location in Windows 10
Follow the steps below to Move User Folders to Another Location in Windows 10.
1. Login to the User Account from which you want to transfer Files to another User Account.
2. Once you are logged-in, open File Explorer.
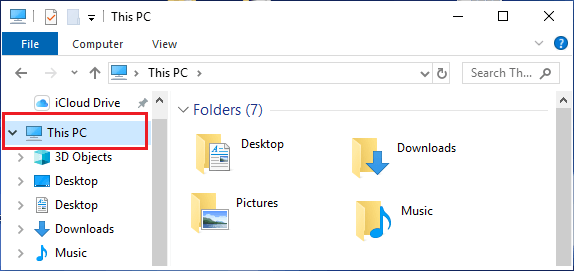
3. On the File Explorer screen, click on This PC in the left pane. In the right-pane, you will see Desktop, Downloads, Pictures, Music and other standard User Account Folders.
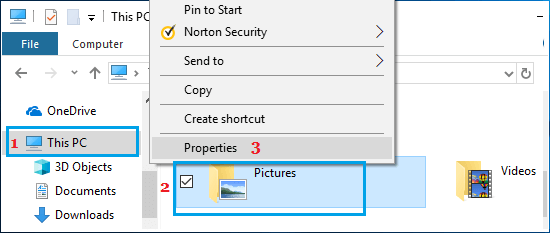
4. Right-click on the Folder that you want to transfer (Pictures in this case) and click on Properties.
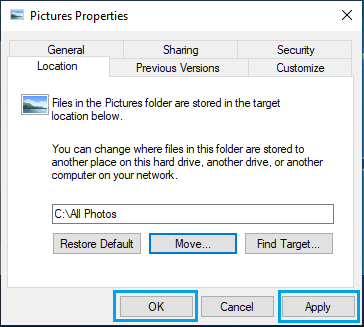
5. On Folder Properties screen, click on the Location tab and click on the Move button.
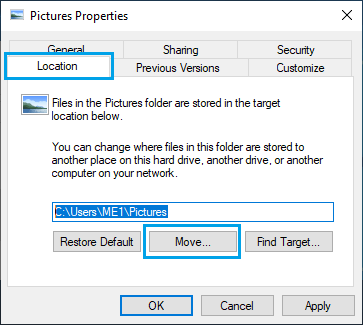
6. On the next screen, you will be able to select the New Location for the Folder. Once your desired location is selected, click on Apply and OK.
7. Next, you will see a pop-up showing the Old and New Location of the Folder. Click on Yes to start the process of Moving Folder from old to its New Location.
The time to Move Files will depend on the size of the files and you will be able to see the progress of File Transfer.
Tip: You can move the Files back to their original location by clicking on Restore Default button on File Properties screen.