If you do not want to use Microsoft Account, you can either convert the Microsoft Account to Local Account or remove the Microsoft Account from your computer.
In order to remove Microsoft Account, you need to be logged out from Microsoft Account and logged-in to the computer using a Local User Account with Admin Privileges.
If you do not have a Local Account with Admin Privileges, you can create one by using steps as provided in this guide: How to Create Local Admin Account In Windows 11/10.
What Happens When You Remove Microsoft Account?
When you remove Microsoft Account from the computer, all the data associated with your Microsoft Account, including all files located on Desktop and stored in Documents, Pictures, Music, and Downloads folders will be deleted.
If the Files are important, you can copy them to a Folder on your computer or move them to a USB Drive or an External Storage Drive attached to the computer.
Another impact of removing Microsoft Account is that you won’t be able to setup Find My Device on your computer, which allows you to Find, Lock or Erase your lost or stolen device.
The good news is that you can always add back the Microsoft Account to your computer at any time and enjoy all the benefits of using a Microsoft Account.
1. Remove Microsoft Account Using Settings
You can follow the steps below to remove Microsoft Account from your Windows 11/10 computer.
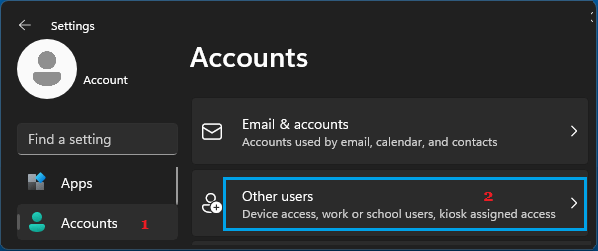
1. Open Settings > select Accounts in the left-pane. Scroll down in the right-pane and click on Other Users.
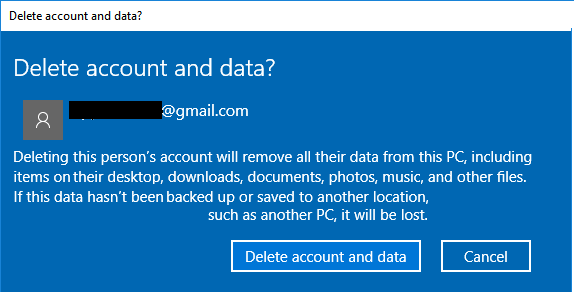
3. On the next screen, select your Microsoft Account and click on the Remove option.
4. On Delete Account and Data screen, click on Delete account and data button.
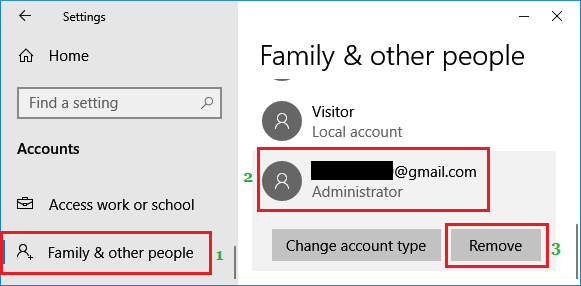
Windows 10: Go to Settings > Accounts > Family & other people > Select your Microsoft Account and click on Remove.
Note: The User Account that you are currently signed in does not appear under list of Accounts.
As mentioned earlier, all the data present in your Microsoft Account will be deleted and your Microsoft account will be removed from the computer.
2. Remove Microsoft Account Using Run Command
An easy way to remove Microsoft Account from a Windows 11/10 computer is by using “netplwiz” command.
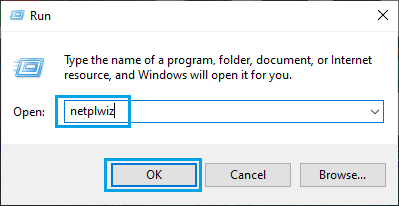
1. Press Win + R keys to open Run command > Type netplwiz and click on OK.
2. On User Accounts screen, select the Microsoft Account that you want to remove and click on the Remove button.
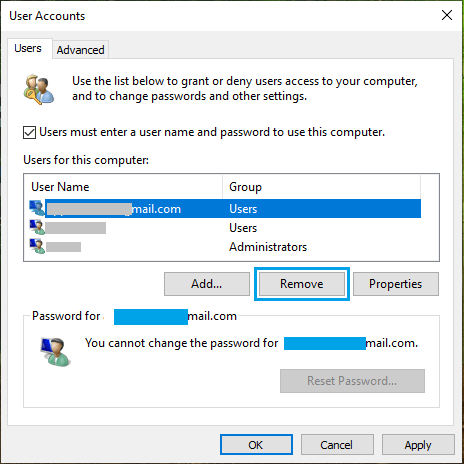
3. On the confirmation pop-up, select the “Yes” option to remove your Microsoft Account from the computer.
3. Remove Microsoft Account Using Command Prompt
On both Windows 11 and Windows 10 computers, you can delete Microsoft Account using Command prompt.
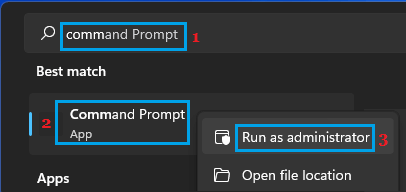
1. Type CMD in the search bar > right-click on Command Prompt App and click on Run As Admin.
2. Type net user username /delete and press the enter key.
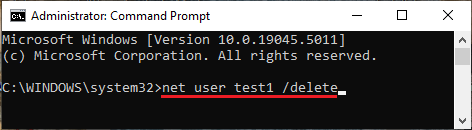
Note: Replace the username with the name of your Microsoft Account.
4. Unlink the Computer from Microsoft Account
If you do not have access to the computer, you can unlink your Microsoft Account from the computer by going to your Microsoft Account page on the internet.
1. Using a computer or phone go to account.microsoft.com.
2. Click on Login > enter Email Address and Password to login to your Microsoft Account.
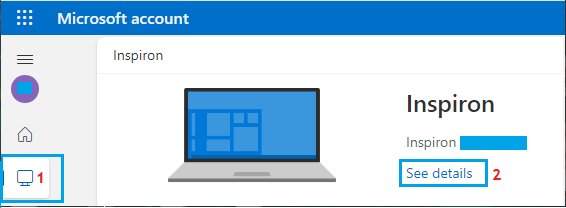
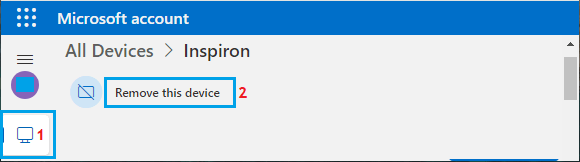
3. Once you are logged-in, select the Devices tab and click on See Details link.
4. On the next screen, click on Remove this device option.
5. On the pop-up, select I’m ready to remove this device and click on Remove.