It is important that you know the steps to Start, Stop and Restart the Print Spooler Service, as it can help you deal with Printer or Printing related problems on your computer.
For example, if you are unable to Print from the computer, the problem might be due the Print Spooler service not running, in which case Starting and Restarting the Print Spooler Service, might help in fixing the problem.
Start, Stop, Restart Print Spooler in Windows 11/10
The Print Spooler service in Windows is responsible for managing, queuing and temporarily storing print jobs in the memory.
Hence, checking the status of Print Spooler service and Starting the service (if it has stopped) and Stopping and Restarting the Spooler Service has the potential to fix Print related problems.
In general, the most common reason for Stopping the Print Spooler service is to clear stuck print jobs and restart the Print Spooler service to resume printing new jobs.
You can find below the steps to Stop, Start and Restart the Print Spooler Service using Command Prompt, Task Manager and also by going to Windows Services screen.
Note: All the methods as provided below require Admin privileges.
1. Stop & Restart Print Spooler Service Using Command Prompt
The fastest way to stop Print Spooler service, clear stuck print jobs and Restart the Print Spooler Service is by using Command Prompt with Admin privileges.
1. Type CMD in the Search bar > right-click on Command Prompt in the search results and select Run as Administrator option.

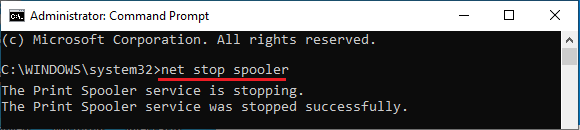
2. On the Command prompt screen, type net stop spooler and press the Enter key to stop the Printer Spooler on your computer.
3. Type del /Q /F /S “%systemroot%\system32\spool\printers\*.*” and press the Enter key, if you wanted to clear stuck print jobs.
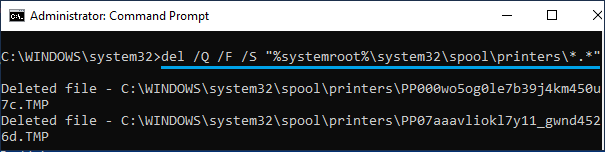
Note: You can also navigate to C: \Windows\System32\Spool\printers and clear stuck print jobs by deleting all the files.
4. After clearing stuck print jobs, type net start spooler and press the Enter key to restart the Print Spooler service.

Note: If you only wanted to Restart the Print Spooler service, you can type net stop spooler && net start spooler command to stop and start the Print Spooler service at the same time.
2. Start, Stop, Restart Print Spooler Service Using Services
Another easy way to start, stop and restart the Print Spooler service is by going to the Services screen on your computer.
1. Right-click on the Start button and click on Run.
2. In the Run command window, type services.msc and click on OK.

3. On the Services screen, right-click on Print Spooler and select the required (Stop, Restart or Start) option.
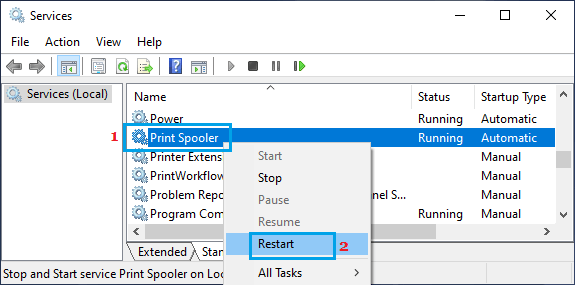
If the Service is not set to Automatic or has Stopped, you can open Print Spooler Properties screen by double-clicking on the Print Spooler entry.
4. On Print Spooler Properties screen, you change the startup type to Automatic and start the Print Spooler Service by clicking on the Start button.
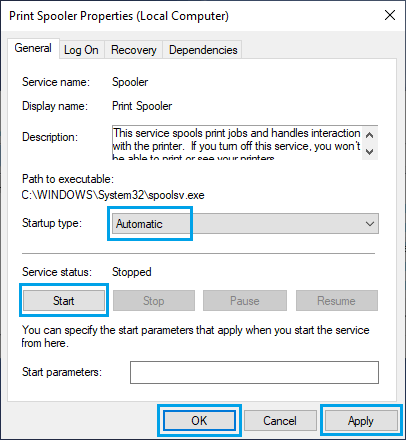
5. Make sure that you click on Apply and OK to save the changes made to the Print Spooler service on your computer.
3. Start, Stop, Restart Print Spooler Using Task Manager
The improved Task Manager in Windows 11 makes it really easy to search for “Print Spooler Service” and execute the required action (Stop, Start or Restart the service).
1. Right-click the Taskbar and click on Task Manager.

2. On the Task Manager screen, go the Services tab, right-click on Spooler entry and select the required action (Stop, Restart or Start)
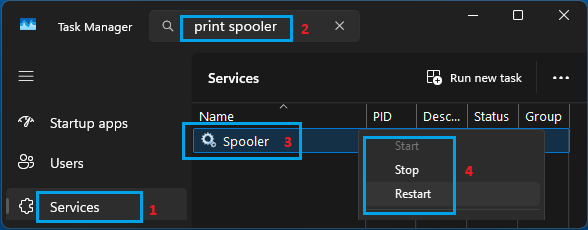
Note: The Start option will be available, only if the service has stopped working.