When a Windows computer gets stuck on a blue screen with “Your PC/Device needs to repaired” error message, the reason is usually due to the boot files becoming corrupted, invalid or missing; as indicated by the File reference (\boot\bcd) and error codes (0xc000000f, 0x000014c, 0x0000098, 0xc0000034 or similar) accompanying the error message.
While this type of error message may allow the computer to be restarted, it does not go away upon restart and returns back to the same blue screen. In such cases, the only way to troubleshoot and fix this issue is by using a Bootable USB Drive to boot the computer into Advanced Startup screen and use one of the following methods.
- Run Startup Repair
- Repair Corrupted Boot Files
- Use System Restore
- Reinstall Windows
Your PC/Device Needs to Be Repaired Error in Windows
The first step that is required to fix “Your PC/Device needs to repaired” error on a Windows computer is to get hold of a Bootable USB Drive. The requirement of a Bootable USB Drive is also specified within the error message on the Blue screen, which reads “You’ll need to use recovery tools on your installation media”.

If you do not have a Bootable USB drive, you can prepare it right now, by going to any other Windows computer and using steps as provided in this guide: How to Create Bootable USB Drive. After creating the Bootable USB drive, you should be able to fix the problem by using one of the following methods.
1. Run Startup Repair
When a computer is stuck on “Your PC needs to repaired screen”, you should always start with Startup Repair; as it does not delete or damage files located on the computer.
1. Press and hold the Power button, until the computer shuts down completely.
2. Insert Bootable USB Drive into the USB port of the computer and start the computer by using the Power button.
3. As the computer is starting up, immediately start pressing the Boot Menu key; which depends on the manufacturer of the computer (For example, F12 for Dell & Esc for Asus).
4. When the Boot Menu appears, select the Bootable USB Drive and press the Enter key.
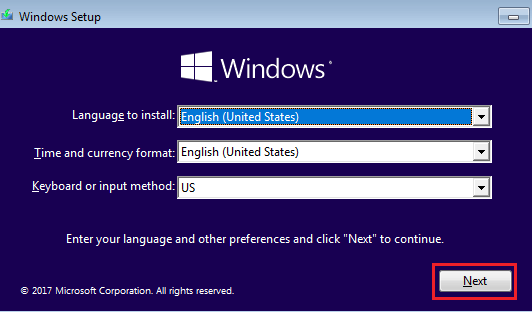
5. The computer should boot up from USB drive, displaying the Windows Setup screen > Select your Language, Currency, Keyboard and click on the Next button.
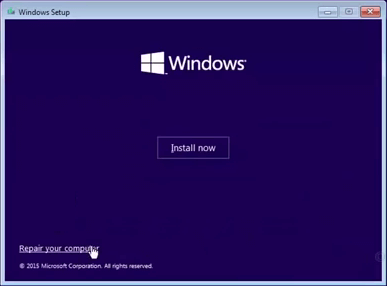
6. On the next screen, click on Repair your computer option.
7. From the next screen, go to Troubleshoot > Advanced Options and select the Startup Repair option.
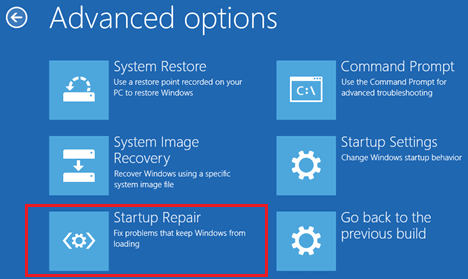
8. Wait for Startup Repair to diagnose and fix the Startup problem on your computer.
Once the repair process is finished, restart the computer and you should find it starting normally.
2. Use Command Prompt
If Startup repair is unable to fix the problem, you can try to repair corrupted boot files using Command Prompt.
1. Follow Steps 1 to 6 as provided in the first method.
2. Navigate to Troubleshoot > Advanced Options and select the Command Prompt option.
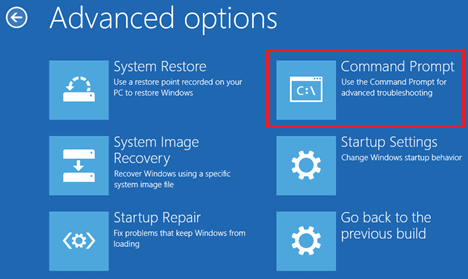
3. On Command Prompt screen, type sfc /scannow and press the Enter key.
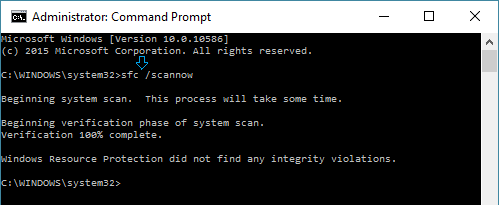
4. Wait for SFC Scan to be completed.
After the scan is completed, run the following Commands to fix the corrupted Boot Record Files on your computer.
- bootrec /fixmbr
- bootrec /fixboot
- bootrec /rebuildbcd
3. Use System Restore
If a System Restore point is available on the computer, you can fix the problem by using System Restore tool as available on the Advanced Startup screen.
1. Follow Steps 1 to 6 as provided in the first method.
2. Navigate to Troubleshoot > Advanced Options and select the System Restore option.
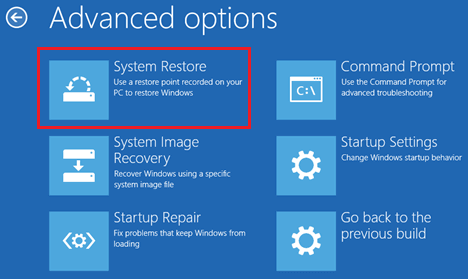
3. Follow the onscreen instructions to Restore the computer back to its previous working status.
Note: For more information and detailed steps to restore Windows computer from a System Restore Point, you can refer to this guide: How to System Restore Windows 11/10 Computer.
4. Reinstall Windows Operating System
If a System Restore point is not available on the computer and none of the above methods are working, the only other option left is to Reinstall Windows operating system. This will result in all the files, programs and data on the computer being wiped out and lost, unless you have made a backup of the data on your computer.
1. Shut Down the computer by using the Power button.
2. Connect Bootable USB Drive to the computer and press the Power button to start the computer.
3. Immediately start pressing the Boot Menu key (F12, F11, F9 or Esc, depending on manufacturer of the computer).
4. When the Boot Menu appears, select the Bootable USB Drive and press the Enter key.
5. On Windows Setup screen, select your Language, Currency, Keyboard and click on the Next button.
6. On the next screen, click on Install Now.
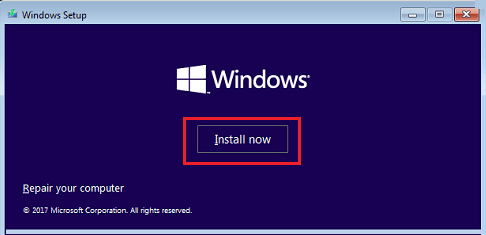
7. Follow the on-screen instructions to complete the setup process and reinstall the latest version of Windows operating system on your computer.