As you can guess from the wordings, “This Device is Disabled. (Code 22)” error message is clearly indicating that a certain hardware device on your computer has been disabled by Windows operating system.
This usually happens if any Hardware device or component becomes incompatible with Windows operating system due to driver software corruption or other reasons.
Most device driver errors are almost always reported as “This device is disabled. (Code 22)” and you should be able to fix the problem using any of the following methods.
This Device is Disabled. (Code 22) Error in Windows 11/10
If you are encountering “This device is disabled. (Code 22) error on your Windows 10/11 computer, you can find below the steps to troubleshoot and fix this problem on your computer.
1. Restart the Computer
Starting with a simple fix, simply Restart the computer and see if this helps in fixing the issue.
This simple fix can help, if the problem is due to device drivers failing to load or partially loading on your computer.
2. Enable Device Using Device Manager
You can re-enable the device from Device Manager and see if this helps in fixing the issue.
1. Right-click on Start button and click on Device Manager.
2. On Device Manager screen, right-click on the problematic Device (Webcam in this case) and select Enable Device option.
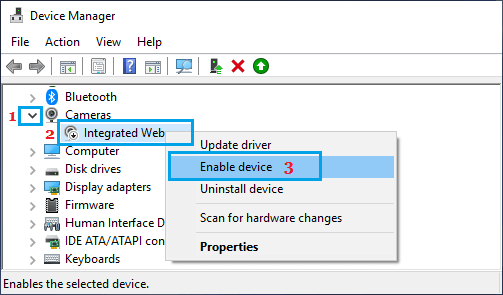
3. Repeat the above steps to enable other disabled devices (if required).
3. Update Drivers
The problem could be due to the driver software for the device being outdated.
1. Right-click on Start button and click on Device Manager.
2. On Device Manager screen, right-click on the Device causing problems and select Update Driver option.
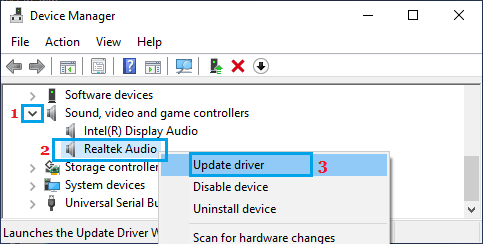
3. On the next screen, select Search automatically for driver software option and follow the instructions to update the driver.
4. Uninstall & Reinstall Device Drivers
If you are unable to update the driver in above steps, uninstall the faulty device driver and allow Windows to install the right driver as required.
1. Right-click on the Start button and click on Device Manager.
2. On Device Manager screen, right-click on Unknown Device and click on Uninstall Device option.
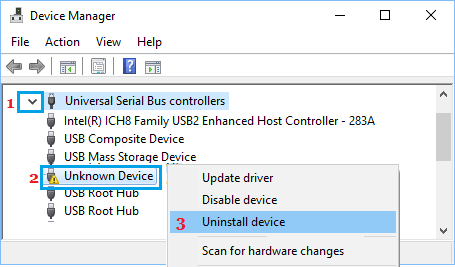
3. After the Device is Uninstalled, Restart the computer.
Once the computer restarts, Windows should automatically install the right drivers.
Note: You may have to Uninstall every device under Universal Serial Bus controllers entry to fix the problem.
5. Use the Troubleshooter
Windows computers come with a built-in Troubleshooter that can fix problems with Keyboard, Printer and others.
1. Go to Settings > System > scroll down in the right-pane and click on Troubleshoot.
2. On the next screen, scroll down and click on Other troubleshooters.
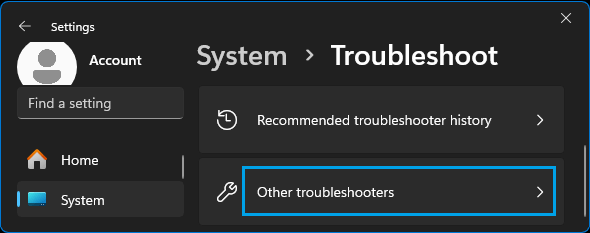
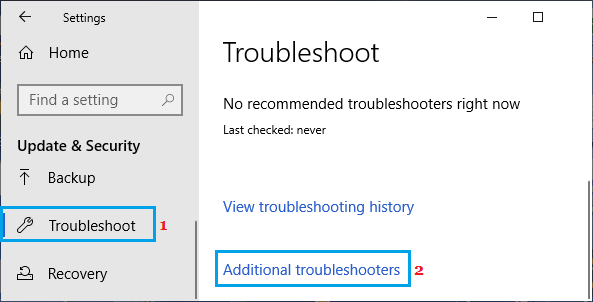
Windows 10: Go to Settings > Update & Security > Troubleshoot > Additional Troubleshooters.
3. On the next screen, select the Device that is causing problems and click on Run the Troubleshooter.
4. Wait for Windows to find and fix the problem with the device.