Over a period of time, an average WhatsApp user can end up accumulating hundreds of photos and videos, taking up a ton of storage space on iPhone.
An easy solution for this issue is to keep transferring WhatsApp photos from iPhone to computer from time to time and free up the storage space on your mobile device by deleting WhatsApp photos.
Another compelling reason for transferring WhatsApp photos to computer would be to make a backup of photos and videos that are received in WhatsApp messages from family, friends and relatives.
Transfer WhatsApp Photos From iPhone to Mac or PC
If your iPhone is getting flooded with WhatsApp photos, you can find below 4 different methods to transfer WhatsApp photos from iPhone to Mac and Windows computer.
Another solution for this issue is to transfer WhatsApp photos to SD Card, using steps as provided in this guide: How to Transfer WhatsApp Photos to SD Card.
1. Transfer WhatsApp Photos From iPhone to Mac
The Photos App on Mac makes it really easy to transfer photos from iPhone to Mac, including WhatsApp photos.
1. Connect iPhone to Mac > If prompted, enter the Passcode to unlock iPhone.
2. Open the Photos App on your Mac (if it does not automatically open).
3. Once you are in the Photos App, select your iPhone under “Devices” section and click on the Down Arrow next to Import To: entry.
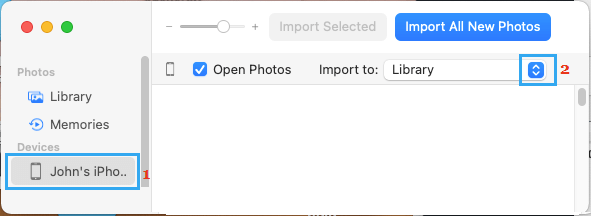
Note: You can Launch Photos App from the Launch Pad or by going to Applications Folder using the Finder.
4. On the pop-up, click on New Album > type a Name for the New Album and click on Create.
5. On the next screen, select Photos that you want to import and click on Import Selected.
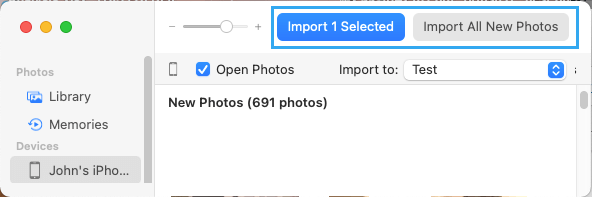
Note: You can use the Import All option to transfer all iPhone Photos to Mac.
All the selected photos will be transferred to New Photo Album on the Desktop of your Mac.
2. Transfer WhatsApp Photos from iPhone to Windows computer
The simplest way to transfer WhatsApp photos from iPhone to Windows computer is by copying the Apple Folders from iPhone to Desktop.
1. Connect iPhone to Windows computer.
2. Unlock iPhone by entering its Lock Screen Passcode or by using Touch/Face ID.
3. Open File Explorer > Navigate to Apple iPhone > Internal Storage > DCIM and copy the Apple Folders to Desktop.
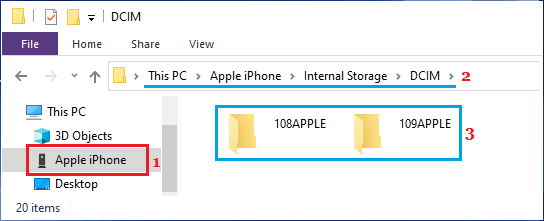
4. Wait for all the Photos to be transferred from iPhone to the Desktop on your computer.
This will transfer all the Photos from your iPhone (including WhatsApp Photos) to computer.
3. Transfer WhatsApp Photos From iPhone to Computer Using Email
This method can be used to transfer selected or specific WhatsApp chats to computer, including all photos and videos linked to the Chats.
1. Open WhatsApp > select the WhatsApp Chat that contains the photos that you want to transfer to computer.

2. On the next screen, tap on the Name of your Contact.

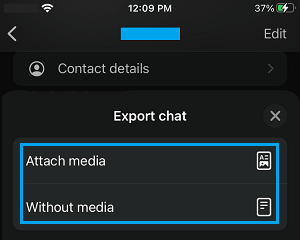
3. On the next screen, Scroll down and select the Export Chat option.

4. On the next pop-up, select Attach Media option.
5. On the sharing menu, select Gmail or the Mail App.

6. Follow the instructions to Email the Chat including all its attached photos and videos to your own Email Address.
Once the Chat is available in your Email Account, you can download the Chat and all its attached photos to your computer.
4. Transfer WhatsApp Photos to Computer Using iCloud Drive
Another way to transfer WhatsApp photos from iPhone to computer is by Backing up WhatsApp Chats to iCloud Drive and downloading them to the computer from iCloud.
1. Open the WhatsApp Chat that contains photos that you want to transfer to Mac or Windows computer.
2. On the next screen, tap on your Contact’s Name.
3. On Contact Detail screen, scroll down and tap on Export Chat option.
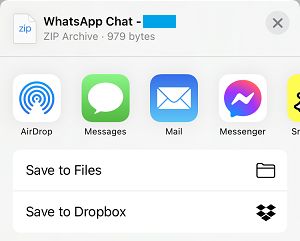
4. On the next pop-up, select Attach Media option > On the sharing menu, select Save to Files option.
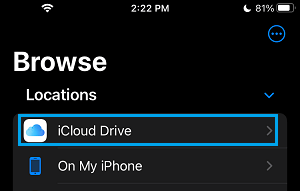
5. On the next screen, select iCloud Drive and save the Chat File to any folder within iCloud Drive.
Note: You can repeat above steps, if you want to transfer Photos from multiple Chats to iCloud Drive.
Once WhatsApp photos are transferred to iCloud Drive, you can download them to Mac or Windows PC at any time by going to icloud.com and logging into your iCloud Account.