When you Add Location Information to Photos on Mac, it provides you with the option to Group and Sort photos based on the Location where they were taken.
For example, if you took a lot of photos during your visit to Canada, adding Location to photos (Toronto, Vancouver, Calgary, Montreal …) allows to group, sort and access photos by Location.
Add Location to Photos on Mac
In general, most people shoot photos using an iPhone, Android phone or a Digital Camera. Hence, the first step would be to transfer photos from your phone or digital camera to Mac.
In most cases, this involves connecting the Camera or Phone to Mac and following the instructions to transfer photos to Mac.
For more information and the actual steps to transfer photos, you can refer to these guides: How to Transfer Photos From iPhone to Mac and How to Transfer Photos From Digital Camera to Mac.
Once, the photos are transferred to Mac, you can use any of these methods to Add Location to Photos on your Mac.
1. Add Location to Single Photo on Mac
You can follow the steps below to Add Location to individual or single photos on your Mac.
1. Open the Photos app on your Mac
2. In Photos App, open the Photo for which you want to add location by double-clicking on it.
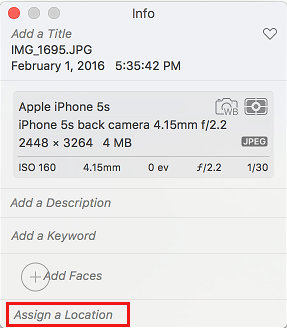
3. Once the Photo is open, click on the i icon located in the top-menu bar and this will provide access to the Photo Info screen on your Mac.
![]()
4. On the Photo Info screen, click on Assign a Location option > enter the name of the city or place where the photo was taken.
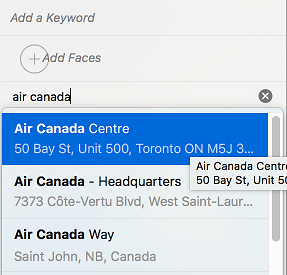
5. As you start typing the Name of City, you will see suggested places coming up, which makes it easy to select the Name of City or place that you want to assign to the Photo.
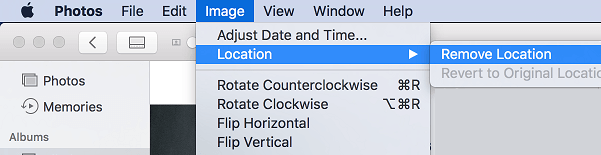
Note: If you end up adding incorrect location information, click on Image > Location > Remove Location.
2. Add Location to Multiple Photos on Mac
Instead of adding location information to photos one by one, you can add location information to multiple photos at the same time.
1. Open Photos app > Select photos that you want to add location information to.
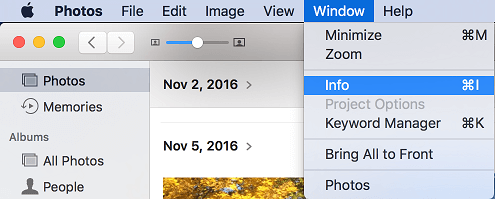
2. After Photos are selected, click on the Window tab (top-menu bar) and select the Info option in the drop-down menu.
3. On the “Info” screen that appears, click on Assign a Location option.
4. Next, start typing the Name of the place where the Photo was taken and select the Name of your Place as it appears in the suggestions.
If you make a mistake, click on Image > Location > Remove Location and add back the correct information.
3. Sort Photos by Location on Mac
After adding Location to Photos, you can follow the steps below to Sort Photos by Location on your Mac.
1. Open the Photos app on your Mac > click on Places tab in the side menu.
2. Once you click on Places, you will now see a map, along with a photo on the map, indicating the total number of Photos taken at a particular Location.
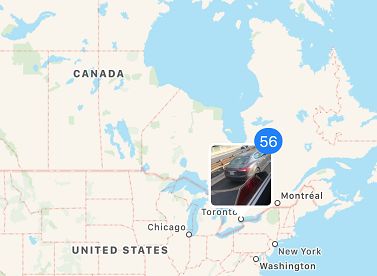
3. Click on the Photo on the Map and this will open all other photos that were taken at the same location.