If you frequently use the Notes App, you can add Notes to the Lock Screen of your iPhone, which allows you to open and write Notes directly from the Lock screen of your device.
You can do this by adding the Notes Widget to Control Center and making the Control Center accessible from the Lock Screen of your device.
Once this is done, you will be able to open and start writing Notes from the Lock Screen of your device, without the need to unlock iPhone, launch the Notes App and open a New or existing Note.
1. Add Notes Widget to Lock Screen
All that is required to make Notes accessible on the Lock Screen of your iPhone is to Add the Notes Widget to Control Center and make Control Center available on the Lock Screen.
1. Open Settings > scroll down and tap on Control Center.
2. On the next screen, scroll down to “More Control” section and tap on the + button located next to Notes App.
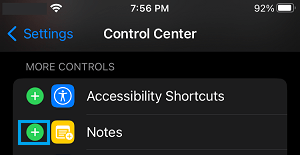
Note: If Notes has already been added to Control Center, it will be in “Included Controls” section.
This will Add the Notes Widget to Control Center. However, you still need to make sure that Control Center is enabled on the Lock Screen of your iPhone.
3. Go to Settings > Touch ID & Passcode > enter your Lock Screen Passcode.
4. On the next screen, move the toggle next to Control Center and Lock Screen Widgets to ON position.
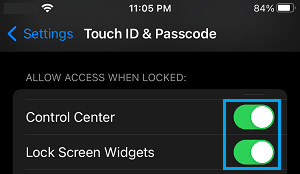
After this, you should be able to access Notes from the Lock Screen of your device.
2. Open and Write Notes from Lock Screen
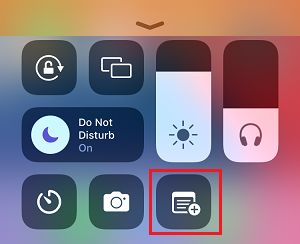
You can open and start writing Notes from the Lock Screen by swiping from top-right corner of the screen (iPhone X and later) or by swiping up from bottom of the screen (iPhone 6/7/8) and tapping on the Note Icon.
3. Resume from Last Note on Lock Screen
You can make the Notes App to always Resume the Last Note that you created on the Lock Screen by following the steps below.
1. Go to Settings > Notes > scroll down and tap on Access Notes from Lock Screen option.
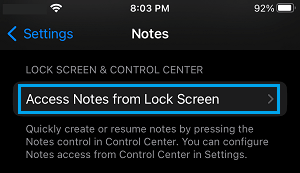
2. On the next screen, select Resume Last Note option.
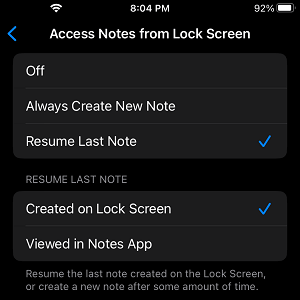
On the same screen, you can select the option to resume the Last Note Created On Lock Screen or Viewed in Notes App.
If you go down, you can select the duration after which a new note can be created on the Lock Screen of your iPhone.
4. Remove Notes from iPhone Lock Screen
At any time, you can remove access to Notes from Lock Screen by following the steps below.
1. Go to Settings > Control Center > scroll down and tap on the – button located to the left of Notes under “Include” section.
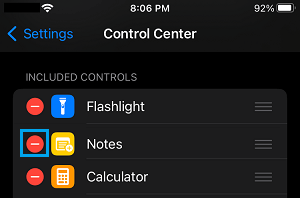
2. Next, tap on the Remove button to confirm.
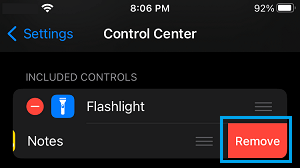
This will remove Access to Notes from the Lock Screen of your device.