In general, the Time Zone setting on a Windows computer is based on the choice of Country or Region made during the initial setup process of the computer.
Once the computer is setup, it automatically starts obtaining “Time & Date” information from an internet-based Windows Time Service (W32Time) and starts displaying accurate Date & Time in the Taskbar.
Change Time Zone in Windows 11/10
If you are travelling, your computer should automatically change its Time Zone based on your current new location and display the correct Date & Time, as applicable for the new location.
If this is not happening, you can either manually change the Time Zone on your computer or enable Location services on your computer and set your device to automatically change Time Zone, based on its physical location.
1. Manually Change Time Zone in Windows 11
At any time, you can manually change the Time Zone on your computer by using the following steps.
1. Press Win + I keys to open the Settings menu on your computer.
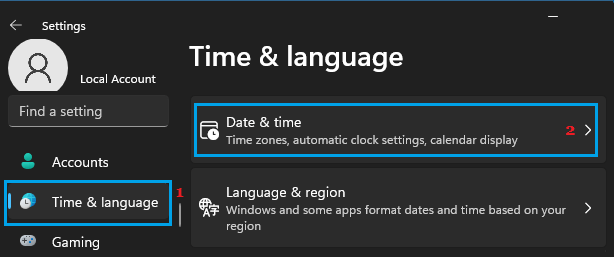
2. On the Settings screen, select Time & Language in the left-pane and click on the Date & Time tab in the right-pane.
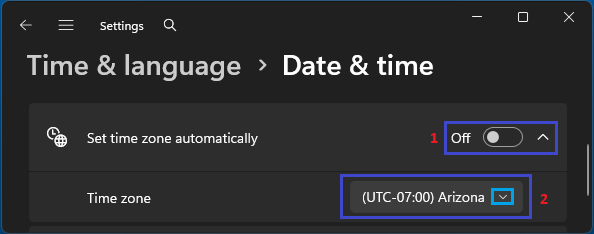
3. On “Date & Time” screen, disable Set time zone automatically option > click on the down arrow next to Time Zone and select the right Time Zone as applicable in your case.
4. On the same screen, scroll down to “Additional Settings” section and click on Sync Now button.
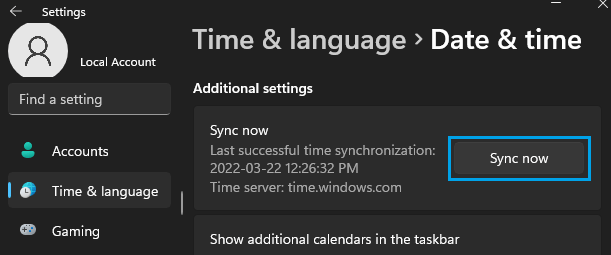
This will force the computer to update and set accurate Time on your computer by connecting to Windows time server.
2. Automatically Change Time Zone in Windows 11
The other option is to set the computer to automatically Set the Time Zone based on its changing location.
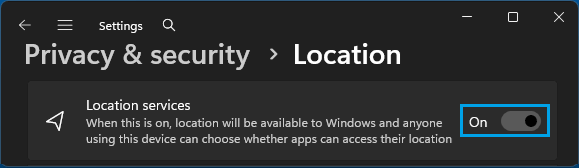
1. Go to Settings > Privacy & Security > Enable Location services by moving the slider to ON position.
2. After this, go to Time & Language > Date & Time and enable the option to Set Time Zone Automatically by moving the slider to ON position.
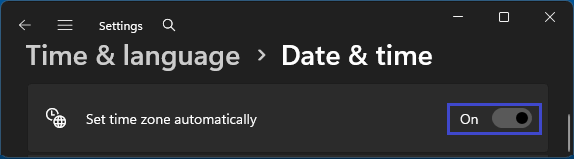
After this change, you should find your computer automatically changing its Time Zone to match the location in which it is actually located, while you are travelling across different time zones.
3. Manually Change Time Zone in Windows 10
If you are using Windows 10, you can follow the steps below to change the Time Zone on your computer.
1. Go to Settings > Time & Language.
2. Select Date & Time in the left-pane. In the right pane, use the down-arrow under Time Zone section to select the right Time Zone as applicable in your case.
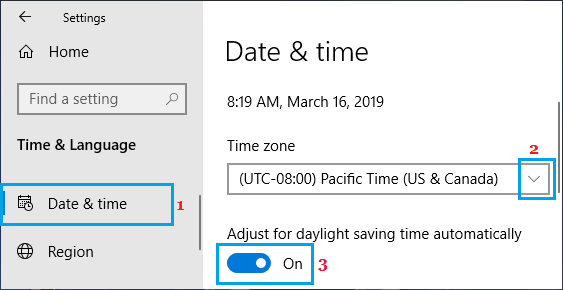
If your Country follows Daylight Time Savings, enable Adjust for daylight saving time automatically option by moving the toggle to ON position.
After this, click on the Sync now button to set the most accurate Date & Time on your computer, based on the new Time Zone.