While an important part of Windows updates is to fix security/software bugs and enhance the performance of your device, it is not uncommon to find apps/programs or drivers becoming incompatible with an update, leading to problems and performance issues on the computer.
In such cases, it becomes necessary to view updates installed on the computer and uninstall update, in case the problem can be traced back to a particular update.
Another reason for checking or viewing installed updates on a Windows computer would be to make sure that it is up-to-date with all the security, software and driver updates that were released by Microsoft.
View Installed Updates on Windows Computer
You can take a look at all the installed updates on your computer by using the Settings App, which provides a complete list of updates installed on the computer, neatly arranged under the following tabs or sections.
- Feature updates
- Quality updates
- Driver updates
- Definition updates
- Other updates.
If you are interested in taking a look at only the Un-installable updates, you can make use of Control panel, which also provides the option to Uninstall the updates.
1. View Installed Updates Using Settings
You can access a complete and comprehensive list of all the installed updates on your computer by going to Update History section of the Settings App.
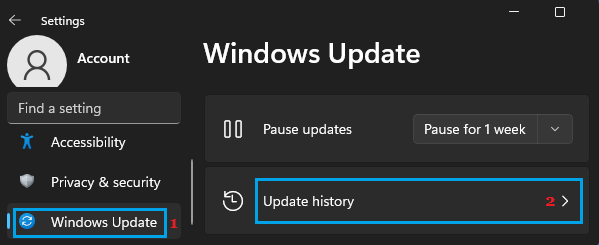
1. Click on Start button > Settings Icon (or press Win + I keys).
2. Click on Windows Update in the left-pane. In the right-pane, scroll down and click on Update History tab.
Windows 10: Go to Settings > Update & Security > Windows Update > click on View Installed update history link in the right pane.
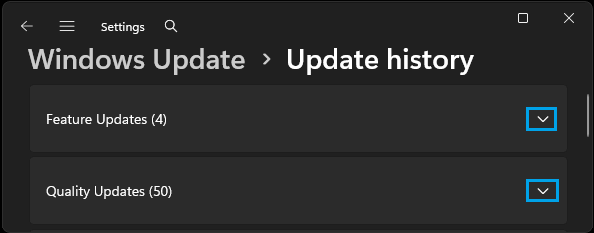
3. On the next screen, click on the Type of update (Quality, Feature, Driver, Definition or Other) that you want to view.
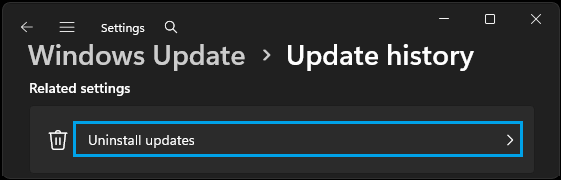
4. If you are interested in taking a look at the list of un-installable updates, scroll down on the same screen and click on Uninstall updates tab, located under “Related Settings” section.
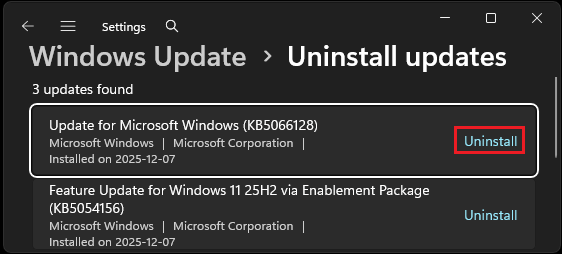
5. On the next screen, you will be able to see the list of un-installable updates on your computer.
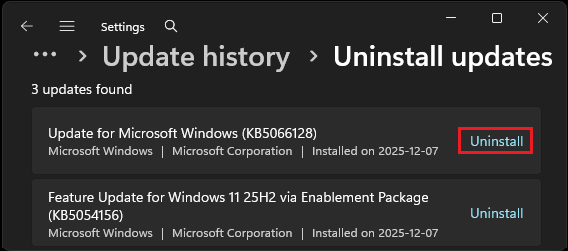
If required, you can uninstall any listed update on this screen by clicking on Uninstall.
2. View Installed Updates Using Command Prompt
You can get a complete list of installed updates on your computer along with their HotFixID (PID Numbers) by using Command Prompt.
1. Type CMD in the Search bar > right-click on Command Prompt in the search results and select Run As Administrator option.

2. Type wmic qfe list brief /format: table and press the Enter key on the keyboard of your computer.
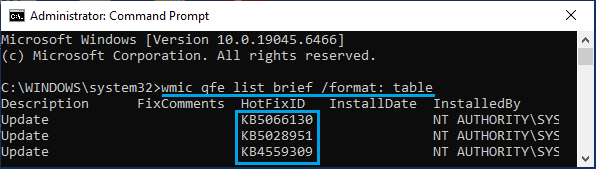
3. Once the Enter key is pressed the wmic qfe list Command will display a complete list of all the updates installed on the computer along with their KB Numbers.
3. View Un-Installable Updates Using Control
Unlike the previous versions of Windows, the current version of Control panel no longer provides a complete and comprehensive list of updates.
In the current version of Windows, the Settings App is the go to location to view all installed updates and Control Panel can only be used to view un-installable updates.
1. Open Control Panel by typing Control Panel in the search bar.
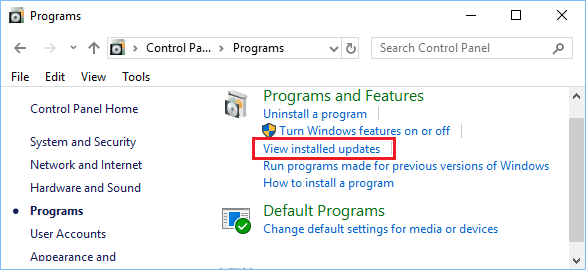
2. On the Control Panel screen, make sure that you are in Category View and click on Programs.

3. On Programs screen, click on View Installed Updates link, located under Programs and Features section.
4. On the next screen, you will be able to see the list of Un-installable updates on your computer.
5. You can Uninstall any listed update on this screen by clicking on the Uninstall option, located next to the listed update.