If your Laptop computer is equipped with Touchscreen, it provides the option to enable and use a Touch Keyboard, in addition to the actual or the physical keyboard of the laptop.
When the Touch Keyboard is enabled on a Windows computer, it can be operated by using a pen or a fingertip, similar to using a virtual keyboard on a mobile device (Tablet or Phone).
Note: If your computer is not equipped with touchscreen, it comes with a On-screen keyboard, which can be be operated by using a mouse or trackpad.
Enable Touch Keyboard in Windows 11/10
If you are like most users, you might like the idea of manually enabling the Touch keyboard on your computer, whenever you find the need to use it.
The other option is to setup your computer to aultomatically bring up the Touch keyboard, whenever there is no keyboard attached to the computer.
1. Manually Enable Touch Keyboard in Windows 11/10
You can manually access the Touch Screen Keyboard at any time on your computer by switching on the On-Screen Keyboard in Settings.
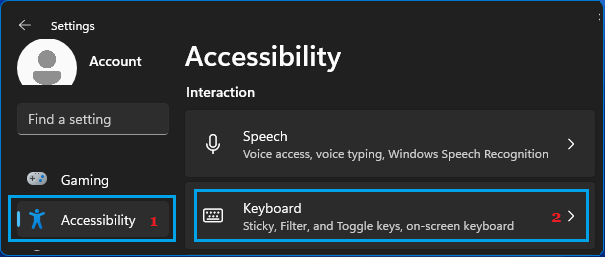
1. Go to Settings > Accessibility > scroll down in the right-pane to “Interaction” section and click on Keyboard.
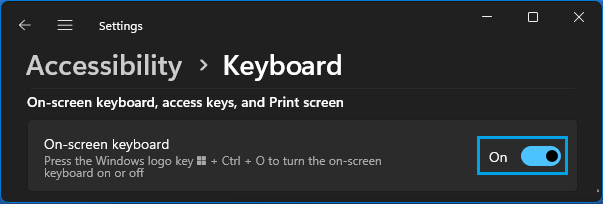
2. On the next screen, move the toggle next to On-Screen Keyboard to ON position.
Windows 10: Go to Settings > Ease of Access > Keyboard > move the On-Screen Keyboard Slider to ON position.
You should immediately see the On-screen keyboard popping up on the screen of your computer.
2. Automatically Enable Touch Keyboard in Windows 11/10
As mentioned above, you can make your computer to automatically enable or switch ON the Touch Screen Keyboard, whenever there is no keyboard attached to the computer.
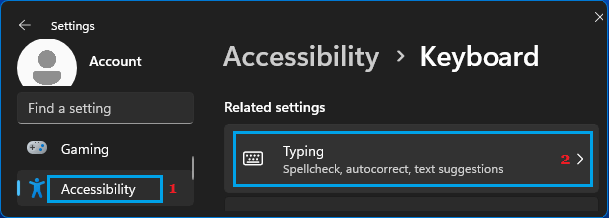
1. Go to Settings > Accessibility (left-pane) > In the right-pane, scroll down to “Related Settings” and click on Typing.
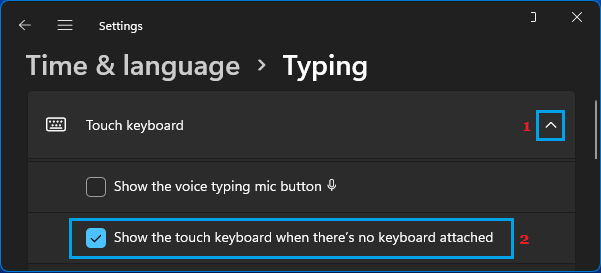
2. On the next screen, expand the Touch Keyboard tab and select Show the touch keyboard when there’s no keyboard attached option.
Windows 10: Go to Settings > Devices > Typing > enable Show the Touch Keyboard option in the right-pane.
After this, the Touch Keyboard should automatically appear on the screen of your computer, whenever there is no actual keyboard attached to the computer.