When Google Chrome is having problems downloading files, it comes with an error message; which may or may not exactly point to the actual reason for the problem.
For example, “Disk Full” Chrome download error clearly points to lack of storage space, while the following Chrome Download errors could be occurring due to a variety of reasons.
- Download Failed – Insufficient Permissions
- Failed Network or Download Failed: Network
- File Missing or No File
- Download Failed: System Busy
Fix Google Chrome Download Errors
You can find below the most commonly used troubleshooting steps to fix File Download Errors in Google Chrome occurring on a Windows computer.
1. Use Save As Option
If Google Chrome is coming up with “Download Failed” or similar error message, try to download the file by using Save As option.
1. Right-click on the File or on the Text/Image that contains the link to File and select Save As option.
2. On the next screen, select the Save Location on your computer.
2. Try Incognito Mode
When you switch Google Chrome to incognito mode, it disables third-party cookies and most browser extension; which might help in fixing the file download problem.
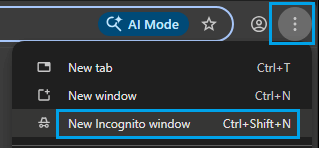
1. Click on 3-dots menu icon and select New Incognito Window option in the drop-down menu.
2. Once you are in Incognito mode, try to download the file again.
3. Clear Browser Cache & Cookies
Broken or corrupted files in the browser cache can interfering with proper functioning of the web browser.
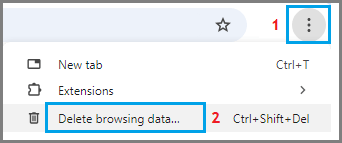
1. Click on 3-dots menu Icon > select Delete Browsing Data option in the drop-down menu.
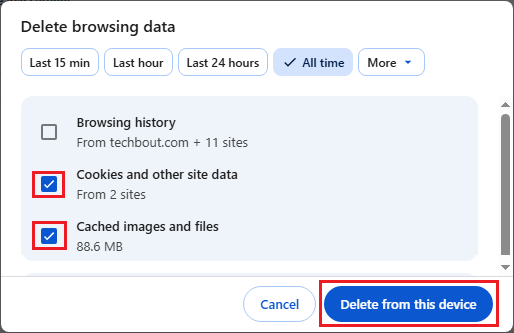
2. On the next screen, select All Time tab, Cookies/other site data, Cached images/files and click on Delete from this device button.
3. After clearing the brower cache & cookies, try to download the file once again on your computer.
4. Disable Browser Extensions
Incompatible browser extensions can stop file downloads and interfere with proper functioning of the web browser on your computer.
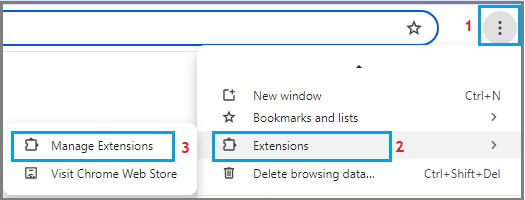
1. Click on 3-dots menu icon > Hoover mouse over Extension > click on Manage Extensions.
2. On the Extensions screen, disable unwanted extensions by moving the slider to OFF position.
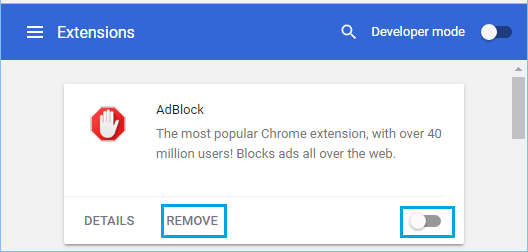
3. After disabling the extensions, restart the browser and try to download the file again.
5. Enable Installation of Third-party Apps
If you are unable to download third-party apps and programs on the computer, the problem might be due to download/installation of third-party apps being disabled on your computer.
1. On your Windows computer, go to Settings > Apps > Advanced App Settings.
2. On Advanced App Settings screen, use the Down Arrow to Allow installation of Apps from Anywhere.

After this, you should be able to download third-part apps and programs on your computer.
6. Change Chrome Download Location
The problem could be due to path to the default Chrome download location (Downloads Folder) becoming corrupted.
1. Click on 3 dots Menu Icon and select Settings in the drop-down menu.
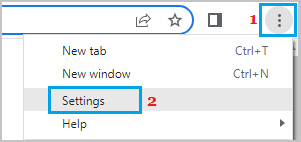
2. On the settings screen, enable Ask where to save each file before downloading option.
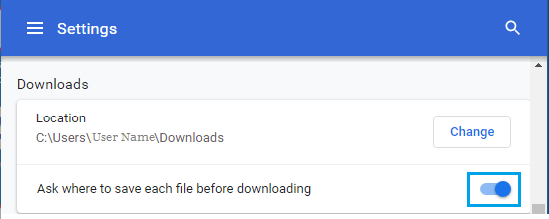
3. After this, try to download the file and select external drive or any other location to save the downloaded file.
7. Reset Google Chrome
The problem could be due to change or corruption of the browser settings on your computer.
1. Open Google Chrome Settings > select Reset Settings in the left-pane and click on Restore Settings to their original defaults in the right-pane.
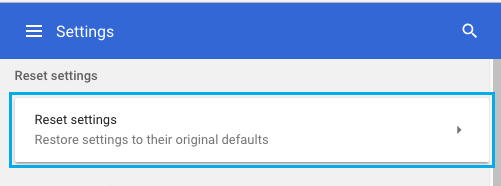
2. On the pop-up, click on Reset Settings button to confirm.
8. Scan the Computer for Malware
Presence of viruses or malware on the computer can cause file download problems by corrupting files and interfering with proper functioning of the web browser.
You can scan the computer for malware using Windows Defender or Third-party antivirus program installed on your computer.
A better solution in this case is to use Microsoft defender Offline Scan, which is specifically designed to remove hard-to-detect malware.
9. Uninstall and Reinstall Chrome
Sometimes, the User Profile in Google Chrome can become damaged or corrupted, which can result in browser related issues, including the File Download problem.
The solution for this issue to remove and Reinstall Google Chrome browser on your computer.