If your computer is unable to connect to internet and coming up with “No Internet Secured” Error, you can find below the steps to fix this annoying error on Windows 11 and Windows 10 computers.

No Internet Secured Error in Windows
In general, a Windows 11/10 computer or Microsoft Surface Tablet is known to come up with “No Internet Secured” error while trying to connect to an available WiFi Network.
However, it is not uncommon for a Windows 11 or Windows 10 computer to come up with “No Internet Secured” error in the middle of a browsing session, while being connected to both WiFi and Ethernet.
1. Restart the Computer
The problem could be due to a stuck program or process preventing the computer from properly connecting to internet and this can be fixed by restarting the computer.
2. Update Network Adapter Driver
The problem could be due to drivers for the Network Adapter on your computer not being updated.
1. Right click on the Start button and click on Device Manager.
2. On Device Manger Screen, expand Network Adapters entry > right-click on the WiFi Adapter and click on Update Driver Software option.

Tip: If you see multiple entries, look for something that has Network, 802.11b or WiFi in it.
3. On the next screen, select Search automatically for updated driver software option and follow the instructions to install updated driver software (if available).
3. Try Network Troubleshooter
Windows comes with its own built-in Network & Internet Troubleshooter that can help diagnose and fix Internet connectivity problems.
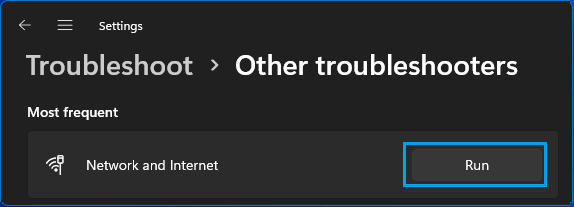
1. Go to Settings > System > scroll down in the right-pane and click on Troubleshoot. On the next screen, click on Other troubleshooters.

2. On the next screen, click on the Run button located in “Network & Internet” tab.
3. Follow onscreen instructions as the troubleshooter tries to find and fix internet connectivity problems on your device.
Windows 10: Go to Settings > Network & Internet > Network Troubleshooter and follow on-screen instructions.
4. Renew Computer’s IP Address
The problem might be due to your computer not getting a valid IP Address from the Modem or Router. This can be fixed by requesting a New IP Address from the DHCP server (Router).
1. Type CMD or Command Prompt in the Search bar > right-click on Command Prompt in the search results and select Run as Administrator option.

2. In Command prompt window type ipconfig /release and hit the Enter key. This will release the current IP Address of your computer

3. Next, type ipconfig /renew and hit the Enter key to Renew the IP Address of your computer.

Type exit to quit Command Prompt and see if you can connect to the internet.
5. Restart the Router
Most network connectivity problems can be fixed restarting the Modem/Router unit.
1. Disconnect Modem/Router from its Power supply source.
2. Wait for 60 seconds and re-connect Modem/Router to its Power Supply source.
3. Wait for all the lights on the Modem/Router to light up.
Once all the lights on the Modem are switched ON, you should be able to connect to internet without encoutering “No Internet Secured” Error.
6. Reset Network Settings
This process will overwrite all your current Network settings and replace them with original settings. Hence, make sure that you down your WiFi Network Name, Password and VPN deatils.
1. Go to Settings > Network & Internet > Advanced Network Settings > On the next screen, click on Network Reset tab, located under “More Settings” section.

2. On the next screen, click on Reset Now button.

3. On the confirmation pop-up, select the Yes option to confirm.
After the computer restarts, click on Network Icon in the Taskbar > select your WiFi Network > enter your WiFi Network Password and click on Next to join WiFi Network.
Windows 10: Go to Settings > Network & Internet > Network Reset > click on Reset Now button and follow the on-screen instructions.
7. Disable IPV6
Users have reported fixing “No Internet Secured” error by disabling IPv6 protocol.
1. Go to Settings > Network & Internet > Advanced Network Settings > scroll down and click on More Network Adapter Options.

2. On the next screen, right-click on your WiFi Network and click on Properties.

3. On WiFi properties screen, uncheck Internet Protocol Version 6 (TCP/IPv6) option and click on OK to save this setting.
")
Windows 10: Go to Settings > Network & Internet > Change Adapter options > right-click on your WiFi Network and click on Properties.
On Network properties screen, uncheck Internet Protocol Version 6 (TCP/IPv6) option and click on OK to save this setting.