A common reason for High CPU usage in Windows computers is due to default tendency of certain resource intensive apps to start up with the computer and keep running in the background, even when they are not being used.
Apart from this High CPU usage can be caused due to heightened activity of certain Windows Services, outdated drivers, corrupted system files, presence of virus/malware and a variety of other reasons.
High CPU Usage in Windows 11/10
You can find below a number of personally tried and tested methods that can be used to bring down the CPU usage on a Windows 11/10 computer.
1. Close High CPU Consuming Services
An easy way to bring down the CPU usage on a Windows computer is by going to the Task Manager, which provides the option to identify high CPU using processes and close or terminate them.
1. Right-click on Start button and click on Task Manager.
2. On the Task Manager screen, click on the CPU Column and this will bring up high CPU using processes to top of the column.
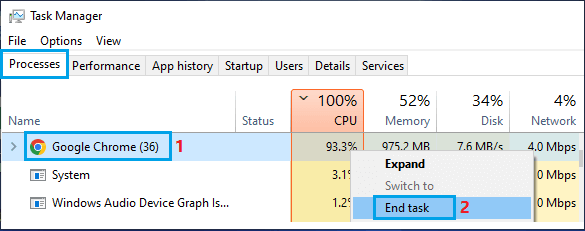
3. Now, right-click on the high CPU using Process and click on the End Task option.
4. Similarly, you can terminate other non-essential processes which are using high amount of CPU on the computer.
2. Disable Startup Programs
As mentioned above, the most common reason for High CPU usage in Windows is due to default tendency of certain resource intensive apps to automatically starting up with the computer and keep running in the background.
You can easily prevent such Apps/Programs from starting up with the computer by using steps as provided below in this guide: How to Prevent Apps from Opening At Startup In Windows.
3. Prevent Apps from Running in Background
Similarly, there are apps that have a tendency to remain active in the background, whenever they are manually opened by the users and closed after being used.
For the steps to prevent apps from running in background, you can refer to this guide: How to Disable Background Apps in Windows 11/10.
4. Update Device Drivers
In certain cases, the problem of High CPU usage on a Windows computer ends up being due to outdated device drivers.
1. Right-click on Start button and click on Device Manager.
2. On the Device Manager Screen, click on Action > Scan for hardware changes.
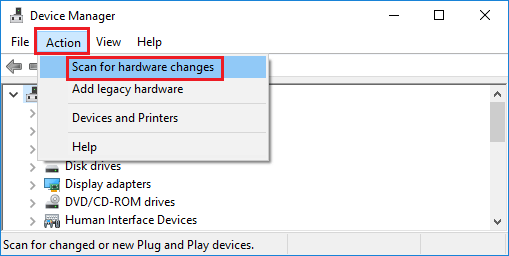
3. Wait for Windows to scan the computer for Hardware changes and update device drivers.
5. Scan the Computer for Malware
As mentioned above, presence of malware/viruses can lead to high CPU usage and other problems on the computer.
You can rule out this possibility by using Microsoft Defender Offline Scan and also by using the scan function as available on most third-party antivirus programs.
If the offline scan detects a virus, it will automatically clear the virus/malware from the computer or prompt you for further actions.
6. Disable Tips & Tricks
While receiving tips from Microsoft can be useful, this feature can sometimes end up using a high amount of resources.
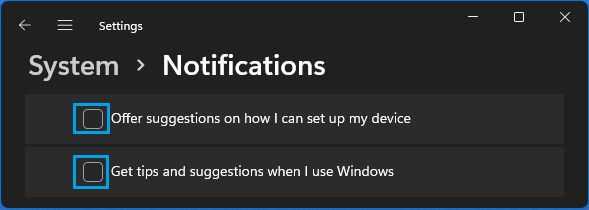
1. Go to Settings > System > click on Notifications in the right-pane.
2. Scroll down in the right-pane and uncheck Offer suggestions on how I can setup my device and Get tips and suggestions when I use Windows options.
3. Restart the computer and you should now find it running better than before.
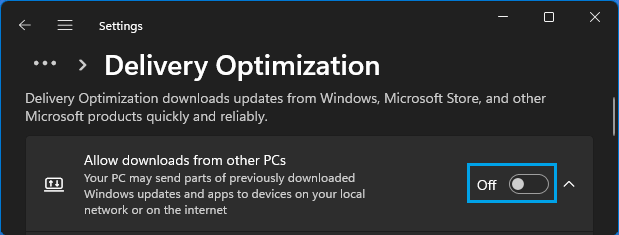
7. Disable Updates from other PCs
Preventing Windows from downloading updates from other PCs can help in reducing CPU usage on budget and low end computers.
1. Go to Settings > Windows Update > In the right-pane, scroll down and click on Advanced Options.
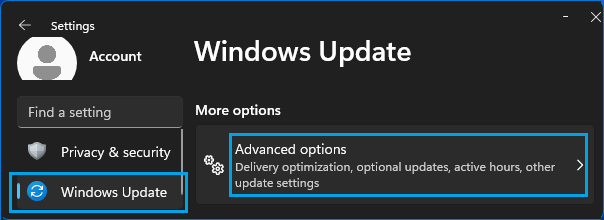
2. From Advanced Options screen, go to Delivery Optimization and disable Allow Downloads from other PCs option.
8. Repair System Files
System Files can sometimes get corrupted during installation of Windows/App updates and lead to high CPU usage.
Luckily, Windows computers come with built-in tools (SFC & DISM), which can be used to check System Files for errors and repair them.
You can find the steps to check system files for damage and repair them in this guide: How to Repair Corrupted System Files In Windows 11/10.
8. Setup Visual Effects for Best Performance
Visual effects like animations and transparencies consume processing power, which can have an adverse impact on the performance of low end and budget computers.
You can limit the impact of visual effects on CPU usage by setting visual effects for best performance on the computer (instead of best appearance).
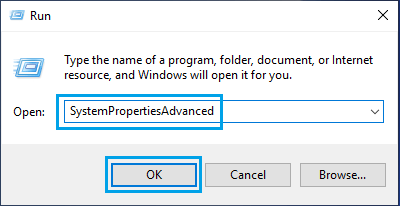
1. Open Run Command (Press Windows + R keys) > Type SystemPropertiesAdvanced and click on OK.
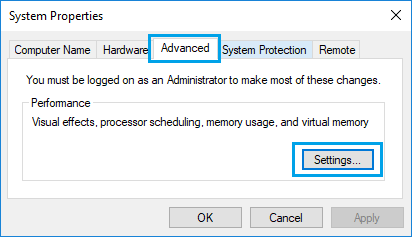
2. On the next screen, switch to Advanced tab and click on Settings button under “Performance” section.
3. On the next screen, click on Visual Effects tab and select Adjust for best performance option.
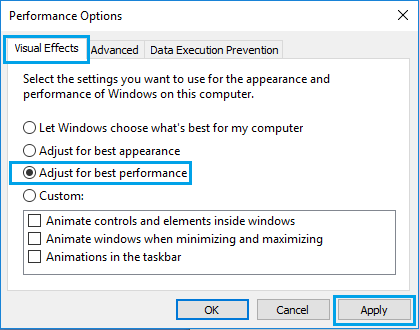
4. Click on Apply > OK to save these settings on your computer.
9. Defragment Hard Drives
Defragmenting the Hard Drive can help, only if your computer is equipped with traditional HDD drive. You can skip this step, if your computer is equipped with SSD drives.
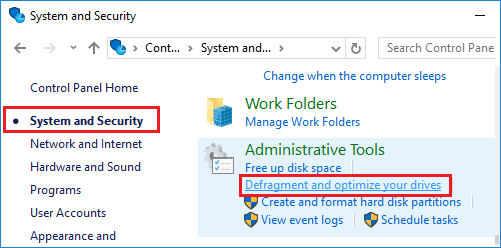
1. Open the Control Panel on your computer.
2. Go to System and Security > scroll down to “Administrative Tools” section and click on Defragment and optimize your drives.
3. On the next screen, select the Drive that you want to defragment and click on Optimize button.
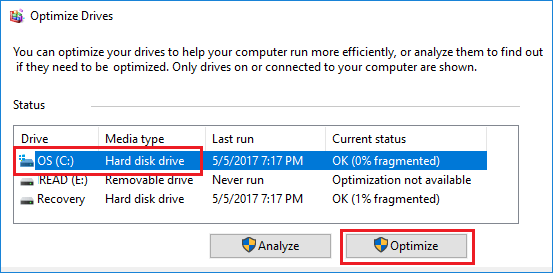
Patiently wait for Windows to complete the process of optimizing the selected drive.