If you are seeing ‘Not Enough iCloud Storage’ Error Message on iPhone or iPad, you can find below the steps to get rid of this error message on your phone.
Not Enough iCloud Storage Message on iPhone and iPad
In general, error message reading “Not Enough iCloud Storage” usually occurs while iPhone is trying to back up its data to iCloud.
This error message is pointing to lack of storage space in your iCloud Account and has nothing to do with lack of native storage space on your iPhone.
Hence, the only way to fix “Not Enough iCloud Storage” error on iPhone or iPad is to free up storage space in your iCloud Account or buy additional iCloud Storage Space.
1. Turn OFF iCloud Photos
When iCloud Photos is turned ON, Photos that you take on iPhone or iPad get automatically uploaded to iCloud, taking up storage space in your iCloud Account.
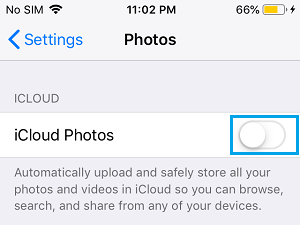
You can prevent iPhone or iPad from uploading photos to iCloud by Turning OFF iCloud Photos option.
Open Settings > tap on your Apple ID.
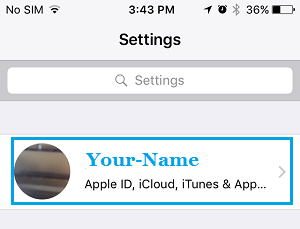
Next, go to iCloud > Photos > move the toggle next to iCloud Photos to OFF position.
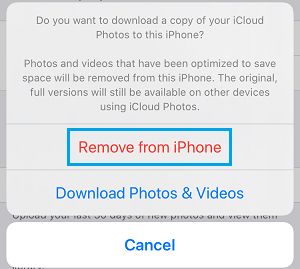
On the conformation pop-up, tap on Remove from iPhone to confirm.
Note: The above steps will only prevent New Photos from being uploaded to iCloud. To free up storage space, you will have to delete Photos that have been already uploaded to iCloud.
2. Delete Photos and Videos from iCloud
The easiest way to free up iCloud storage space is to download iCloud Photos to computer and delete them from your iCloud Account.
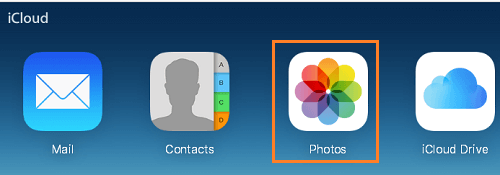
Visit icloud.com on your computer and login to your iCloud Account. Once you are in iCloud, click on the Photos tab.
In Photos App, click on the Photos tab to switch to Photos View.

Next, press Command + A keys to select All Photos and click on the Download icon to start downloading All Photos from iCloud to your Mac.
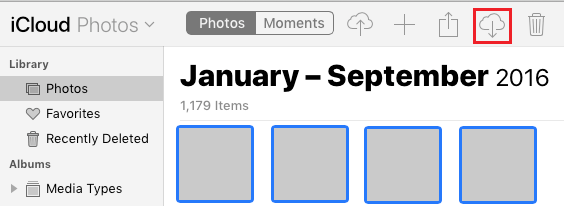
Note: If you are on Windows PC, press CTRL + A to select All Photos and click on the Download Icon to download Photos to your Windows PC.
After Photos are downloaded, click on the Trash Can icon to Delete All the selected iCloud Photos.
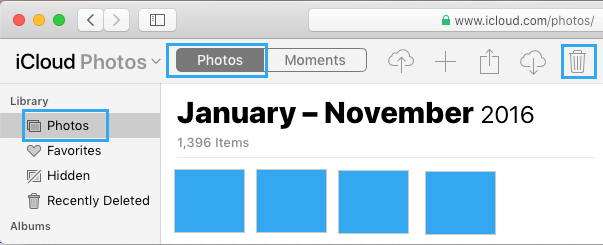
The deleted Photos will still be available in your iCloud Account for a period of 30 days, after which they will be automatically deleted.
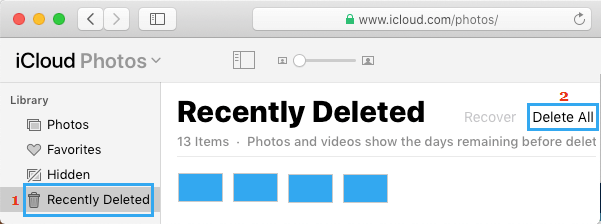
To immediately free up iCloud Storage, you will have to remove the Deleted Photos from Recently Deleted Folder in iCloud.
Click on Recently Deleted tab in the left-pane. In the right-pane, click on Delete All option to permanently Delete All Photos from your iCloud Account.
3. Delete App Data
Many Apps on your device have a tendency to back up their data to iCloud.
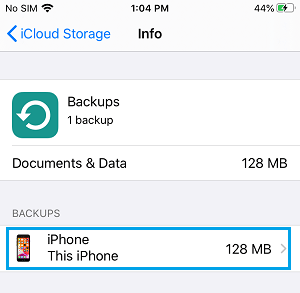
Go to Settings > Apple ID > iCloud > Manage Storage > Backups > and tap on your iPhone located under ‘Backups’ section.
On the next screen, disable the Apps that you do not want backing up data to iCloud by moving the toggle next to the Apps to OFF position.
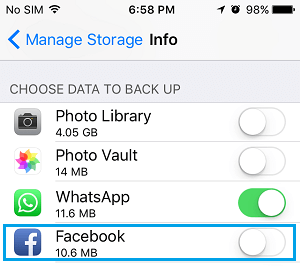
On the Confirmation pop-up, tap on Turn Off & Delete.
This will delete all the App Data stored by the App on iCloud Stored and also prevent the App from storing data on iCloud.
4. Delete iCloud Backups
You can Free Up iCloud Storage Space by deleting old iPhone backups (previous iPhone or other devices linked to your Apple ID).
Go to Settings > Apple ID > iCloud > Manage Storage > Backups.
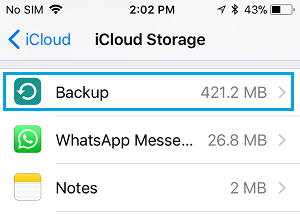
On the next screen, select the Backup of old iPhone that you want to delete.
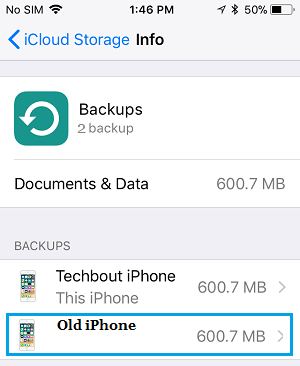
On the next screen, scroll down and tap on Delete Backup option.
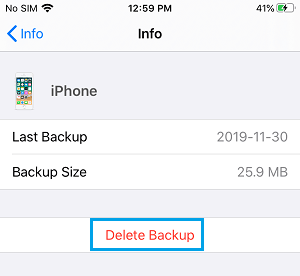
On the Confirmation pop-up, tap on Turn off & Delete to confirm.
This will remove the Backup of your old iPhone from iCloud and also prevent Turn OFF iCloud Backups for that device.
5. Buy More iCloud Storage
As you can imagine, the easiest option when you run out of iCloud Storage space would be to upgrade your iCloud storage plan to something in line with your growing iCloud storage requirements.
iCloud Storage space is not that expensive and Apple makes it really easy to buy more storage and also to revert back to Free storage plan at any time.
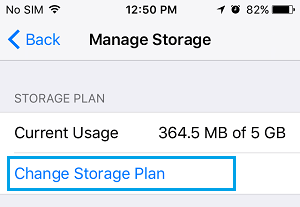
Go to Settings > Apple ID > iCloud > Manage Storage > tap on Change Storage Plan.
On the next screen, select the Storage Plan that you want to go for and tap on Buy.
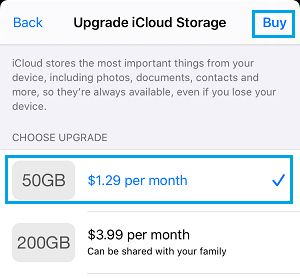
Once you complete the purchase, you will immediately see the total storage space in your account changing to reflect the total storage space allowed by your new plan.