In addition to the Library Folder located at top-level, macOS creates an additional Hidden Library Folder for every User Account on your MacBook.
This Hidden User Level Library Folder contains multiple system files that store settings, preferences and other data for various Apps and Programs related to that particular User account on your Mac.
In general, users find the need to open this hidden Library Folder on Mac for troubleshooting purposes.
Open Library Folder on Mac
You can open the Hidden Library Folder on your MacBook by using the Options Key and also by using the “Go To Folder” option, as available in macOS.
If required, you can permanently unhide the Library Menu in the top-menu bar of your Mac, which makes it readily accessible on your MacBook.
1. Open Library Folder on Mac Using Option Key
If you can see the “Go” tab in the top-menu bar of your Mac, you can follow the steps below to open the Library Folder on your MacBook.
1. Click on the Finder Icon located in the taskbar of your Mac.
2. Next, press and hold the Option key > click on the Go tab in top-menu bar and select Library in the drop-down menu.
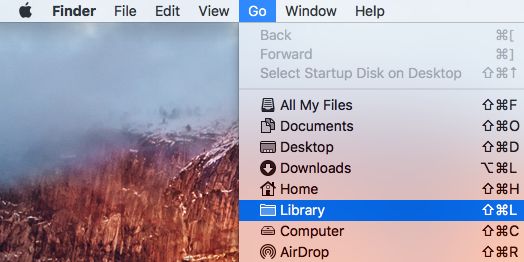
Note: Press the Alt Key in case you are using an external Windows keyboard with your Mac.
3. Clicking on the Library tab will take you straight to the User Level Library Folder on your Mac.
2. Open Library Folder On Mac Using “Go to Folder” Option
Another way to open the Library Folder on Mac is by using the “Go to Folder” option as available in macOS.
1. Click on Finder Icon located in the taskbar of your Mac.
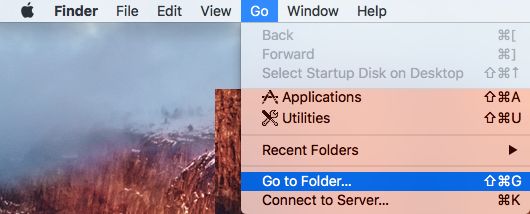
2. Next, select the Go tab in top-menu bar and click on Go to Folder… option in the drop-down menu.
3. In the “Go to Folder” window, type ~/Library, and click on the Go button.
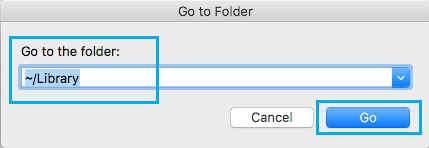
This will immediately take you to the Library Folder on your Mac.
3. Permanently Unhide Library Menu On Mac
It is possible to permanently unhide the Library Menu in the top-menu bar of your Mac by using the terminal.
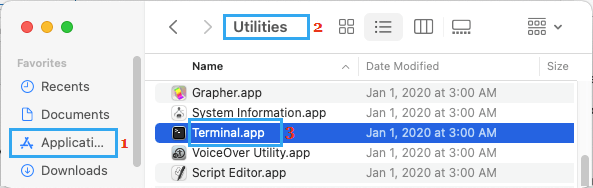
1. Click on the Finder Icon > Go to Applications > Utilities > Double-click on the Terminal App.
2. On the Terminal screen, type chflags nohidden ~/Library/ and Press the Enter key to submit your command for execution.
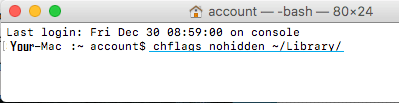
Once the command is executed, you will see the Library Menu item being clearly visible and permanently unhidden in the top menu-bar of your Mac.
You can always go back to the default Hidden Library option by running chflags hidden ~/Library/ command in the Terminal.
1. Click on the Finder Icon > Go to Applications > Utilities > Double-click on the Terminal App.
2. On the Terminal screen, type chflags hidden ~/Library/ and press the Enter Key on the keyboard of your Mac.
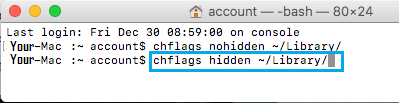
Once the Command is executed, you will find the Library Menu option being hidden in the Go Menu.