If the Printer Icon is not showing up on “Devices & Printer” screen, you won’t be able to access the Printer Settings and select the Printer for printing.
While the problem of Printer Icon missing from “Devices & Printers” screen is usually known to occur after a Windows update, it can also occur due to other reasons.
Printer Icon Not Showing in Windows 11/10
If the Printer Icon is missing or not showing up on the Desktop, it is likely that you may accidentally deleted the Printer Icon and this issue can be easily fixed by creating New Shortcut to the Printer.
If the Printer Icon is missing or not showing up on “Devices and Printers” screen, you should be able to fix the problem using other troubleshooting steps as provided below in this guide.
1. Create New Desktop Shortcut to Printer
As mentioned above, if the Printer Icon is missing from Desktop, you can create a New Shortcut to the printer.
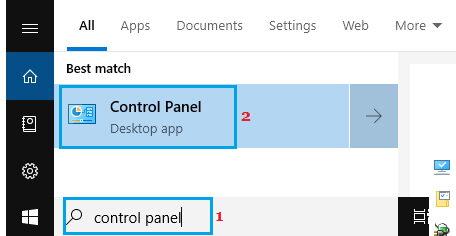
1. Type Control Panel in the Search bar and click on Control Panel Desktop App in the search results.
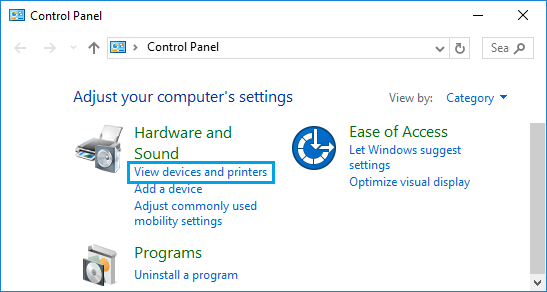
2. On Control Panel screen, switch to Category view and click on View Devices and Printers link.
3. On the next screen, right-click on the Printer and select Create Shortcut option.
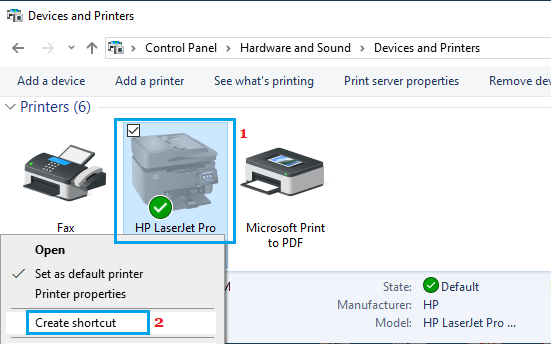
Note: If Printer Icon is Not Showing on this screen, follow other methods (2 to 5) as provided below.
4. On the pop-up, click on the Yes button to create a Desktop Shortcut.
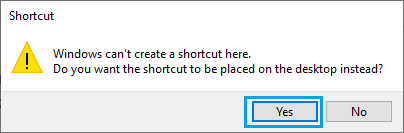
The Printer Icon should now be visible on the Desktop of your computer.
2. Run Printer Troubleshooter
The built-in Printer Troubleshooter as available on your computer might help in fixing this problem.
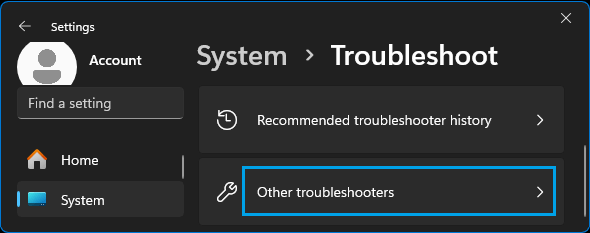
1. Go to Settings > System > Troubleshoot > Other Troubleshooters.
2. On the next screen, click on the Run button located in Printer tab.
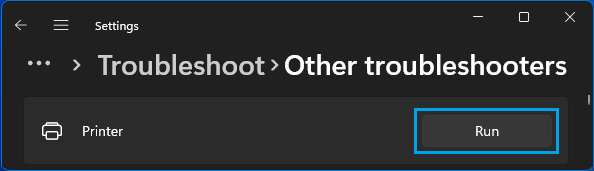
3. Follow the instructions as the troubleshooter tries to find and fix printing problems on your computer.
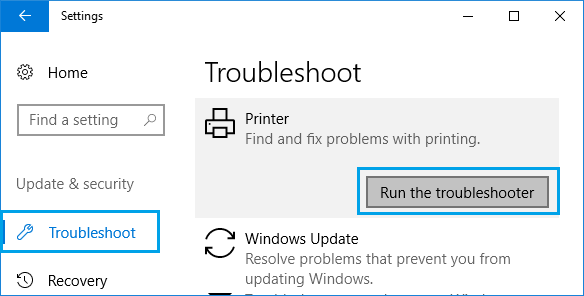
Windows 10: Go to Settings > Update & Security > Troubleshoot. In the right-pane, select your Printer and click on Run the Troubleshooter.
3. Enable Bluetooth Support Service
The problem can also be caused due to Bluetooth Support service being disabled on the computer.
1. Press Windows + R keys to open Run command.
2. In the Run command window, type Services.msc and click on OK.

3. On the next screen, right-click on Bluetooth Support Service and click on Start.
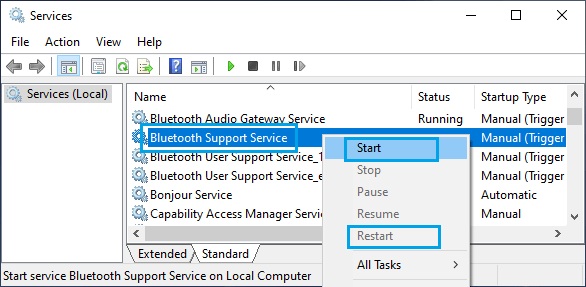
After this, restart the computer and check “Devices & Printers” screen.
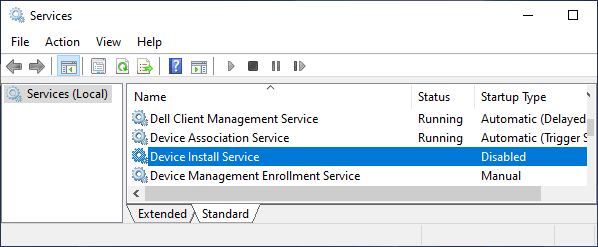
4. Enable Device Install Service
In many cases, the problem is due to “Device Install Service” or other Device services being disabled on the computer.
1. Open Run Command > type Services.msc and click on OK.
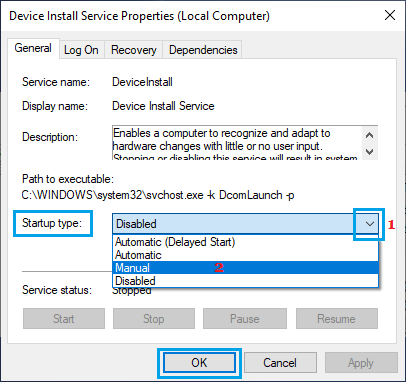
2. On the next screen, double-click on Device Install Service (if it is disabled).
3. On the pop-up, change the Startup Type to Manual > click on Apply & OK.
After this, make sure that the other Device related services are set to the following startup types.
- Device Association Service – Manual (Trigger Start)
- Device Management Enrollment Service – Manual
- Device Setup Manager – Manual (Trigger Start)
- DevQuery Background Discovery Broker – Manual (Trigger Start).
5. Edit Registry
If above methods did not help, creating a New Registry Key for the Printer in Desktop and Control Panel Folders might help in fixing the problem.
Note: It is recommended that you Backup the Registry or create a System Restore Point before going ahead with this step.
1. Open Run Command > type regedit and click on OK.

2. From the Registry Editor screen, navigate to HKEY_LOCAL_MACHINE\SOFTWARE\Microsoft\Windows\CurrentVersion\Explorer\Desktop\NameSpace
3. Right click on NameSpace > select New > Key.
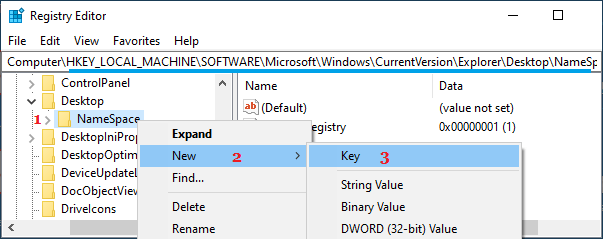
4. Name the New Key as: {2227a280-3aea-1069-a2de-08002b30309d}, which is the CLSID for the Printers Folder.
5. Select the New Key in the left pane. In the right pane, edit the value of Default key to Printers.
6. Close the Registry Editor and Restart the computer.