The Time Machine feature on Mac makes it easy to Backup Mac to an External Hard Drive and use the Backup to restore specific files or restore entire Mac from Time Machine Backup.
Restore Mac from Time Machine Backup
While it is possible to manually copy files from Old to New Mac, it is much easier to transfer data from Old to New Mac using Time Machine.
In addition to restoring Hard Drive, Time Machine can also be used to recover accidentally deleted files and also to find time stamped older versions of files.
You will find below the steps to Restore Mac from Time Machine Backup and also the steps to Restore Specific Files from Time Machine Backup.
1. Restore Files from Time Machine Backup
Follow the steps below to Restore Files or Folders on Mac using Time Machine Backup.
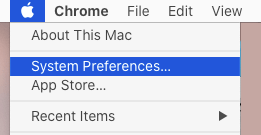
1. Click on Apple Icon in top-menu bar and select System Preferences in the drop-down menu.
2. On System Preferences screen, click on Time Machine icon.

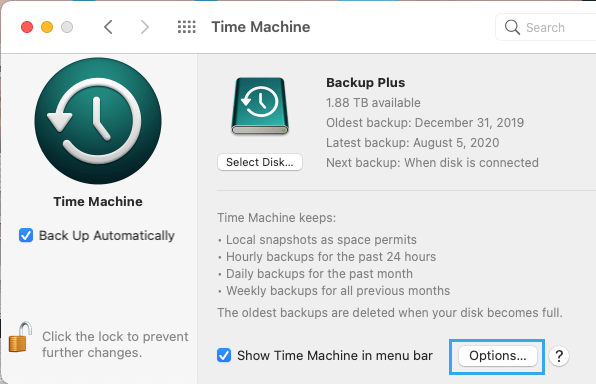
3. On the next screen, make sure Show Time Machine in menu bar option is selected. This will enable the Time Machine icon in top-menu bar (top-right corner).
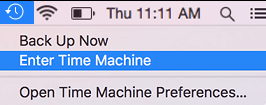
4. Click on Time Machine Icon in the top-menu bar and select Enter Time Machine option in the drop-down menu.
5. On the next screen, select the Time (Today, Yesterday, earlier) > select the Files/Folders that you want to Restore and click on the Restore option.
Time Machine will copy the selected File/Folder from External Hard Drive and copy it back to its original location on your Mac.
2. Restore Hard Drive from Time Machine Backup
Time Machine can also be used to Restore the entire Hard Drive on Mac. This can be helpful, if you are upgrading to New Mac or Upgrading Mac to SSD Drive.
1. Connect External Hard Drive containing Time Machine Backup to Mac.
2. Press the Power Button to start Mac and immediately hold Command + R keys.
3. Release both keys when you see Apple Logo or Spinning Globe.
4. If prompted, enter your Admin password.
5. On macOS Utilities screen, select Restore From Time Machine Backup option and click on Continue.
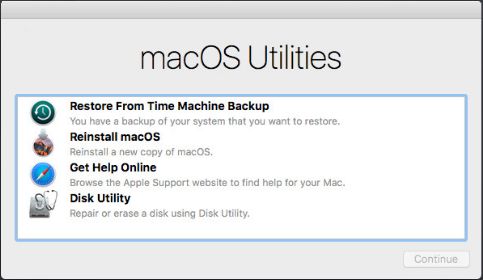
6. On the confirmation screen, click on Continue to confirm.
7. On the next screen, select your Time Machine Backup Disk as the restore source and click on Continue.
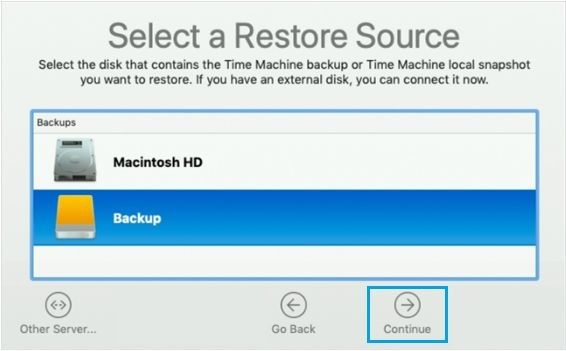
8. Select the Storage Drive on your Mac as the destination source and click on Restore.
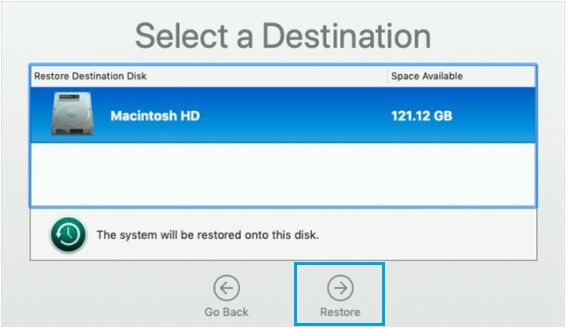
8. Patiently wait for the Restore Process to be competed.
Once Time Machine Restore is completed, restart Mac and see if all your data is intact.
3. Files or Folders Missing from Time Machine Restore
Sometimes, Time Machine Restore process may end up skipping certain files/folders due to user error or technical glitches.
If this happens, click on Time Machine Icon in top-menu bar > select Enter Time Machine.

On the next screen, copy the missing Files/Folders and paste them into appropriate folders on your New Desktop.