As indicated by its name, “Startup Folder” is a hidden Windows system folder; containing references or shortcuts to apps, desktop programs, scripts and files that have been allowed to automatically startup with the computer.
Hence, the most common reason for users trying to open the Startup Folder on a Windows computer is either to prevent apps from starting up with the computer or to make a particular App, Desktop Program or File to automatically start up with the computer by placing a shortcut to that particular app/program or file in the Startup Folder.
The Location of “Startup Folder” in Windows 11/10
There are actually two types of Startup folders on a Windows computer; one of which is located at System Level and the other type of Startup Folder is located at the User Level.
The “System Level Startup Folder” is located at path: C:\ProgramData\Microsoft\Windows\Start Menu\Programs\Startup and it contains shortcuts to common applications that apply to all User Accounts on the computer.
The “User Level Startup Folder” is located at path: C:\Users\YourUsername\AppData\Roaming\Microsoft\Windows\Start Menu\Programs\Startup and it contains shortcuts to applications that are being allowed to startup with the computer in those particular User Accounts.
Hence, if you want to make an app, desktop program or file to automatically startup with the computer and become available in a particular User Account, you need to place the shortcut in the User Level Startup Folder.
1. Open User Level Startup Folder
You can access the current User Level Startup Folder on a Windows computer by using the following steps.
1. Right-click on the Start button and click on Run.
2. On the Run Command screen, type shell:startup and click on OK.
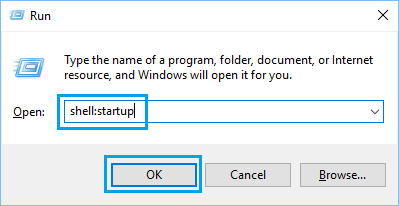
3. This will take you to the current User Level Startup Folder located at the following path: C:\Users\Username\AppData\Roaming\Microsoft\Windows\Start Menu\Programs\Startup.
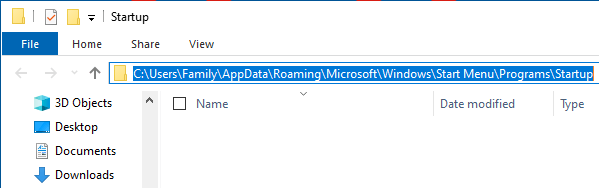
As mentioned above, you can make any app, desktop program or file to automatically startup with the computer by placing a Shortcut to that particular app or desktop program in the User Level Startup Folder.
For the actual steps to add Apps and Desktop programs to the startup folder, you can refer to this guide: How to Add App or Program to Startup in Windows.
2. Open System Level Startup Folder
You can open the System Level Startup Folder on a Windows computer by using the following steps.
1. Open the Run Command on your computer.
2. Type shell:common startup and click on OK.
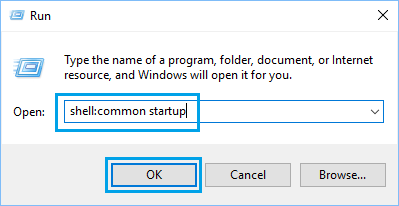
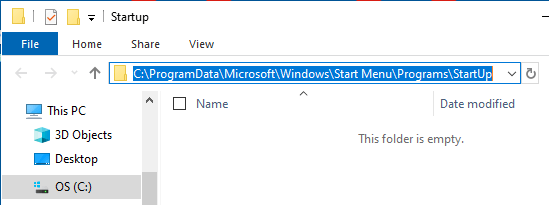
3. This will immediately take you to C:\ProgramData\Microsoft\Windows\Start Menu\Programs\StartUp, which is the common or system level Startup Folder on the computer.
3. Open Startup Folder Using File Explorer
In order to open Startup Folder using File explorer, you need to enable the option to Show Hidden Files by using steps as provided in this guide: How to Show Hidden Files in Windows 11/10.
Once the option to Show hidden files is enabled, you can open both System & User Level Startup Folders by navigating to their location using the File Explorer screen.
1. Click on the File Icon in the Taskbar to open the File Explorer on your computer.

2. From the File Explorer screen, navigate to the location of the desired (User or System) Startup Folder on the computer.
User Startup Folder: Navigate to C:\Users\Username\AppData\Roaming\Microsoft\Windows\Start Menu\Programs\Startup.
System Startup Folder: Go to C:\ProgramData\Microsoft\Windows\Start\Menu\Programs\Startup.