In order to provide users with a personalized user experience, Windows computers come with a built-in tendency to collect user Activity History; which includes apps & desktop programs used, files opened and also the websites visited by the users.
While Windows collects Activity History for all User Accounts on the computer, only the activity history linked to your Microsoft User Account is sent to Microsoft and the activity history linked to your local user account remains on the device.
Clear Your Activity History in Windows 11/10
Since, the default setting on a Windows computer is to store Activity History locally on the computer, it can be cleared or deleted at any time by going to the “Privacy & Security” settings on your computer.
Similarly, the Activity History linked to your Microsoft Account can also be cleared and you can even prevent the computer from sending your Activity History to Microsoft.
1. Clear Your Activity History from the Computer
You can follow the steps below to clear the Activity History that has been stored locally by Windows on your computer.
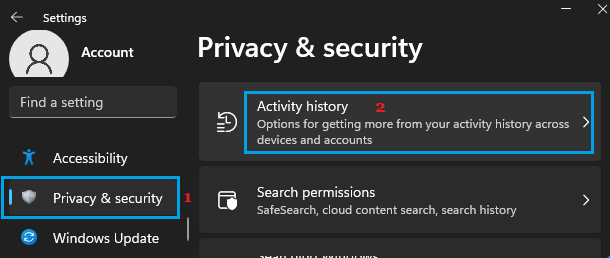
1. Open Settings > select Privacy & Security in left-pane. In the right-pane, scroll down and click on Activity History card.
2. On the next screen, scroll down in the right-pane to “Clear Activity History” section and click on the Clear button.
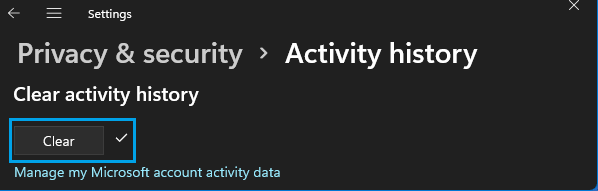
Windows 10: Go to Settings > Privacy > Activity History > click on the Clear button, located under “Clear Activity History section”
3. On the confirmation pop-up, click on OK to confirm.
2. Clear Activity History in Microsoft Account
If you use Microsoft Account to Login to the computer, you can view and clear your Activity History by going to the “Privacy” dashboard in your Microsoft Account.
1. Go to Settings > select Privacy & Security in the left-pane. In the right-pane, scroll down and click on Activity History card.
2. On the next screen, scroll down in the right-pane and click on Privacy Dashboard Link. This will take you to Microsoft’s Privacy website
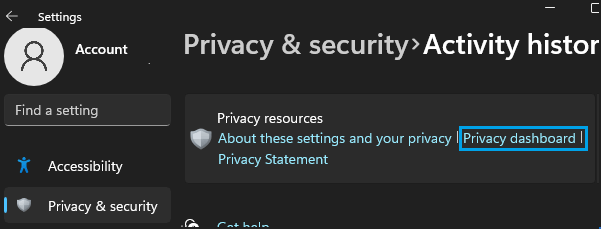
Windows 10: Go to Settings > Privacy > Activity History > click on Privacy Dashboard Link.
3. If prompted, login to your Microsoft Account, click on Privacy > Activity History.
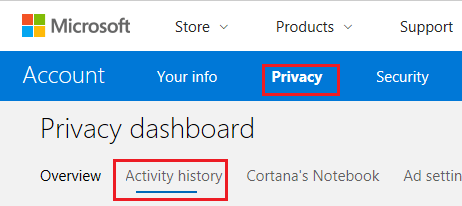
4. On the Activity History Page, you will see your Activity History arranged by Data Types (Apps, Voice, Search, Browse, Media and Location).
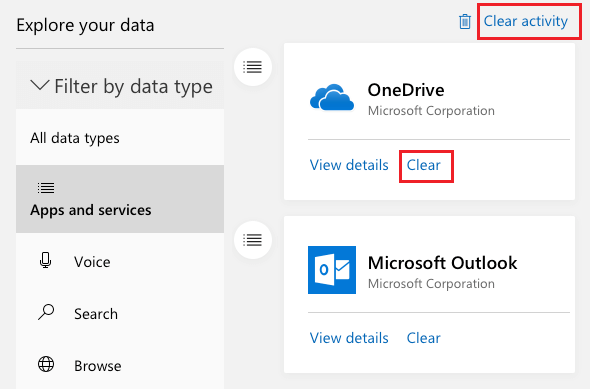
As you can see from above image, there is no option to clear All Activity History at once. Hence, you will have to open and clear Activity History for each Data type.
3. Prevent Computer from Sending Activity History to Microsoft
Windows operating system also provides the option to prevent your Activity History from being sent to Microsoft.
1. Go to Settings > select Privacy & Security in the left-pane. In the right-pane, scroll down and click on Activity History card.
2. On the next screen, Uncheck Store my activity history on this device and Send my activity history to Microsoft option.
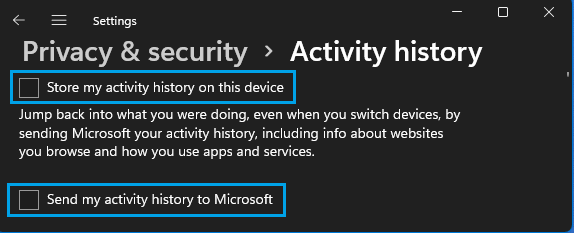
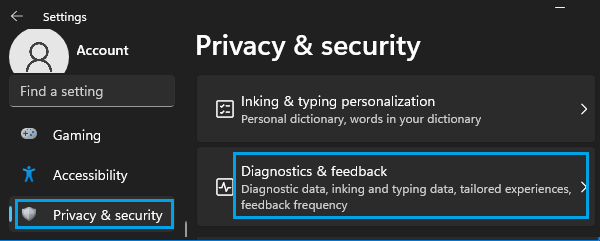
3. After this, go to Settings > Privacy & Security > click on Diagnostics & Feedback Card.
4. On the next screen, disable Diagnostic data, Improve inking & typing and Tailored experiences.
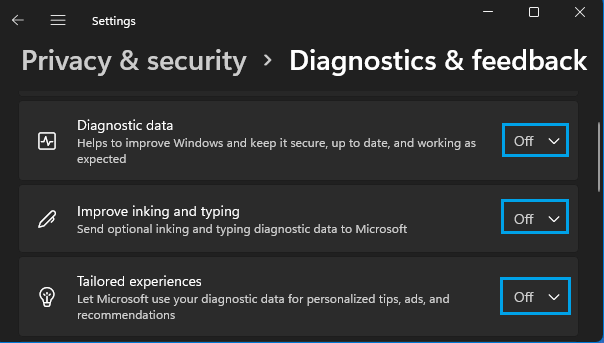
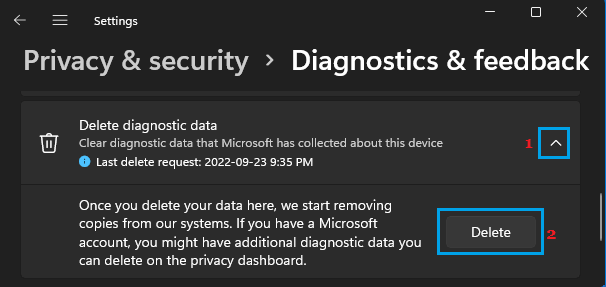
After this, scroll down on the same screen and click on Delete Diagnostic data to clear Diasgnostic data stored on your computer and Microsoft servers.
Note: You can also clear your Activity history, without being logged into the computer. You can do this by going to the “Privacy” section in the Email Account that is linked to your Microsoft Account.