Here is how you can Wipe Data From iPhone With Broken Screen by using iTunes and iCloud on a Mac or Windows computer.

Wipe Data From iPhone With Broken Screen
Until Apple comes up with a self healing iPhone, the only fix for an iPhone with broken screen is to replace the broken screen.
If you have Apple Care+ Plus plan, Apple will replace your damaged iPhone new one. If you do not have Apple Care plan, you will have take your iPhone to a repair center.
In both cases, you will find the need to Wipe Data from your iPhone, before giving it away to Apple or leaving your device with a Repair Center.
You will find below the steps to Wipe Data From iPhone with Broken Screen, after making a backup of the data on your device.
1. Back Up iPhone to Computer
Before wiping the data from your iPhone, you may want to save a backup of your iPhone to Mac or PC using steps provided in these guides:
After making a backup of iPhone, you can Wipe the Data on your iPhone using any of the following methods.
2. Wipe Data From iPhone Using iCloud
If Find iPhone service is enabled on your device, you can follow the steps below to Wipe data from your iPhone using iCloud.
1. Using your computer visit icloud.com and sign in to your iCloud Account.
2. Once you are in iCloud, click on Apps Icon and then click on Find My icon.

3. Next, click on All Devices option located at the top of screen and click on your device in the drop-down.
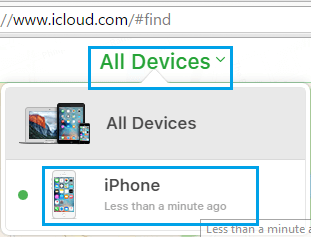
4. Once your device is selected, click on the Erase iPhone option.
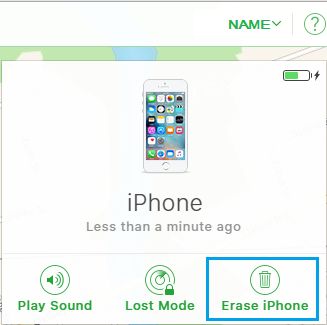
5. On the confirmation pop-up, click on Erase to confirm.
2. Erase Data From iPhone Using iTunes
Follow the steps below to Wipe Data From iPhone With Broken Screen using iTunes.
1. Connect iPhone to Windows computer using its supplied USB Cable.
2. Start iTunes on your computer and click on the Phone Icon, whenever it appears in iTunes
![]()
3. Next, click on the Summary tab in left-pane. In the right-pane, click on Restore iPhone… option.
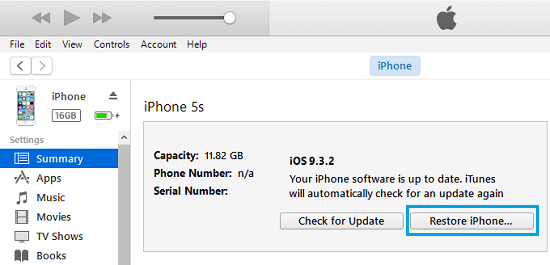
Note: You need to Turn OFF Find My iPhone in order use iTunes to Restore your iPhone.
4. On the confirmation pop-up, click on the Restore button to confirm.
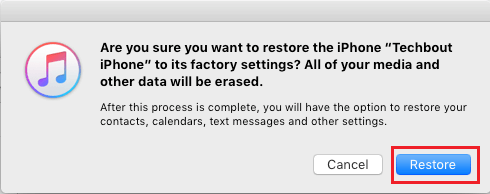
Once you click on Restore, iTunes will begin the process of completely wiping out all the Data from your iPhone.
Once the data is deleted, you will be able to safely give the iPhone away for repairs.
Whenever the iPhone is repaired, you can get back all the Data on your repaired or New iPhone by Restoring iPhone From Backup.
4. Erase Data From iPhone Using Recovery Mode
In case your cracked iPhone has become completely unresponsive, you should be able to wipe its Data using the Recovery Mode.
For this you can refer to this guide: How To Put iPhone in Recovery Mode.