If your computer is coming up with “Requested Resource is in use” error message, the problem could be due to presence of Tprdpw32 rootkit malware, which is also known as SmartService Trojan Horse Malware.
While this error message can also appear due to the Preview pane being enabled in File explorer and appear while trying to remove a printer port from the computer, it is important to rule out the possibility of the computer being infected.
If the computer is infected by malware, the error message appears due to the antivirus program installed on the computer being blocked or disabled by Tprdpw32 rootkit malware.
Note: If your computer is coming up with ‘Requested Resource is in use’ error while trying to remove a Printer Port, you can refer to this guide: Unable to Delete TCP/IP Printer Port in Windows 10.
The Requested Resource is in Use Error Message
If your computer is coming up with “The Requested Resource is in use” error message, you can find below the steps to check your computer for presence of malware and remove those harmful or malicious programs from the computer.
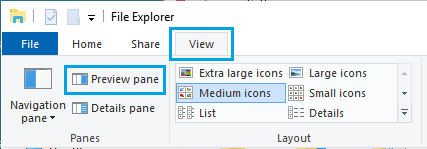
1. Disable Preview Pane
If you are getting ‘Requested Resource is in use’ error message while trying to copy a File/Folder, it is most likely that you have enabled the ‘Preview Pane’ in File Explorer.
1. Open the File Explorer on your computer.
2. In File Explorer screen, click on the View tab in top-menu bar and Uncheck Preview pane.
If you are getting “Requested resource is in use” error, even after disabling the Preview Pane, it is possible that your computer is infected by malware.
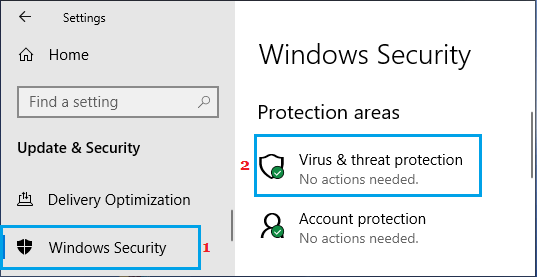
2. Run Windows Defender Offline Scan
Using Windows defender in offline mode is known to help in detecting persistent and hard to detect malware.
1. Go to Settings > Update & Security > select Windows Security in the left pane. In the right-pane, click on Virus & threat protection option.
2. On the next screen, click on the Advanced Scan option.
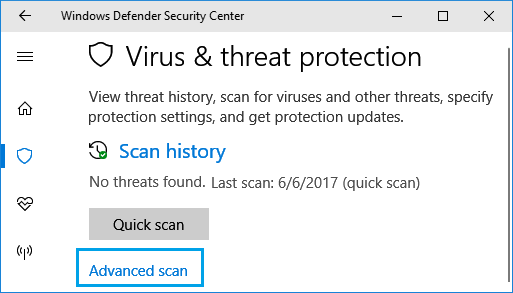
3. On the next screen, select Windows Defender Offline scan and click on Scan now.
4. Wait for Windows Defender to scan and remove malware (if any) from your computer.
To check if any malware was removed, go to Scan History > See Full History page.
3. Check Startup Programs
Most malware programs have a tendency to start up with the computer and become active as soon as you start the computer.
1. Right-click on the Start button and click on Task Manager.
2. On the Task Manager screen, switch to Startup tab and Disable programs from unknown publishers.
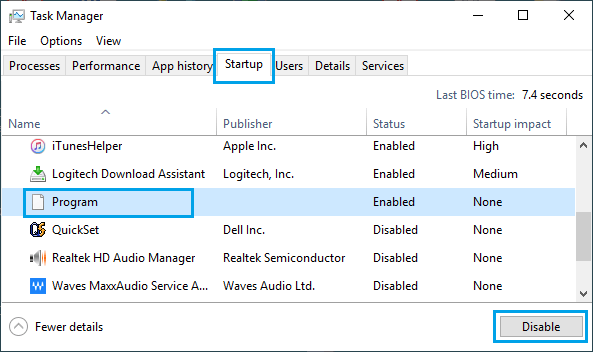
Note: Make sure, you are not disabling Microsoft Programs or programs related to browser and Antivirus software.
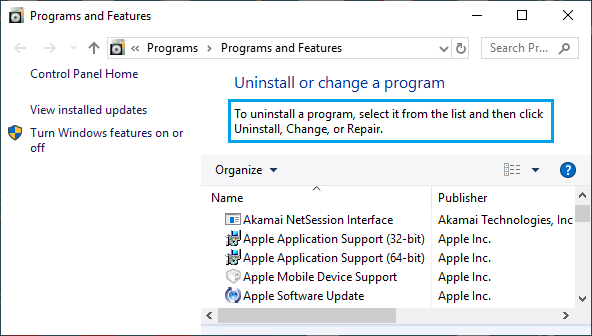
4. Uninstall Malicious Programs
Take a good look at all the programs installed on your computer and uninstall suspicious looking programs.
1. Right-click on the Start button and click on Run.
2. In the Run Command window, type appwiz.cpl and click on OK.

3. On Programs and Features screen, identify and uninstall suspicious looking programs.
Note: Make sure, you do not uninstall Microsoft Programs or programs related to browser and Antivirus software.
5. Check Hosts File
Malware programs can insert IP Addresses in the Hosts File with the intention of re-directing browser requests and other harmful purposes.
The default Hosts File on a Windows computer is located at C:\Windows\system32\drivers\etc and it only contains a few comment lines staring with ‘#’ character.
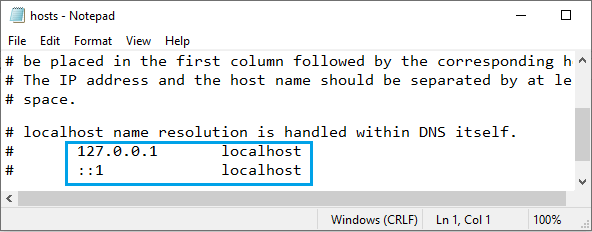
If your computer is affected by malware, you will see unknown IP Addresses, domains or hostnames listed on the Hosts File.
In such a case, you will have to remove unknown IP Addresses by editing the hosts file.
6. Use Safe Mode Scan
SmartService malware has the ability to stop Antivirus programs. Hence, it can only be scanned and removed by booting your computer in Safe Mode.
Booting the computer into Safe Mode allows you to run Virus Removal Software, without any interference from SmartService malware.
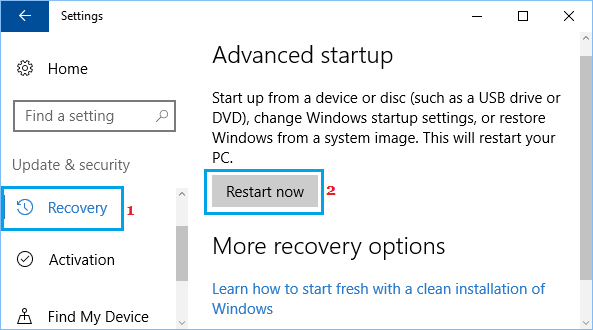
1. Go to Settings > Update & Security > click on Recovery in the left pane. In the right pane, scroll down and click on Restart Now button, located under ‘Advanced’ startup section.
2. From the next screen, go to Troubleshoot > Advanced options > Startup Settings and click on the Restart button.
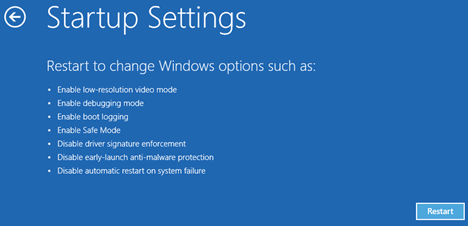
3. After the computer restarts, select Enable Safe Mode option (F4 key) to boot your computer into Safe Mode.
4. In Safe Mode, scan the computer for malware using the Antivirus Program installed on your computer or use Windows Defender Offline Scan (As provided in Method#2 above).
7. Remove Malicious Registry Entries
Before going ahead with these steps, it is recommended that you make a backup of registry files on your computer.
1. Open the Run command on your computer > Type regedit and click on OK.

2. On the Registry editor screen, press Ctrl+F to bring up the Find box and search for SmartService malware in registry files.
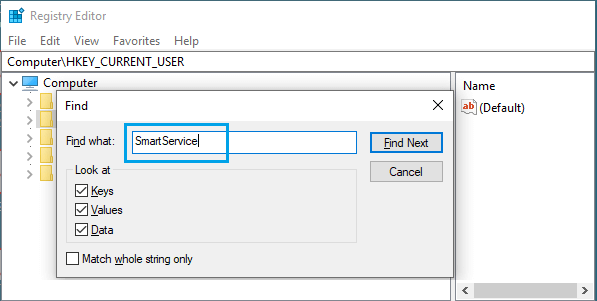
3. Similarly, search for other malware (if you know their names) and remove them.
4. Navigate to HKEY_LOCAL_MACHINE\SOFTWARE\Microsoft\Windows\CurrentVersion
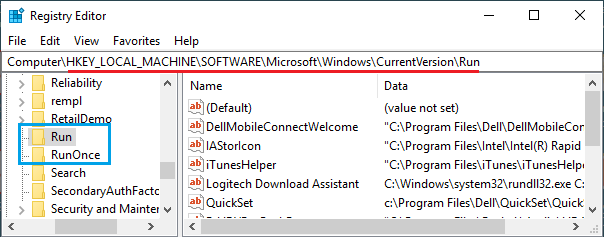
In the Current Version Folder, open all Folders containing the word ‘Run‘ and look for suspicious entries in those folders.
Note: Before disabling or removing suspicious entries, make sure that you look them up on the internet and get more information about them.