In general, most users do not find the need to start, stop and disable any of the services running on the computer; as Windows operating system comes with the built-in ability to manage services that are required for proper functioning of apps, desktop programs and features that are actively being used on the computer.
However, it is also not uncommon to find cases of Windows services requiring a restart (stop/start) and temporarily stopped to troubleshoot and fix problems on the computer. Hence, we are providing below the steps to Start, Stop and Disable Windows Services.
Start, Stop & Disable Windows Services
The act of enabling or disabling a Windows Service in many cases can end up modifying system-level configurations. Hence, you need to be signed-in to an Admin Account or logged-in to a User Account with Admin privileges in order to manage Windows Services on a Windows computer.
Before making changes to Services, it is recommended that you create a system restore point as a precautionary measure; so that you can undo the changes made (If required).
1. Start, Stop, Restart Windows Service Using Services Console
You can find below the steps to Start, Stop and Restart any Windows Service by going directly to the Services Console on a Windows computer.
1. Right-click on the Start button and click on Run.
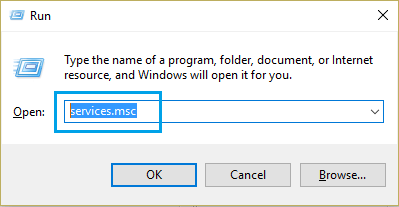
2. Type services.msc and click on OK.
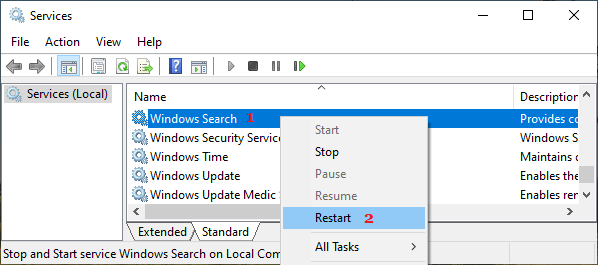
3. On the Services screen, you can Stop, Start and Restart any service by right-clicking on it and selecting the required option.
2. Start, Stop, Restart Windows Service Using Task Manager
Perhaps the easiest way to stop, start and restart any Windows Service is by using Task Manager.
1. Right-click on the Taskbar and click on Task Manager.

2. On the Task Manager screen, select the Services Tab in the left-pane and you will be able to see all the Services running on the computer in the right-pane.
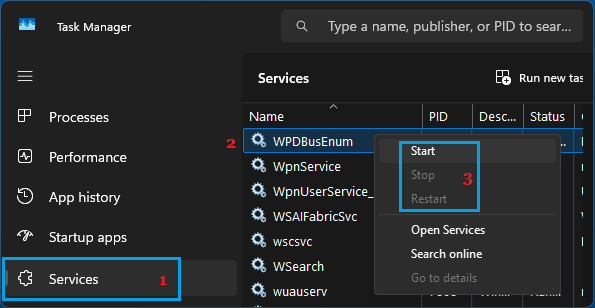
You can Start, Stop or Restart any service by right-clicking on it and selecting the required option in the right-click menu.
3. Enable, Disable Windows Service Using Services Console
You can enable or disable any Windows Service by going to the Properties screen of the selected Windows Service.
1. Right-click on the Start button and click on Run.
2. Type services.msc and click on OK.
3. On the Services screen, locate the Service that you want to Enable or Disable and double-click on it.
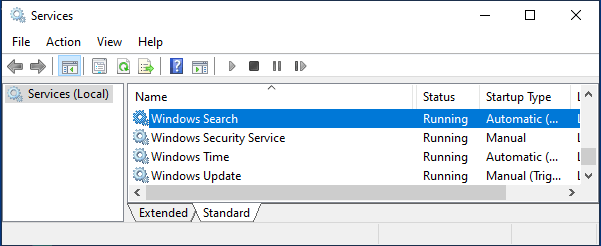
4. On the Service’s Properties screen, select the Disable option in the box located next to Startup type.
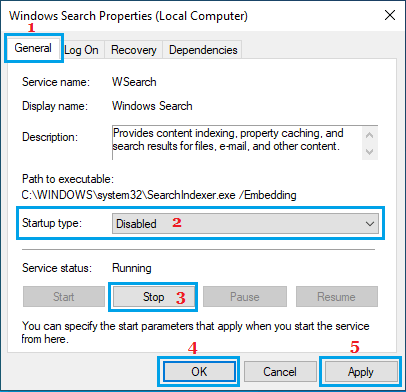
5. Stop the service by clicking on Stop and click on Apply & OK to save this change on your computer.
4. Start, Stop Windows Service Using Command Prompt
If you know the name of the service, you can Start or Stop the service by using Command Prompt.
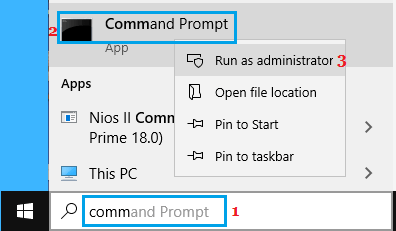
1. Type CMD in the Search bar > Right-click on Command Prompt and select Run as administrator option.
2. To start a service, type net start “Service Name” and press the Enter key.
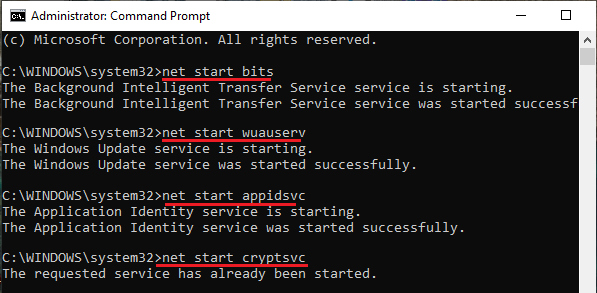
3. To Stop a service, type net stop “Service Name” and press the Enter key.
5. Enable, Disable Windows Service Using Command Prompt
You can follow the steps below to disable any Windows Service by using Command Prompt.
1. Open Command Prompt As Admin.
2. To disable a service, type sc config “Service Name” start= disabled and press the Enter key.
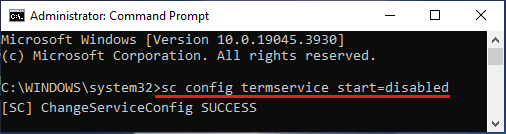
3. To re-enable the service, type sc config “Service Name” start= auto and press the Enter key.