It is not uncommon to find Windows computer being stuck on a Windows update with Working on updates, Don’t Turn off the computer message being displayed forever on the screen of the computer.
If the progress of update is being displayed on the screen, you may find the Windows update being stuck forever at 0% or on any other figure from 55% to 90%.
In most cases, the reason for this problem is due to a stuck file or process preventing the computer from installing the update or due to Windows update cache being filled up with expired and corrupted files.
Fix Stuck Windows Update
If the computer has been stuck on “Working on updates…” message for a long time, it is mostly likely that a stuck file or process is preventing the computer from installing the update.
Hence, the first step would be force the computer to Shut Down, which closes all open files/apps and also results in all the stuck files and processes being terminated.
If this not help, you should be able to fix the problem by using the built-in Windows update Troubleshooter and clearing Windows update cache.
1. Force Shut and Restart
As mentioned above, the first step is to Force the computer to Shut Down and Restart it back again.
1. Press and Hold the Power button, until the computer starts to shut down.
2. Patiently wait for the computer to completely shut down > Wait for 5 minutes > Restart the computer.
3. After the computer restarts > Go to Settings > Windows Update > Click on Check For Updates button in the right-pane.
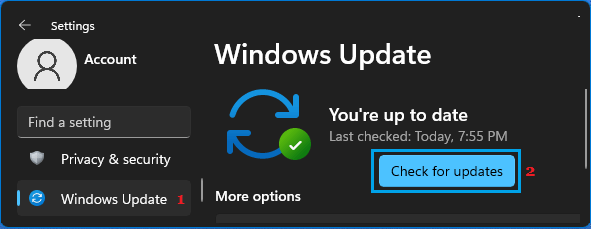
Note: If the computer fails to install the update and does not go back to the login screen, you will be required to boot the computer in Safe Mode and try to fix the problem.
2. Run Windows Update Troubleshooter
You can trust the built-in Windows Update Troubleshooter to find the reason for Windows update problems on your computer and hopefully fix it.
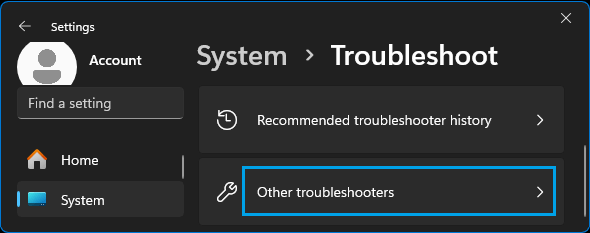
1. Go to Settings > System > Troubleshoot (right-pane) > scroll down and click on Other troubleshooters.
2. On the next screen, scroll down and click on the Run button, located next to Windows Update.
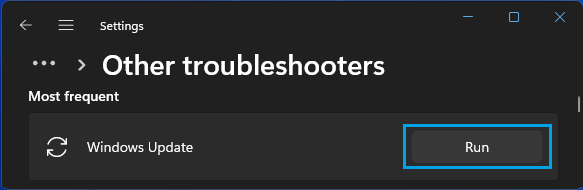
Windows 10: Go to Settings > Update & Security > Troubleshoot > Windows Update > click on Run Troubleshooter.
3. Patiently wait for Windows to find and fix the problem with Windows Update on your computer.
3. Clear Windows Update Cache File
As mentioned above, the problem could be due to Windows update cache folder on your computer being filled up with expired or corrupted files.
This problem can be fixed by going to C:\Windows\SoftwareDistribution and deleting all Files and Folders in this location.
1. Right-click on Start button and click on Command Prompt (Admin).
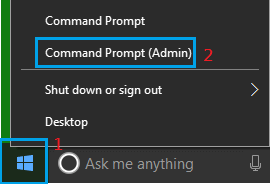
2. On the Command Prompt screen, type net stop wuauserv and press the Enter key to stop the Windows Update Service on your computer.
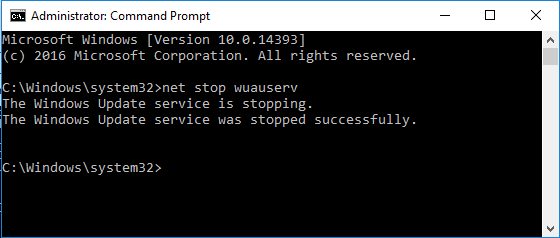
Note: After this step, do not close the Command Prompt Window.
3. Open the File Explorer on your computer by clicking on the File Explorer Icon in the taskbar.
4. From the File Explorer screen, navigate to Local Disk (C:) > Windows > SoftwareDistribution Folder.
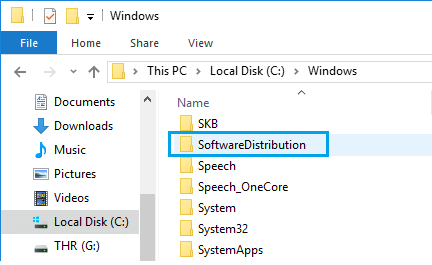
Note: Just to be on the safe side, copy “SoftwareDistribution” folder to Desktop as a backup
5. Open SoftwareDistribution Folder and Delete all Files located in this folder.
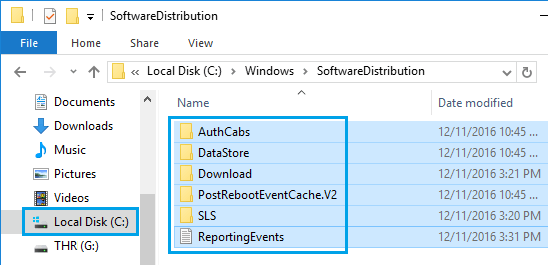
Note: These are just temporary files and Windows will create them again from scratch.
6. After deleting the Files in SoftwareDistribution folder, go to Command Prompt (See step #1 above).
7. On the Command prompt screen, type net start wuauserv and press the Enter Key.
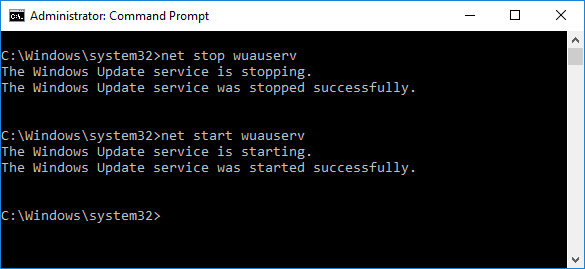
8. After this go to Settings > Windows Update > click on Check For Updates button.
Hopefully, this time you should find your computer installing the latest Windows updates without any problem.