Certain problems on a Windows computer like keyboard keys not working, random restarts and others might require you to update BIOS.
Newer computers have replacement BIOS chips known as UEFI (Unified Extensible Firmware Interface) that support larger disk size and faster boot time compared to older BIOS chips.
The main function of BIOS/UEFI on a computer is to initialize CPU, GPU, Disc Drives, other hardware components and load the default operating system on the computer.
Hence, just like any other software program, BIOS needs to be updated in order to maintain its compatibility with hardware and software running on a computer.
Update BIOS/UEFI In Windows 11/10
You should think in terms of updating BIOS only if an update is recommended by the manufacturer of your device and the problem on your computer is hardware related.
Make sure that you check the version of BIOS running on your computer and update BIOS only if a later version is available.
Do not update BIOS by downloading the same version of BIOS as already available on your computer.
Make sure that your computer is connected to a direct power source (AC adapter), as BIOS can get corrupted if the computer turns OFF during BIOS update.
It is recommended that you Backup your data before updating BIOS. Errors during BIOS update can lead to a loss of data.
How to Update BIOS on a Windows Computer
The steps to Update BIOS are the not the same for all Windows computers, they can vary depending on the manufacturer of your computer.
However, the basic idea is to download the latest version of BIOS from the manufacturers support site and install it on your computer.
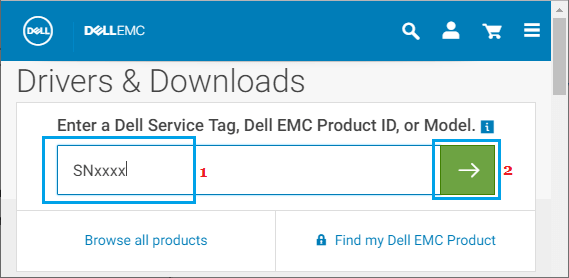
1. Using Chrome or any other web browser, visit the Support Page for the manufacturer of your computer.
For example, in case of DELL you will be visiting https://www.dell.com/support and in case of HP you will be visiting support.hp.com.
2. Depending on the manufacturer, you may be required to enter the Model Number or the Serial Number of your computer.

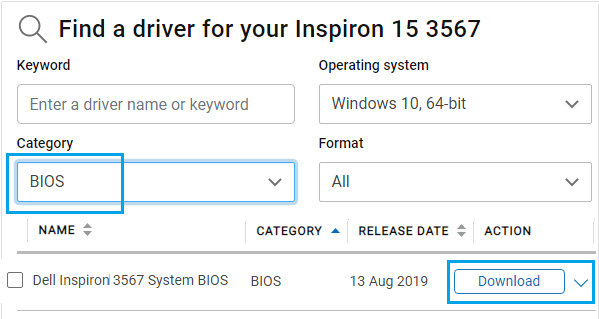
In our case, it was possible to use the Model Number on the manufacturers download page to access the latest version of BIOS available for download.
3. Once you find the download, click on the Download button next to the latest version of BIOS as available for your model of computer.

Note: If there is no Update available, do not download and install the same version of BIOS.
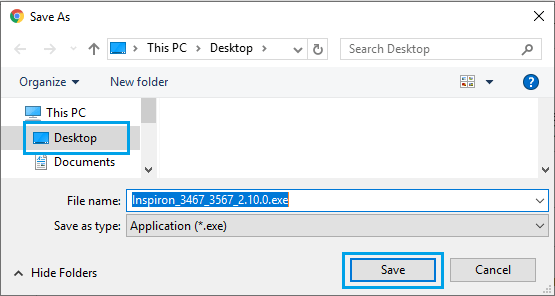
4. After the file is downloaded, save the BIOS Update file to desktop.

5. Double-click on the downloaded BIOS executable File on your computer.

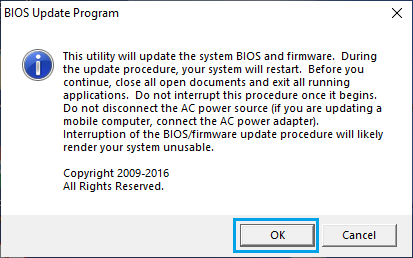
Important: Make sure your computer is connected to direct power source (AC Power), remove all attached devices (except keyboard/mouse) and do not close the computer during the update process.
6. On the pop-up, click on OK (Or Next) to begin the process of BIOS Update on your computer. Follow the next set of onscreen instructions to complete the process.

Once you complete the process and Restart PC, your computer will be updated to the latest version of BIOS.