The problem of USB ports not working on a Windows computer could be due to drivers for the USB ports not being loaded during the startup process of the computer. While this can happen due to a glitch, it is more likely to happen if the “Fast Startup” feature has been enabled on the computer.
Apart from this, USB ports can stop working due to outdated or corrupted device drivers, power supply to the USB ports being automatically switched off by the computer and other reasons.
USB Ports Not Working in Windows 11/10
Before going ahead with the troubleshooting steps, it is recommended that you restart the computer to rule out the possibility of the issue being caused due to a technical glitch.
This can help, if the problem was being caused due to drivers for the USB port not being properly loaded on the computer due to a temporary glitch.
1. Scan USB Controllers for Hardware Changes
1. Right-click on the Start button and select Device Manager in the right-click menu.
2. On the next screen, locate USB Serial Bus Controllers entry > right-click on it and select Scan for hardware changes.

This should result in missing device drivers (if any) to be installed for the USB ports on your computer.
2. Update USB Drivers
Manually update drivers for all the USB items listed under “Universal Serial Bus Controllers” entry.
1. Open the Device Manager on your computer.
2. On Device Manager screen, open Universal Serial Bus Controllers entry > right-click on the first listed USB Device and select Update Driver option.
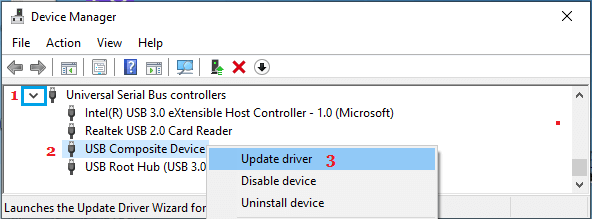
3. Repeat the above steps for other USB related entries under “Universal Serial Bus Controller” section.
3. Change Power Management Setting for USB Root Hub
Windows computers have a default tendency to turn-off power supply to USB ports that are not actively being used and this can sometimes lead to the problem of USB ports not working.
1. Open the Device Manager on your computer.
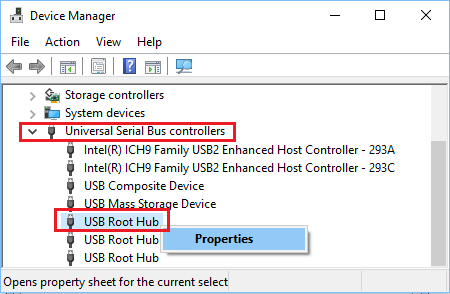
2. On the “Device Manager” screen, expand Universal Serial Bus Controllers entry > right-click on USB Root Hub and click on Properties.
3. On “USB Root HUB Properties” screen, switch to Power Management tab and uncheck Allow the computer to turn off this device to save power option and click on OK.
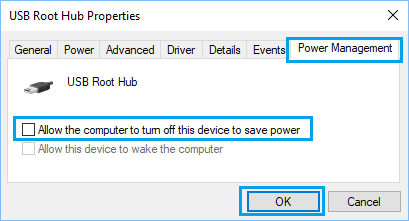
If there are multiple USB Root Hubs, you need to repeat the above steps for them as well.
4. Check for Updates
If an update is available, Windows should install the latest available drivers for USB Ports on your computer.
1. Go to Settings > Windows Update (left-pane) > Click on Check for Updates button in the right-pane.
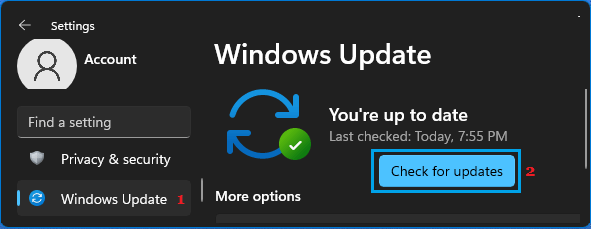
2. Wait for Windows to check for updates > Follow the instructions to download and Install Updates (If available).
5. Disable Fast Startup
The “Fast startup” feature in Windows can sometimes lead to USB drivers being skipped during the startup process or not being properly installed on the computer.
For the actual steps to disable Fast Startup, you can refer to this guide: How to Enable/Disable Fast Startup in Windows 11/10.
6. Disable USB Selective Suspend Setting
If above steps did not help, disabling the “Selective Suspend” feature might help in fixing the problem.
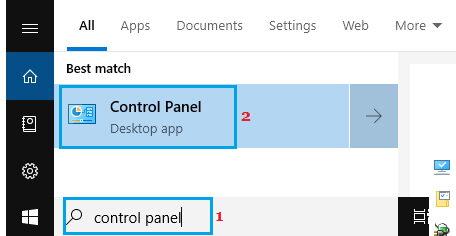
1. Type Control Panel in the Search bar and click on Control Panel in the Search results.
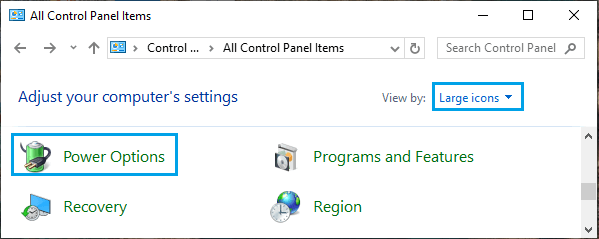
2. On the Control Panel screen, click on Power Options.
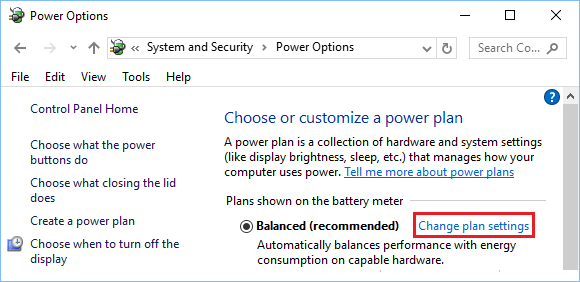
3. On the next screen, click on Change Plan Settings link; located next to the current power plan on your computer.
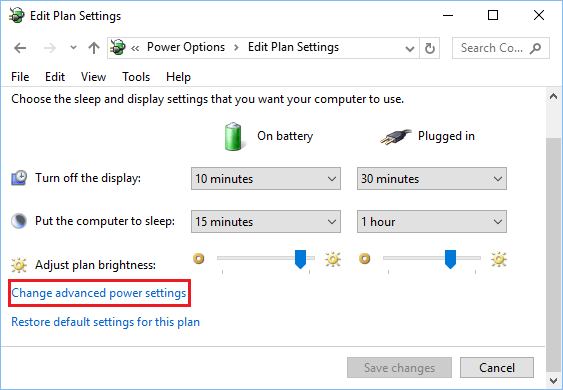
4. On the next screen, click on Change Advanced Power Settings link.
5. On “Power Options” screen, expand USB Settings > USB selective suspend setting and select the disabled option, both for Plugged In and On Battery.
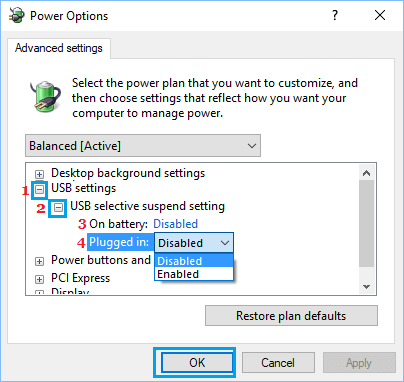
6. Click on OK to save these changes on your computer.