The default Setting on a Windows computer is to go into sleep mode, if it is not actively being used and has remained inactive for period of 10 minutes. If this is not happening, the reason could be due to an App, Desktop program or a device keeping the computer awake and preventing it from going to into sleep mode.
In addition to this, features like Fast Startup, Hybrid Sleep and changes in Power Plan Settings can prevent the computer from going into Sleep Mode.
Related: How to Enable Or Disable Hibernation in Windows 11/10.
Windows Computer Not Going to Sleep
If your Laptop or Desktop computer is not going into Sleep Mode, you should be able to fix the problem using the following steps.
1. Check If Sleep Mode Is Enabled
The first step would be to make sure that the computer is set to go into sleep mode after a reasonable period of inactivity.
1. Press Windows + I keys to open the Settings menu on your computer.
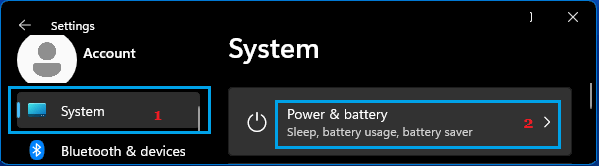
2. On the Settings screen, select System in the left-pane and click on Power & Battery in the right-pane.
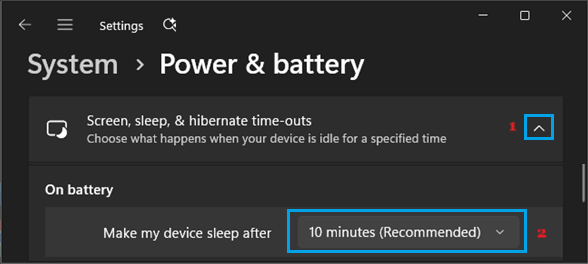
3. On the next screen, open Screen, Sleep & Hibernate time-outs tab > select the Recommended Sleep time for “Make my Device sleep after” entry, both for Battery & Plugged-in sections.
Windows 10: Go to Settings > System > Power & Sleep > set a reasonable time for PC goes to sleep after option, both for Battery power and while plugged into Power Supply.
2. Restore Default Power Plan
A good way to fix sleep related problems on a Windows computer is to restore the computer to its default Power plan settings.
1. Press Windows + R keys to open the Run Command on your computer.
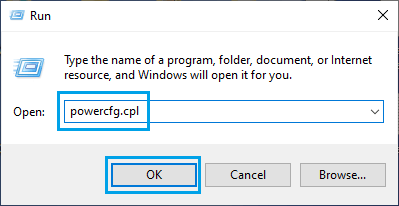
2. In the Run Command window, type powercfg.cpl and click on OK.
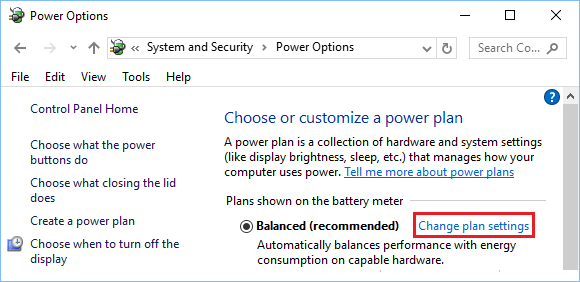
3. On the “Power Options” screen, click on Change plan settings link, located next to the active Power Plan on the computer.
4. On the next screen, click on Restore Default Settings for this plan.
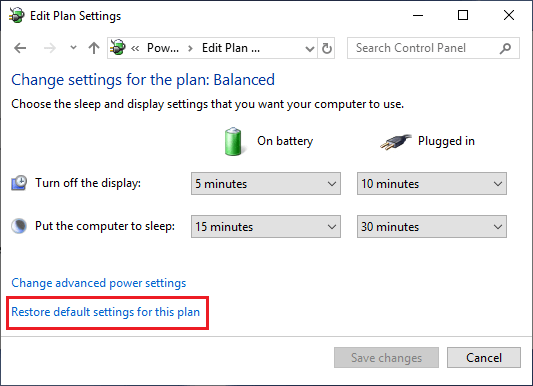
Once the default Power Settings are enabled, your computer should go into sleep mode.
Prevent Devices from Waking Up
3. Disable Hybrid Sleep
The problem might be due to Hybrid Sleep not being supported by your computer. Hence, disable Hybrid Sleep and see if this helps in fixing the problem.
1. Press Windows + R keys > type powercfg.cpl and click on OK.
2. On the “Power Options” screen, click on Change Plan Settings link; located next to the current or selected Power Plan on the computer.
3. On “Edit Plan Settings” screen, click on Change Advanced Power Settings.
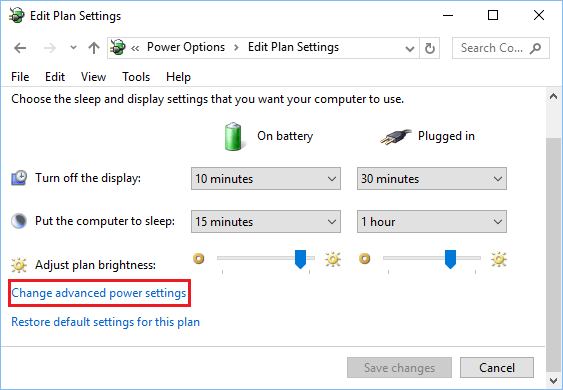
4. On the next screen, go to Sleep > Sleep After and set Allow hybrid sleep entry to OFF position, both for Battery and while Plugged in options.
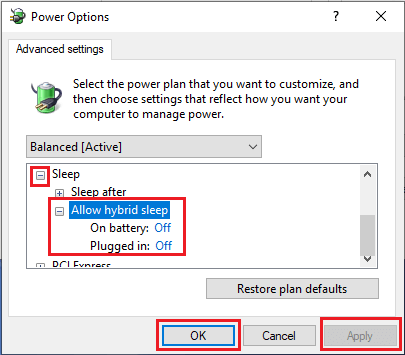
5. Click on Apply/OK to save these changes to Power settings on your computer.
4. Prevent Mouse from Waking up the computer
The reason for your computer not going into sleep mode could be due to any vibration or movement of the Mouse being able to wake up the computer from sleep mode.
1. Right-click on the Start button and click on Device Manager.
2. On the Device Manager screen, expand Mice and other pointing devices entry > right-click on the HID-complaint mouse and click on Properties.
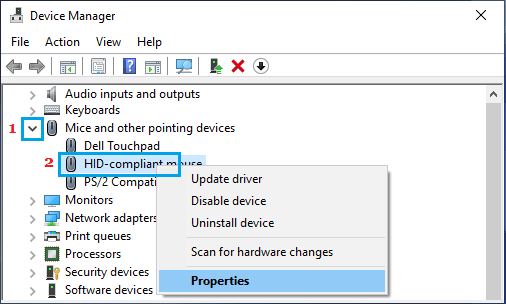
3. On the Mouse Properties screen, go to the Power Management tab and uncheck Allow this device to wake the computer option.
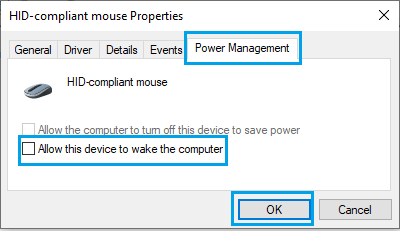
4. Click on OK to save this Power setting on your computer.
This will prevent the possibility of the mouse being able to prevent the computer from going into sleep mode.
5. Check open Apps & Programs
As mentioned above, an open app, desktop program or process can prevent the computer from going into sleep mode.
1. Type CMD in the search bar > right-click on Command Prompt and select Run as Administrator option.
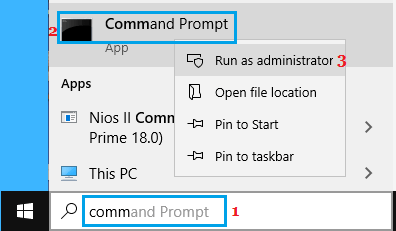
2. On Command Prompt screen, type powercfg -requests and press the Enter key.
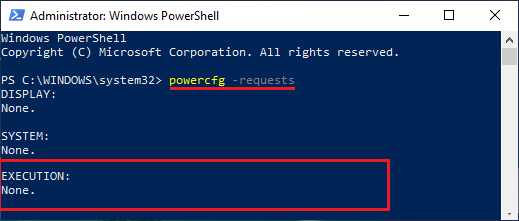
Once this command is executed, look for programs listed under “Execution” section.
If you find any other App or Program appearing on the Command prompt window, close that program.
6. Disable Fast Startup
While the Fast Startup feature can improve the boot times of a computer, it can alsp prevent the computer from going into sleep mode.
For more information and the steps to disable the Fast Startup feature on a Windows computer, you can refer to this guide: How to Disable Fast Startup in Windows 11/10.