It is time to make efforts to Free Up Storage Space on your iPhone, if it is slowing down and coming up with ‘Not Enough Storage’ pop-up.
Even if your iPhone is not yet coming up with “No Storage” pop-up, it is a good practice to periodically take a look at the status of storage space and free up storage space by removing unwanted items from your device.
With only a limited amount of storage space remaining on your device, you won’t be able to install iOS updates, download Apps or take Photos.
Free Up Storage Space on iPhone
You can periodically check and monitor the status of storage space on your iPhone by going to Settings > General > iPhone Storage.
On iPhone Storage screen, you will be able to see the total amount of storage space used and remaining on your iPhone.
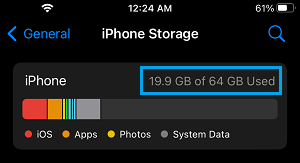
If the remaining storage space on your iPhone is getting lower, you can follow the steps as provided below to Free Up Storage Space on your iPhone.
1. Remove Unwanted Photos from iPhone
If you are like most users, you should be able to free up a considerable amount if storage space on your iPhone by getting rid of unwanted photos from your device.
1. Open the Photos App on your iPhone > switch to Albums and the open the Recents Album.
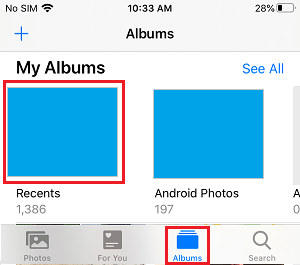
2. In the Recents Album, tap on the Select option located at top-right corner.
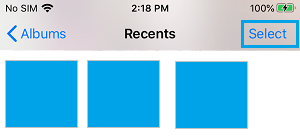
3. On the next screen, select the unwanted photos that you want to delete by tapping on them.
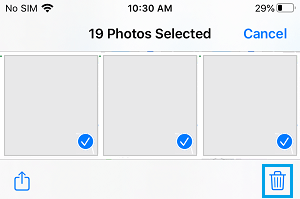
Once you are done, tap on the Trash can icon to remove the selected Photos from your device.
2. Delete Recently Deleted Photos from iPhone
When you delete photos on iPhone, the deleted photos are moved to Deleted Photos Folder, where they continue to occupy storage space, until they are deleted by the system.
1. Open the Photos App on your iPhone > tap on Albums tab in the bottom-menu.

2. Scroll down and go to Recently Deleted and delete All Photos in this Folder.
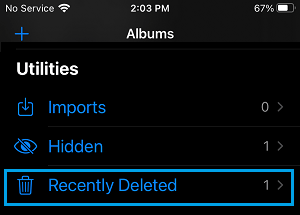
This should free up enough storage space on your device to accommodate a major iOS Update (1.5 GB) and to download Apps, songs and shoot new Photos.
If you need to free up more storage space, you can transfer Photos from iPhone to Mac or Windows PC and bulk delete all Photos from your iPhone.
3. Remove Duplicate Photos from iPhone
If you are like most users, there is a good chance that your iPhone is filled up with lots of duplicate photos that cannot be easily identified.
In general, duplicate photos end up on iPhone due to HDR Photos being enabled and also due to the default tendency of most social media apps to automatically download photos.
For more information, you can refer to this guide: How to Remove Duplicate Photos from iPhone
4. Offload/Delete Unused Apps
You can expect to free up a good amount of storage space on your iPhone by Offloading or Deleting Apps that you are not really using.
1. Go to Settings > General > iPhone Storage > select the App that you want to offload or delete.
2. On the next screen, you can select the option to Delete or Offload App the App.
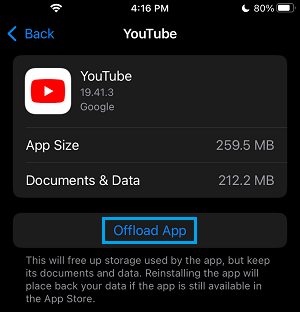
Similarly, you can repeat the above steps to Offload or Delete other unused Apps from your device.
Note: The Offload option removes the App, while keeping its Documents & Data on your device.
5. Delete Downloaded Music
As a music lover, you may have downloaded hundreds of songs on your device. However, it likely that you only listen to a few selected songs most of the times.
Hence, you can easily free up some storage space by deleting unused Music Albums and Songs from your device.
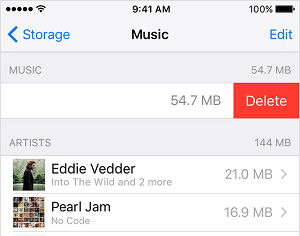
1. Go to Settings > Music > Downloaded Music
2. On the next screen, you can delete All Songs or go through Albums, Artists, Songs individually and delete them from your device.
6. Delete Documents and Data
Over a period of time app related data starts accumulating on your device and ends up taking a lot of storage space on your iPhone.
This app related data will be listed as ‘Documents and Data’ on your iPhone and can be cleared to recover some storage space on your device.
You can find the steps to delete documents & data on iPhone in this article: How to Delete Documents and Data On iPhone and iPad.
7. Delete Downloaded Books
In general, books do not take up much storage space, but they can add up, as you continue to download books on your device and forget to delete them.
If you have been downloading books for a while, you can use the steps as listed in this article: How to Delete Books From iPhone and iPad
8. Turn Off Shared Albums
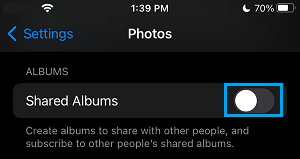
The Shared Albums Feature on iPhone allows you to create Albums to share photos with other people and to subscribe to other people’s shared albums.
However, you need to be aware that joining other people’s photo stream causes photos of other people to appear on your iPhone and consume storage space.
1. Open Settings > scroll down and tap on Photos.
2. On the next screen, disable Shared Albums.
9. Set Messages to Auto-Delete
Over a period of time, iMessages with attachments and MMS Text Messages can start taking up a lot of storage space on your iPhone.
To free up storage space, you can either delete old messages manually or set up your device to delete messages automatically, after a certain period of time.
1. Go to Settings > Messages > Keep Messages.
2. On the next screen, select either 30 Days or 1 Year – Depending on how long you want to keep record of messages on your device.
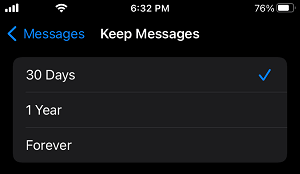
Depending on the setting, messages older than the selected period will be automatically deleted from your device, along with their attachments.
10. Delete Voicemail Messages
If you get tons of Voice messages, you can free up some storage space by deleting old Voice Messages stored on your device.
1. Open the Phone app > tap on the Voicemail tab located in bottom menu.

2. On the next screen, you can go through Voicemail Messages and delete them.